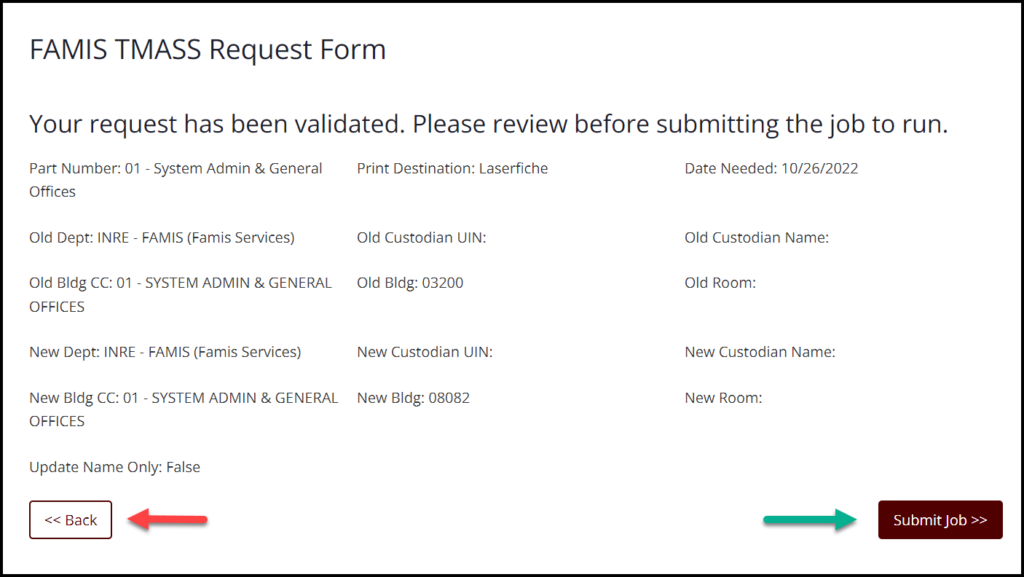
The TMASS request form enables authorized requestors to submit changes to the department, subdepartment, custodian number, campus code, building and room number. Only authorized requestors may use this request form, and access is validated based on the user’s FAMIS security record.
Updated Request Form Changes
In November 2022, a new TMASS request form was released. Although similar to the previous version, the new request form has two distinct changes.
Access Based on User Security Record
Access to use the TMASS request is now based on the user’s security record in FAMIS. The user must have “Update to TMASS Entity” on their security profile. As with all other security changes, this is handled by the member FAMIS Security Administrator.
To create TMASS requests for multiple members, the entity record must be updated for each member. If this access is needed, users should contact the FAMIS Security Administrator for their member.
NOTE: Accessing the TMASS request form goes through FAMIS Security; there may not be an immediate response from the server.
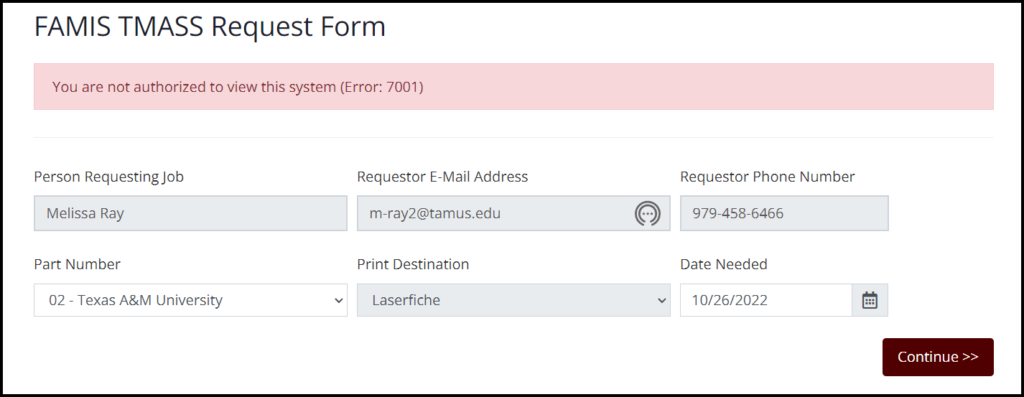
- If a user IS NOT authorized to access the TMASS request form and attempts to do so, they will receive the following error message:
- If a user IS authorized, they will be advanced to the TMASS request form.
Form Entry Format
The previous version of the TMASS request form contained freeform text entry fields. The current version now uses dropdown menus with entry choices based on previous selections. This improves validations and decreases errors.
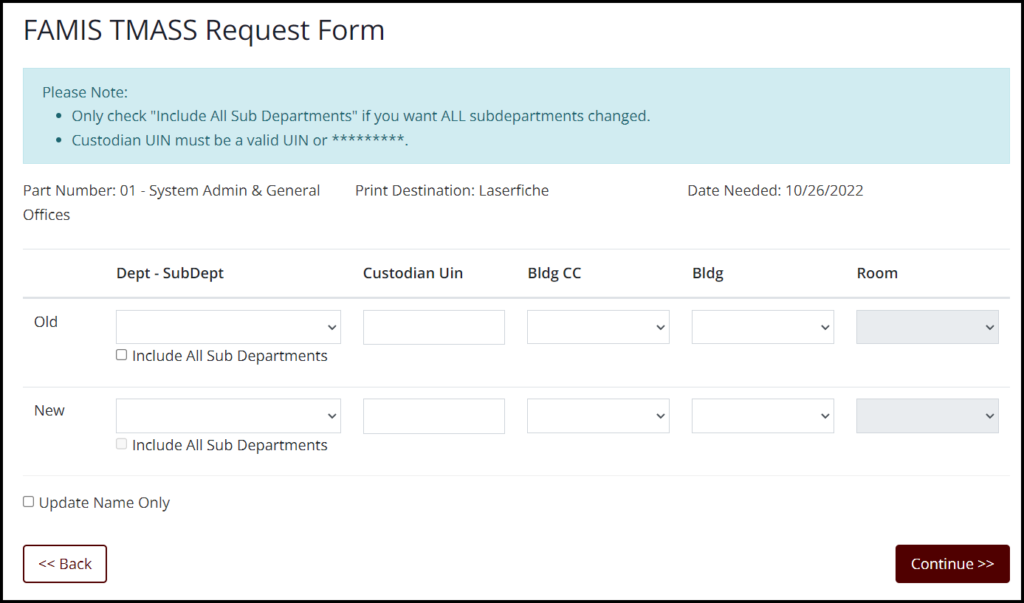
TMASS Functionality
Updating the Current APO for a Specific Department / Sub Department
- Select the Old Dept – SubDept by clicking on the down arrow in the field to display a list of all departments and subdepartments or by typing part of the department code and then selecting the correct department or subdepartment. The screen will refresh briefly as the data is validated.
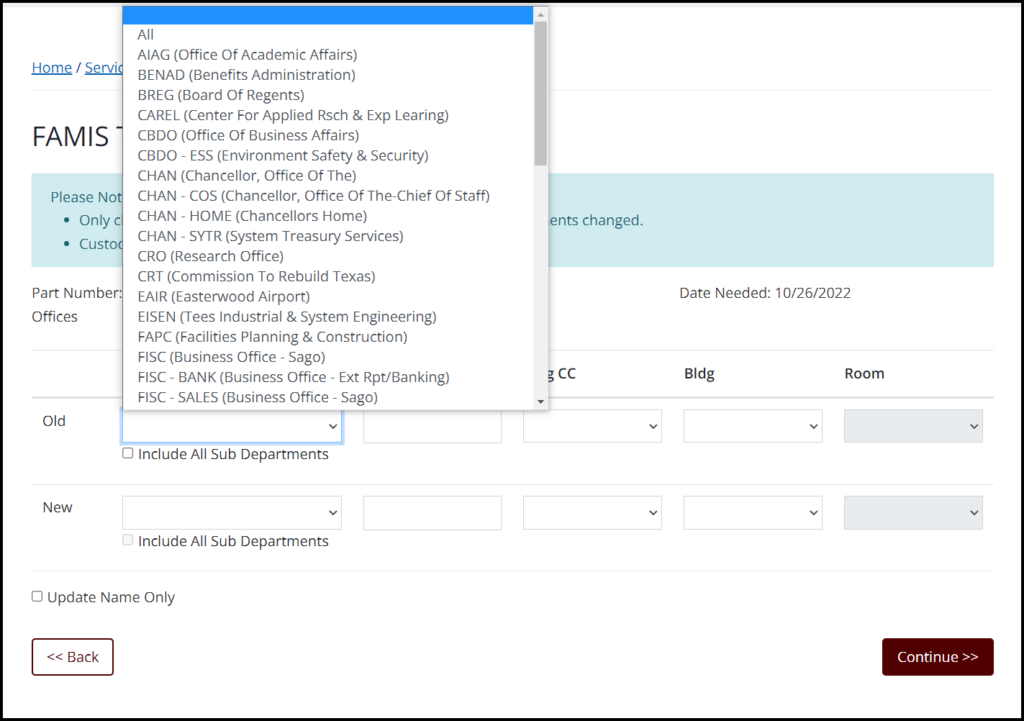
- Enter the UIN for the old APO.
- Select the New Dept – Sub Dept by clicking on the down arrow in the field to display a list of all departments and subdepartments or by typing part of the department code and then selecting the correct department or subdepartment. The screen will refresh briefly as the data is validated.
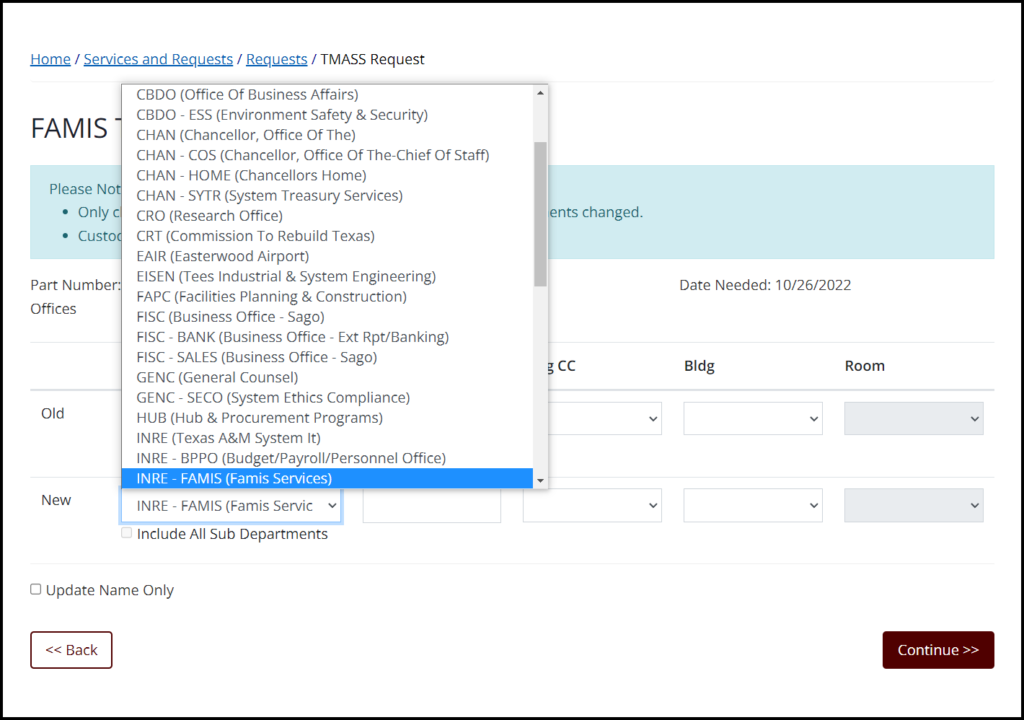
- Enter the UIN for the new APO and then click on the Continue button. The system will validate the entries.
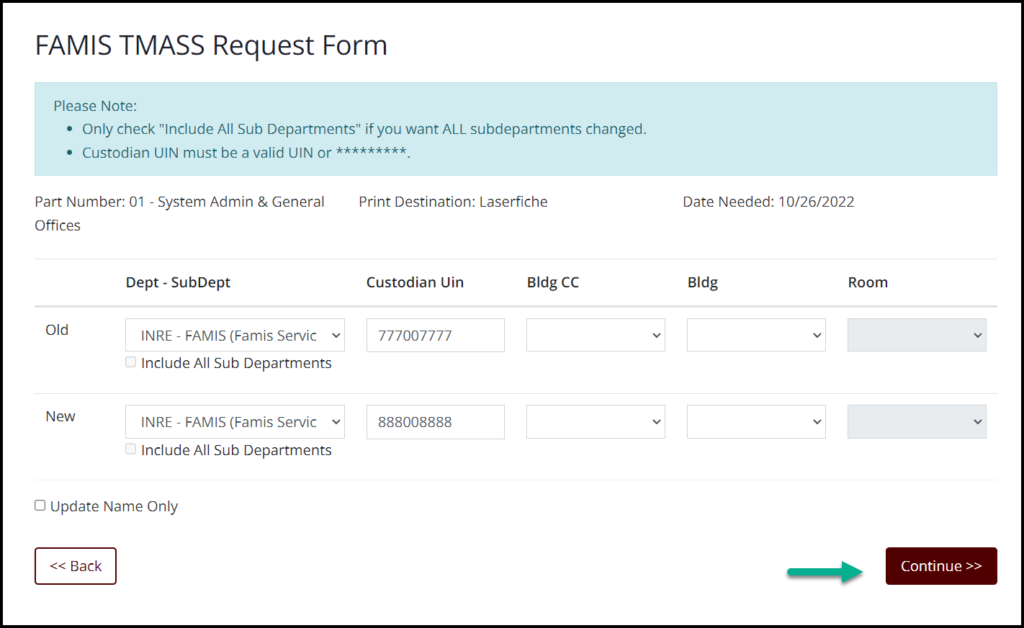
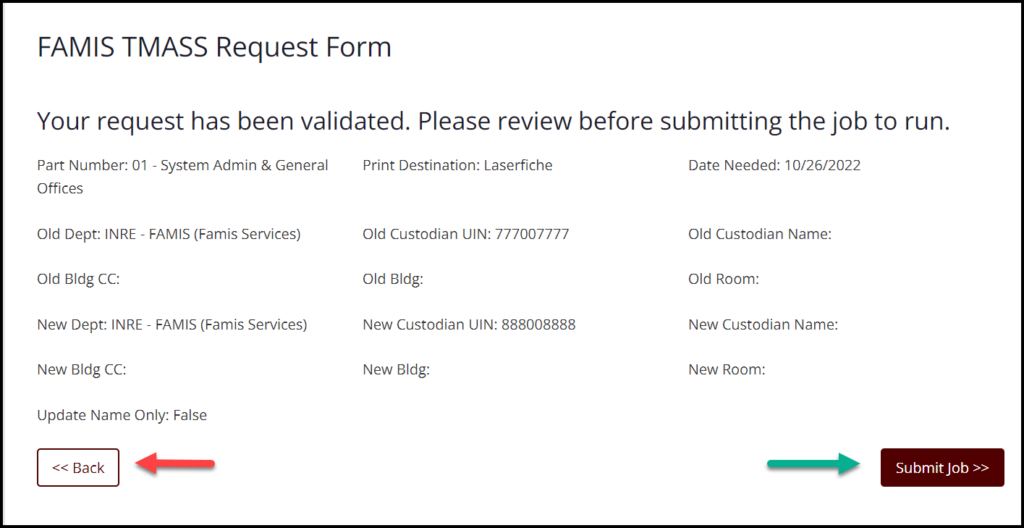
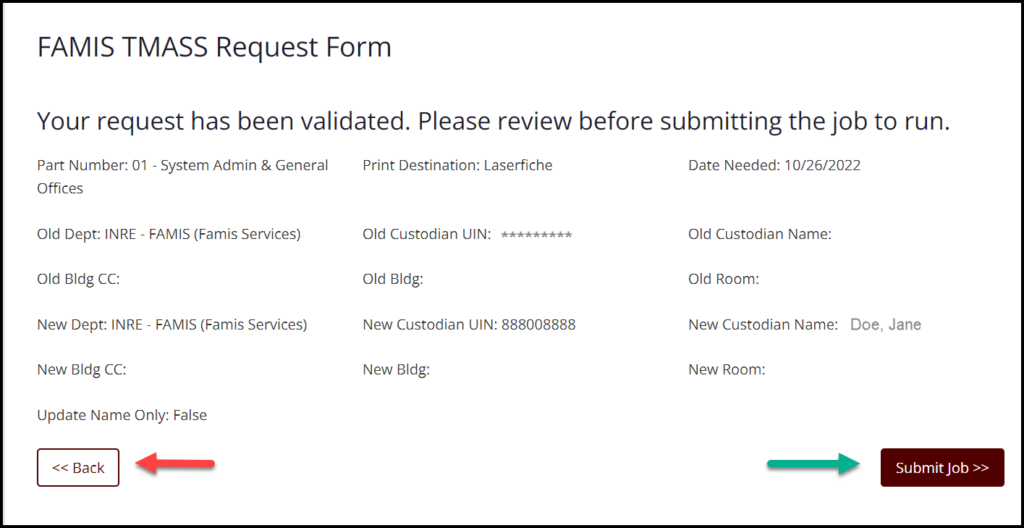
- Review the changes.
- If all entries are correct, click on the Submit Job button to submit the form to FAMIS Production for processing.
- If changes are needed, click on the Back button and make the necessary changes.
Updating all APOs for a Specific Department / Sub Department
- Select the Old Dept – Sub Dept by clicking on the down arrow in the field to display a list of all departments and subdepartments or by typing part of the department code and then selecting the correct department or subdepartment. The screen will refresh briefly as the data is validated.

- Enter 9 asterisks (*********) for the old APO.
- Select the New Dept – Sub Dept by clicking on the down arrow in the field to display a list of all departments and subdepartments or by typing part of the department code and then selecting the correct department or subdepartment. The screen will refresh briefly as the data is validated.

- Enter the UIN for the new APO, and click on the Continue button. The system will validate the entries.
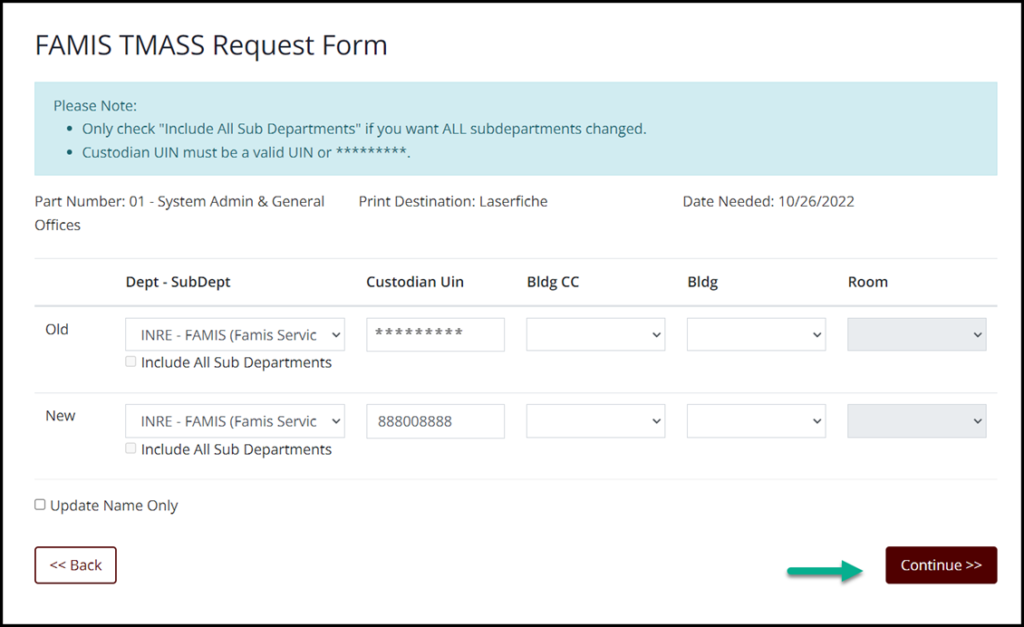
- Review the changes.
- If all entries are correct, click on the Submit Job button to submit the form to FAMIS Production for processing.
- If changes are needed, click on the Back button and make the necessary changes.
Updating the Name Associated With an APO Across All Departments
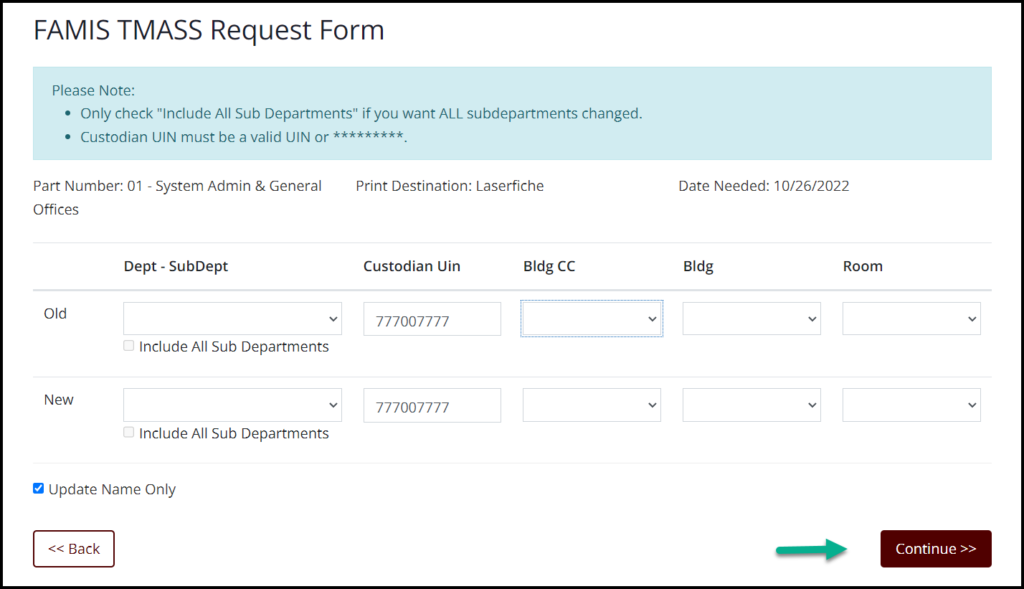
- Leave the Old Dept – Sub Dept field blank.
- Enter the UIN for the old APO.
- Leave the New Dept – Sub Dept field blank.
- Enter the UIN for the new APO.
- Click on the checkbox to select Update Name Only.
- Click on the Continue button. The system will validate the entries.
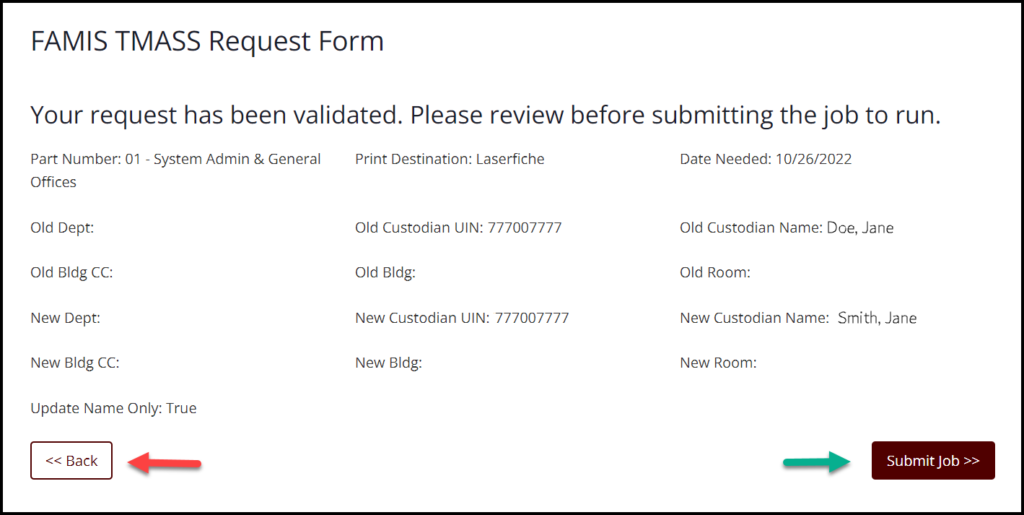
- Review the changes.
- If all entries are correct, click on the Submit Job button to submit the form to FAMIS Production for processing.
- If changes are needed, click on the Back button and make the necessary changes.
Moving All Assets for a Department From One Location to Another
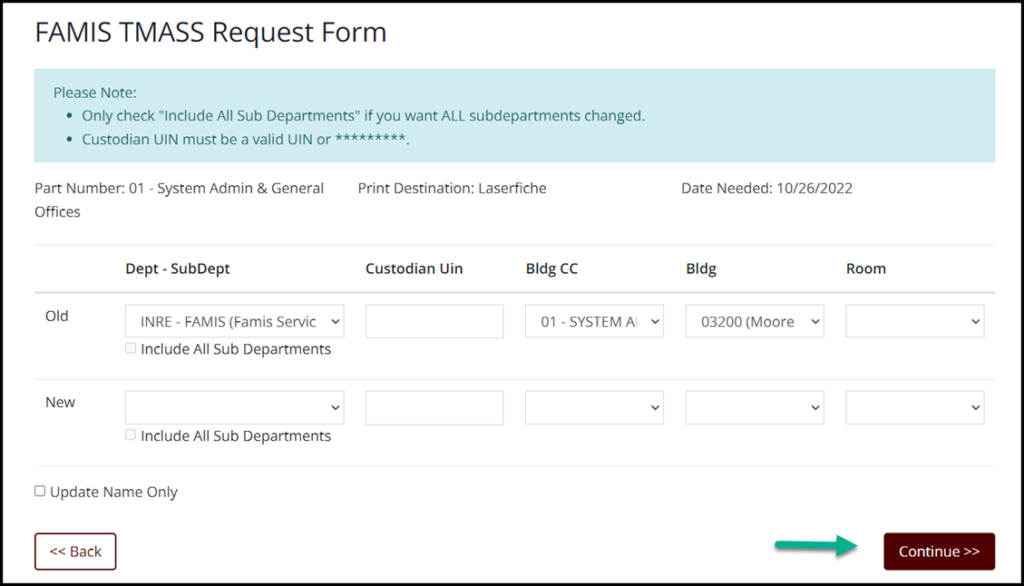
- Select the Old Dept – Sub Dept by clicking on the down arrow in the field to display a list of all departments and subdepartments or by typing part of the department code and then selecting the correct department or subdepartment. The screen will refresh briefly as the data is validated.

- Leave the Old Custodian Uin field blank.
- Select the old building campus code from the Old Bldg CC dropdown menu.
- Select the old building from the Old Bldg dropdown menu.
- If needed, select the old room from the Old Room dropdown menu.
- Select the New Dept – Sub Dept by clicking on the down arrow in the field to display a list of all departments and subdepartments or by typing part of the department code and then selecting the correct department or subdepartment. The screen will refresh briefly as the data is validated.

- Select the new building campus code from the New Bldg CC dropdown menu.
- Select the new building from the New Bldg dropdown menu.
- If needed, select the new room from the New Room dropdown menu.
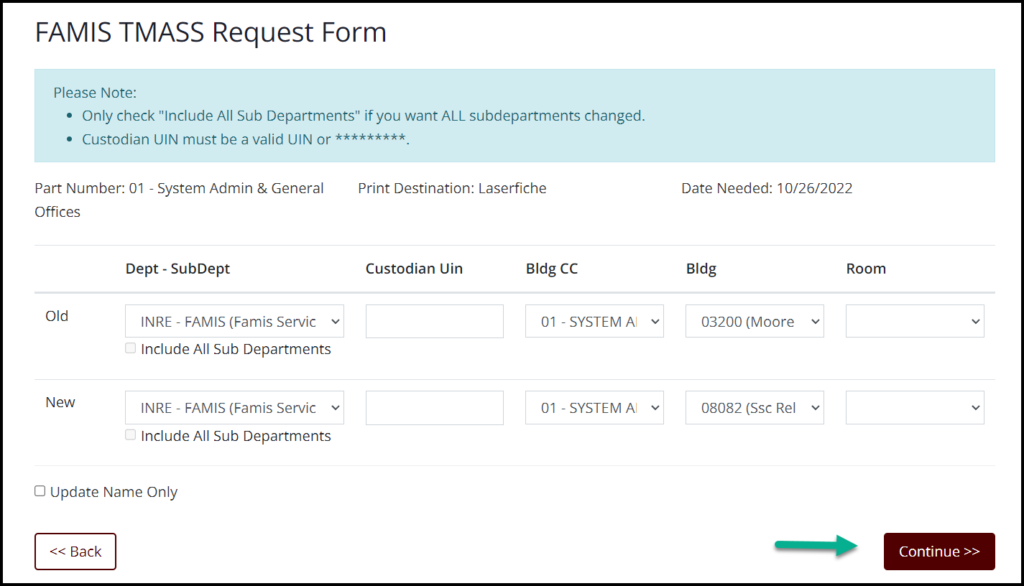
- Click on the Continue button. The system will validate the entries.
- Review the changes.
- If all entries are correct, click on the Submit Job button to submit the form to FAMIS Production for processing.
- If changes are needed, click on the Back button and make the necessary changes.
