• Skip to primary navigation
  • Skip to main content
  • Skip to primary sidebar
Enterprise Data Warehouse
Logo, Texas A&M University System, Office of Information Technology
  • Home
  • About
    • Governance
    • Security
      • Quarterly User Review Process
      • Quarterly User Review Form
      • Authorized Security Requesters
  • Documentation
  • Report Inventory
    • All Commonly Used Reports
    • Reports Grouped by Process
  • Universes
    • HCM Universes
    • Financial Universes
    • Payroll Universes
    • Historic BPP Universes
  • Training
  • Data Status
    • Academic Data Status
    • Data Load Status
    • Payroll Data Status
  • Office of Information Technology
    • Services
    • Contact the Office of Information Technology
    • Search OIT
Home / Documentation / Modifying BusinessObjects Scheduled Reports

Modifying BusinessObjects Scheduled Reports

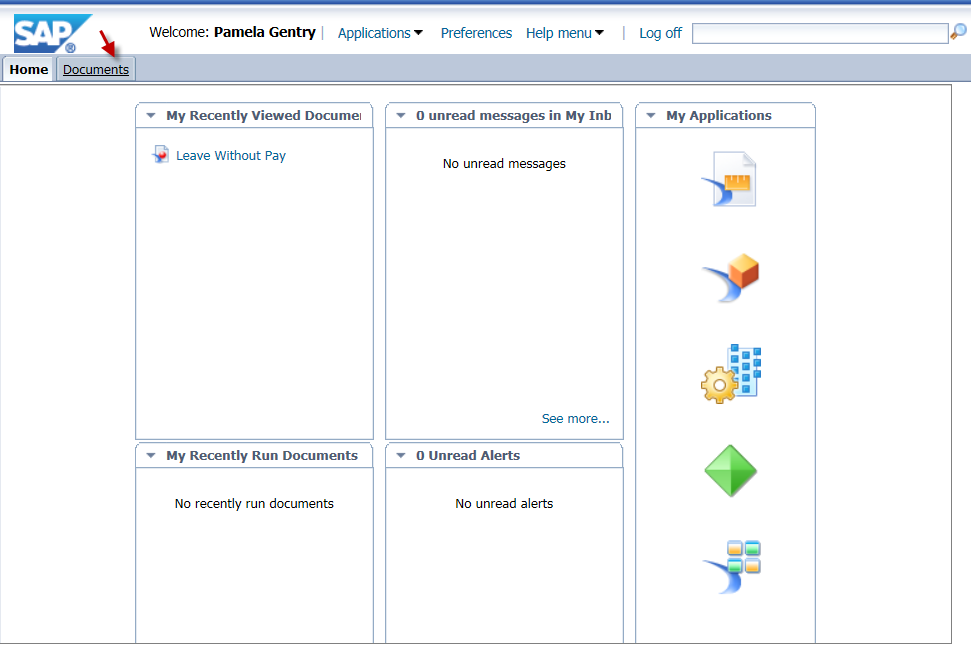
1. Select BusinessObjects from your SSO menu.

2. Select the Documents tab in the top left.

Click Documents

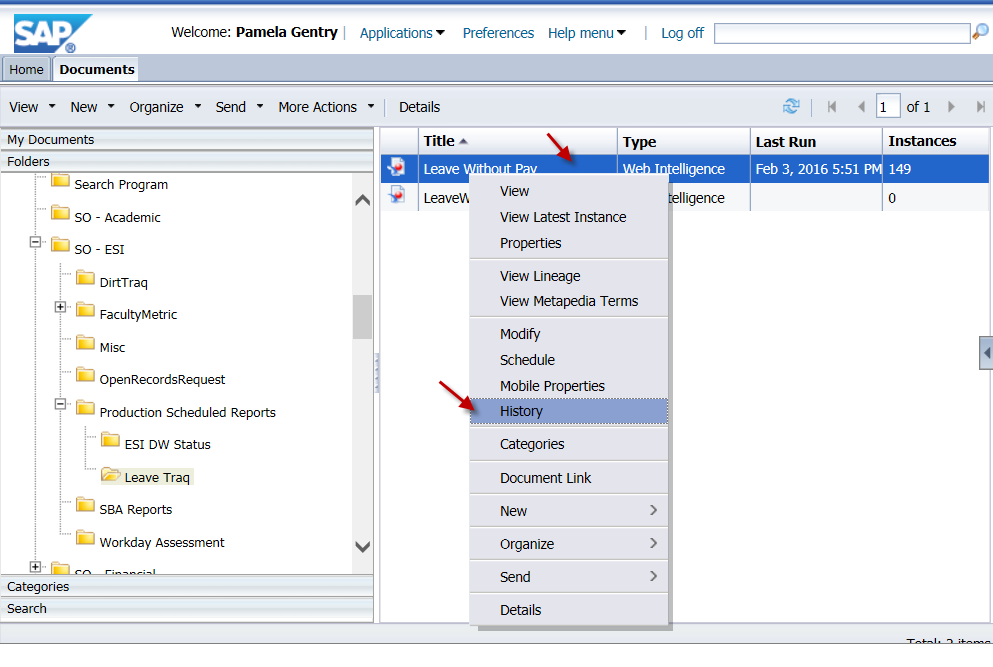
3. Navigate to the BusinessObjects folder where the report is located.

4. Right-click on the report generating the scheduled document, and choose History.

History

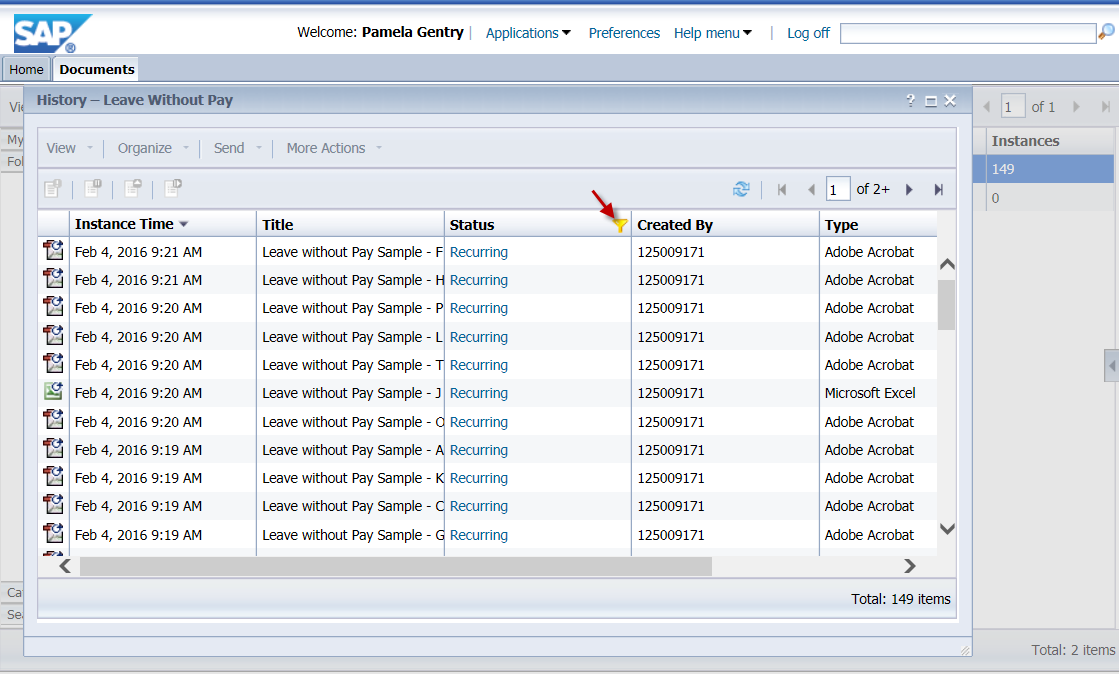
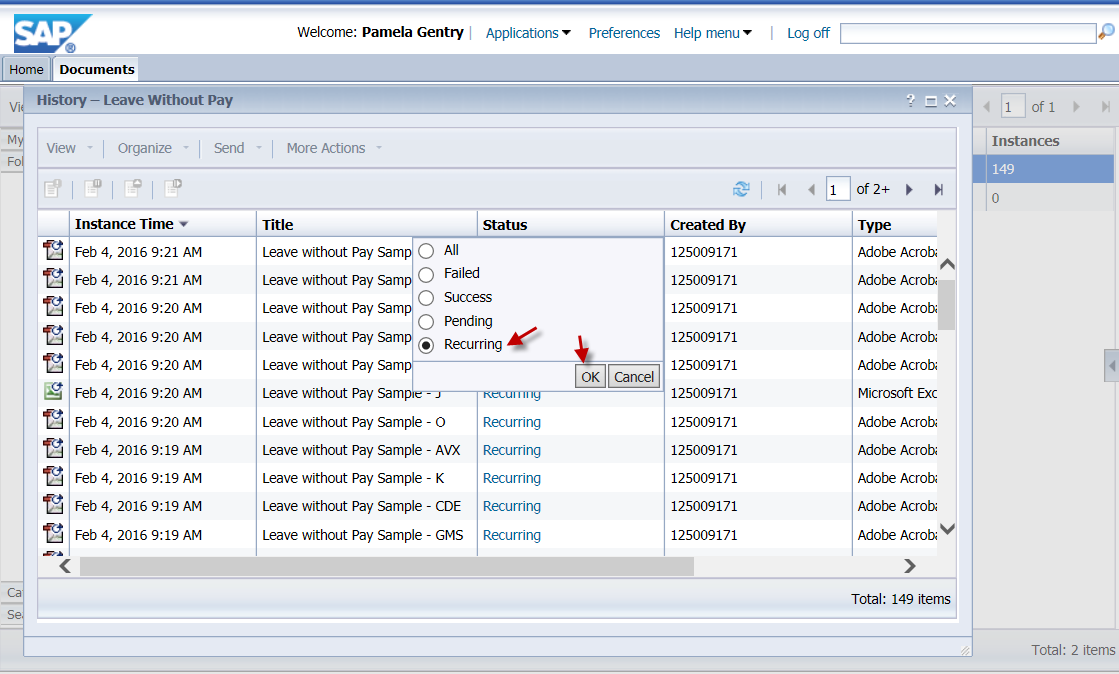
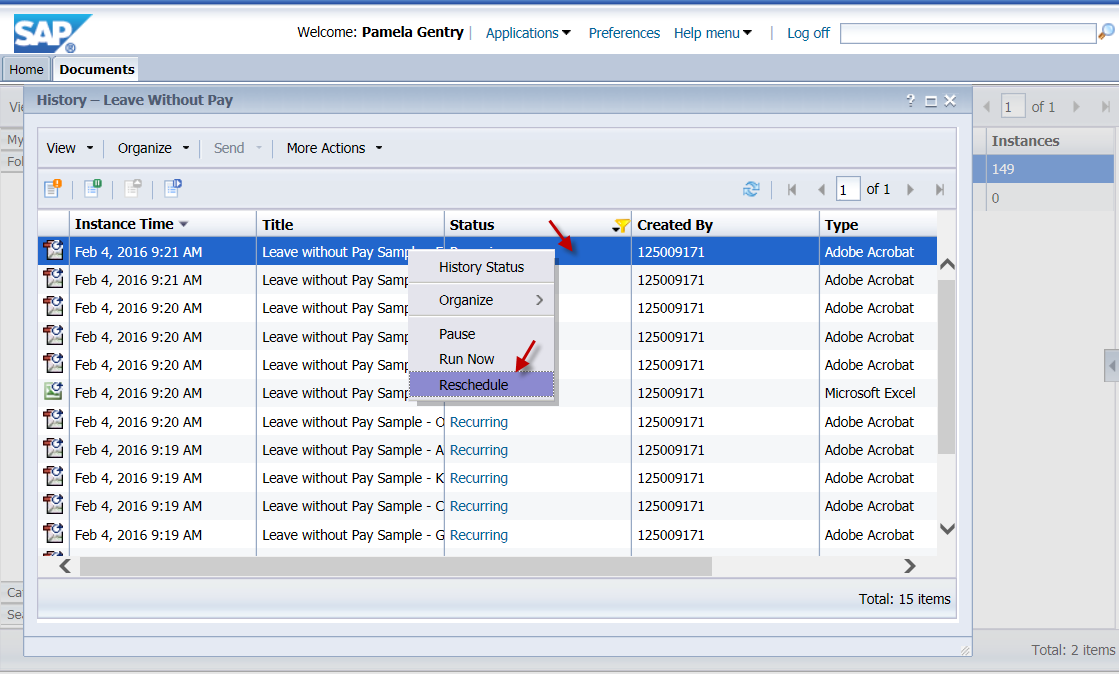
5. Hover over the Status column until you see a funnel in the right corner, and choose Recurring. This filters the list to give you the recurring instance that is driving the automated schedule.

Funnel

Recurring

6. Right-click on the row for the recurring instance and choose Reschedule.

Reschedule

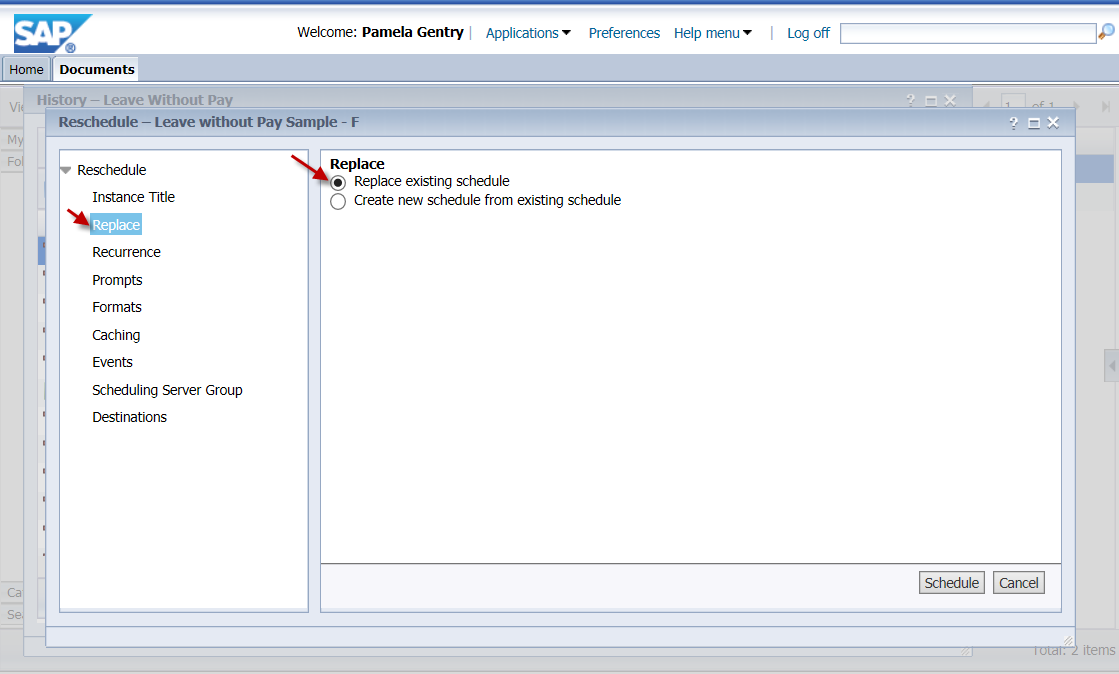
7. Select Replace from the menu on the left to overwrite the recurring instance with your new settings. Choose radio button: Replace existing schedule.

ReplaceSchedule

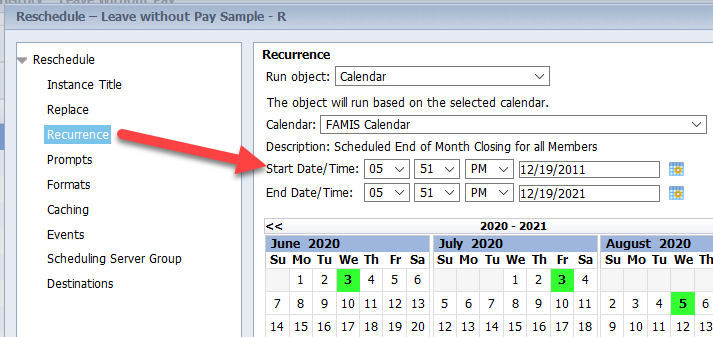
8. Select Recurrence from the menu on the left and check the Start Date/Time fields. If the Start Date/Time is in the past, be aware that the schedule will be run once when you update this schedule. To avoid this, choose a date/time in the future when you’d like the schedule to run again.
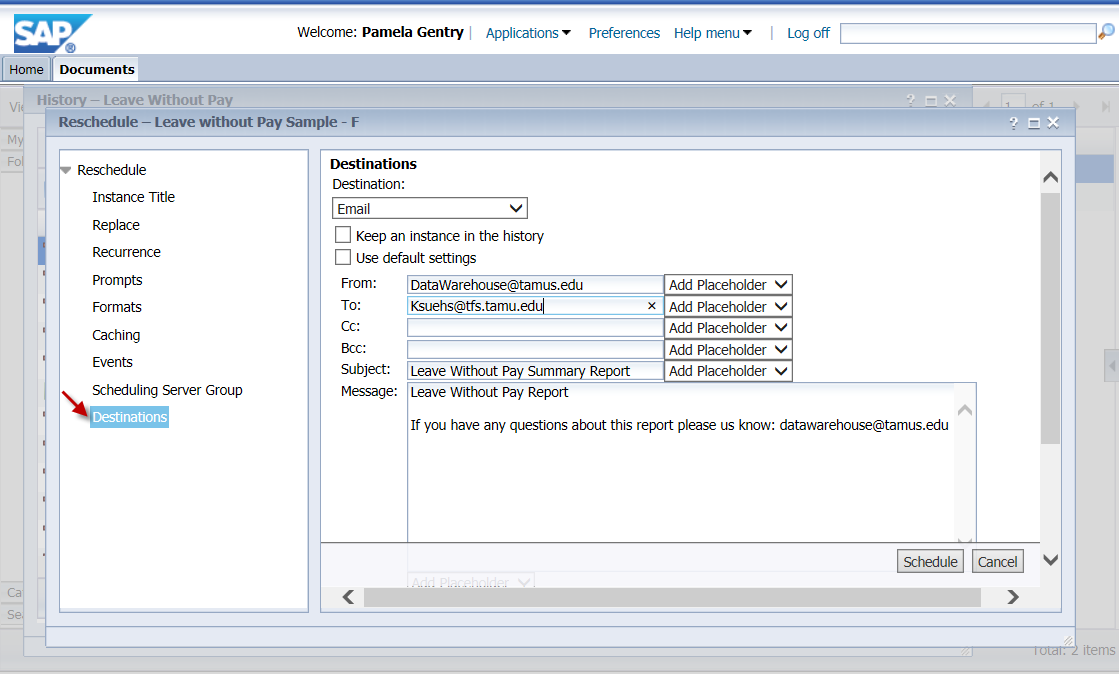
Select Recurrence

8. Select Destination from the menu on the left, and update the email addresses in the fields on the right.

Destinations

9. When finished, click the Schedule button at the bottom left of the window.

Primary Sidebar

Related

  • Employee Organizations
  • IPEDS HR Report
  • How Do I Request Access to BusinessObjects?
  • How to Schedule a BusinessObjects Report
  • Choosing a Financial Universe
  • Choosing an HR Universe
  • Choosing a Payroll Universe
  • Choosing an Other Universe
  • Changing Ownership of Scheduled BusinessObjects Report
  • Exporting BusinessObjects Reports
  • Modifying BusinessObjects Scheduled Reports
  • Navigating Folders in BusinessObjects
  • Current vs. Historic Attributes
  • FTE Quarterly Reporting
  • BusinessObjects Security Access
  • BusinessObjects Applet Error

Copyright © 2023 Texas A&M University System All rights reserved.

301 Tarrow Street, College Station, TX 77840 | MAP | Phone: (979) 458-7700 | email: support@tamus.edu
State of Texas | Texas Homeland Security | Texas Veterans Portal | Statewide Search | Risk, Fraud & Misconduct Hotline | Privacy | Web Accessibility | State Link Policy | Campus Carry

Texas A&M University System