
This job aid describes the steps for a Compensation Partner, HR Partner, HR Contact or Manager to request ad hoc compensation changes for an Employee.
Request Compensation Change
Last updated on March 14, 2026
Page Loading...
Checking SSO...
Prerequisites
You will need to know the Effective Date and Reason for the compensation change before you begin.
Important Information
- If the Employee’s job is changing along with a compensation change, use the Start Job Change business process instead.
- A compensation change can only be done for employees within the Supervisory Organizations that a security role supports, for the direct reports of a Manager or for those within the management chain.
- The Request Compensation Change business process is used to update an Employee’s compensation in the Salary, Hourly, Allowance sections.
Getting Started
Important: To cancel a Compensation change simply leave the page before saving or submitting.
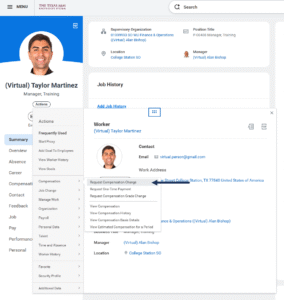
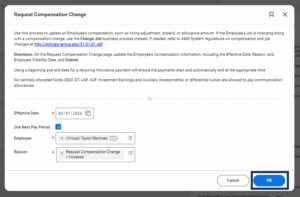
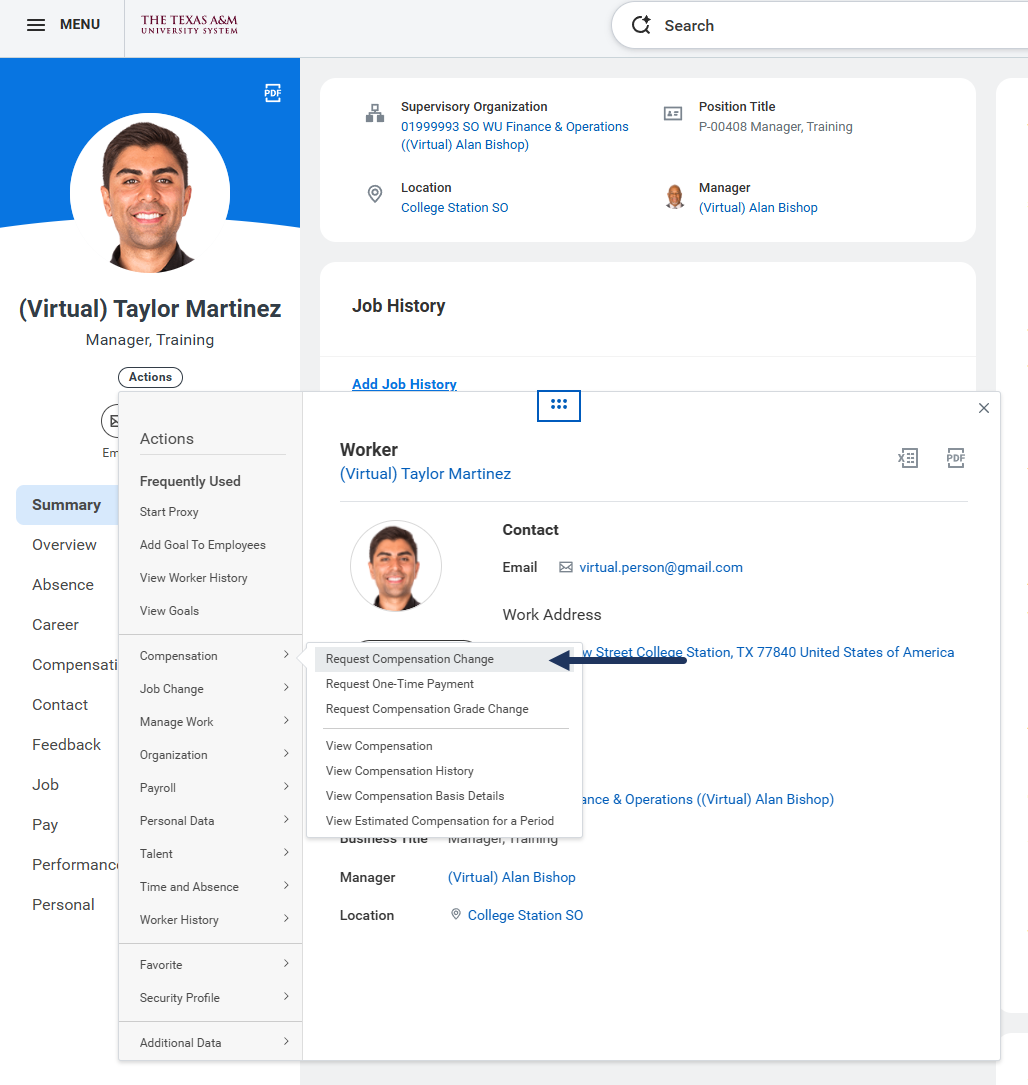
- Navigate to the Employee’s Worker Profile and select Actions > Compensation > Request Compensation Change.
- In the Request Compensation Change dialog box, complete or confirm the following fields:
- Effective Date. This is the date when the new compensation amount takes effect. It is also the Employee Visibility Date if that field is left blank.
- Use Next Pay Period. This will be auto-populated based on the chosen Effective Date.
- Reason. Select the appropriate reason for the compensation change.
- Position. If an Employee holds multiple positions, the Position field will appear. Select the Position related to the compensation change.
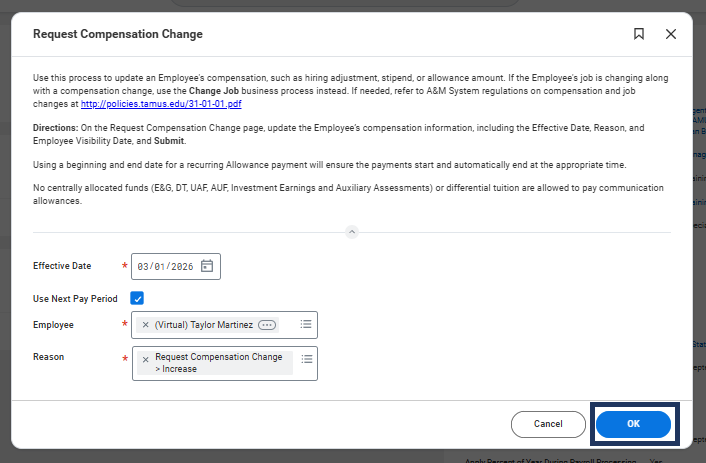
- Select OK.
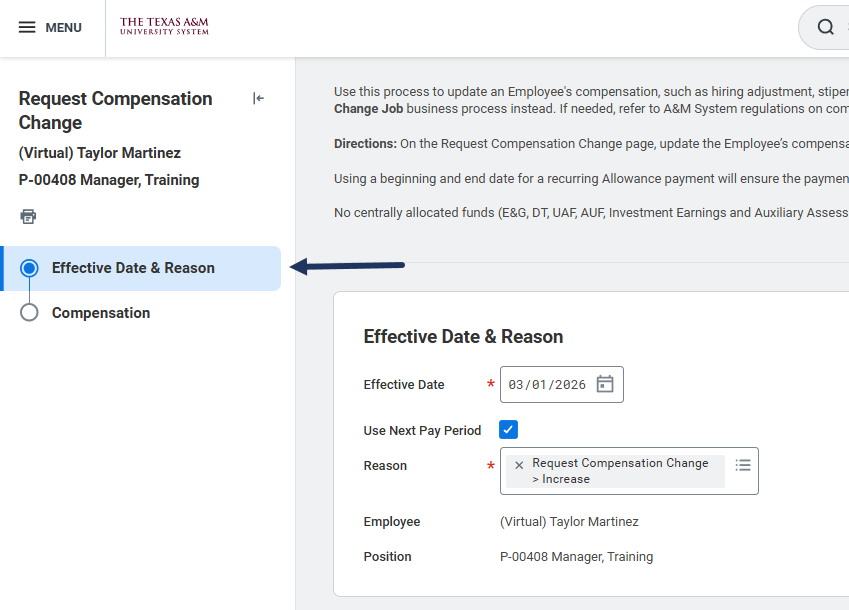
- The Request Compensation Change page displays. If you need to change the Effective Date or Reason, select Effective Date & Reason from the left-side navigation panel.
- Enter the Employee Visibility Date by selecting the Related Actions menu and then Edit. The Employee Visibility Date must be on or after the Effective Date. If left blank, this date will default to the Effective Date.

- The Total Base Pay will update automatically when salary or hourly data is entered. This field cannot be edited.
- Edit the Guidelines section, as needed. Changes to Guidelines are not typical and should be avoided. In most cases, you should make Salary updates.

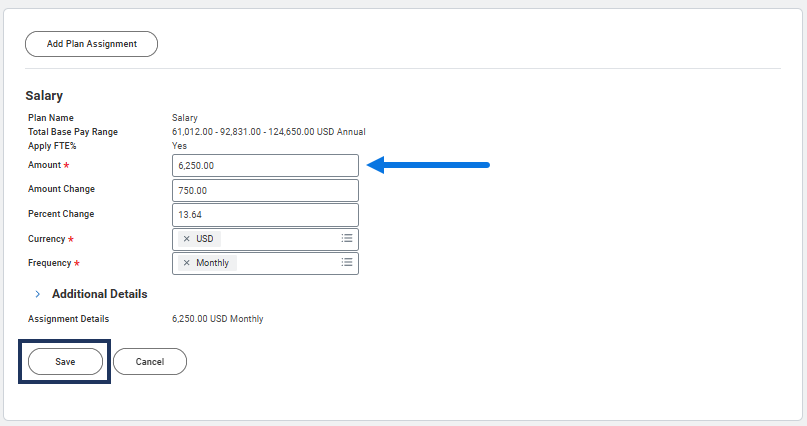
- Edit the Salary or Hourly section, as needed. When you adjust the Amount, Amount Change, or Percent Change fields, Workday automatically calculates the other two fields.
- Select Save.

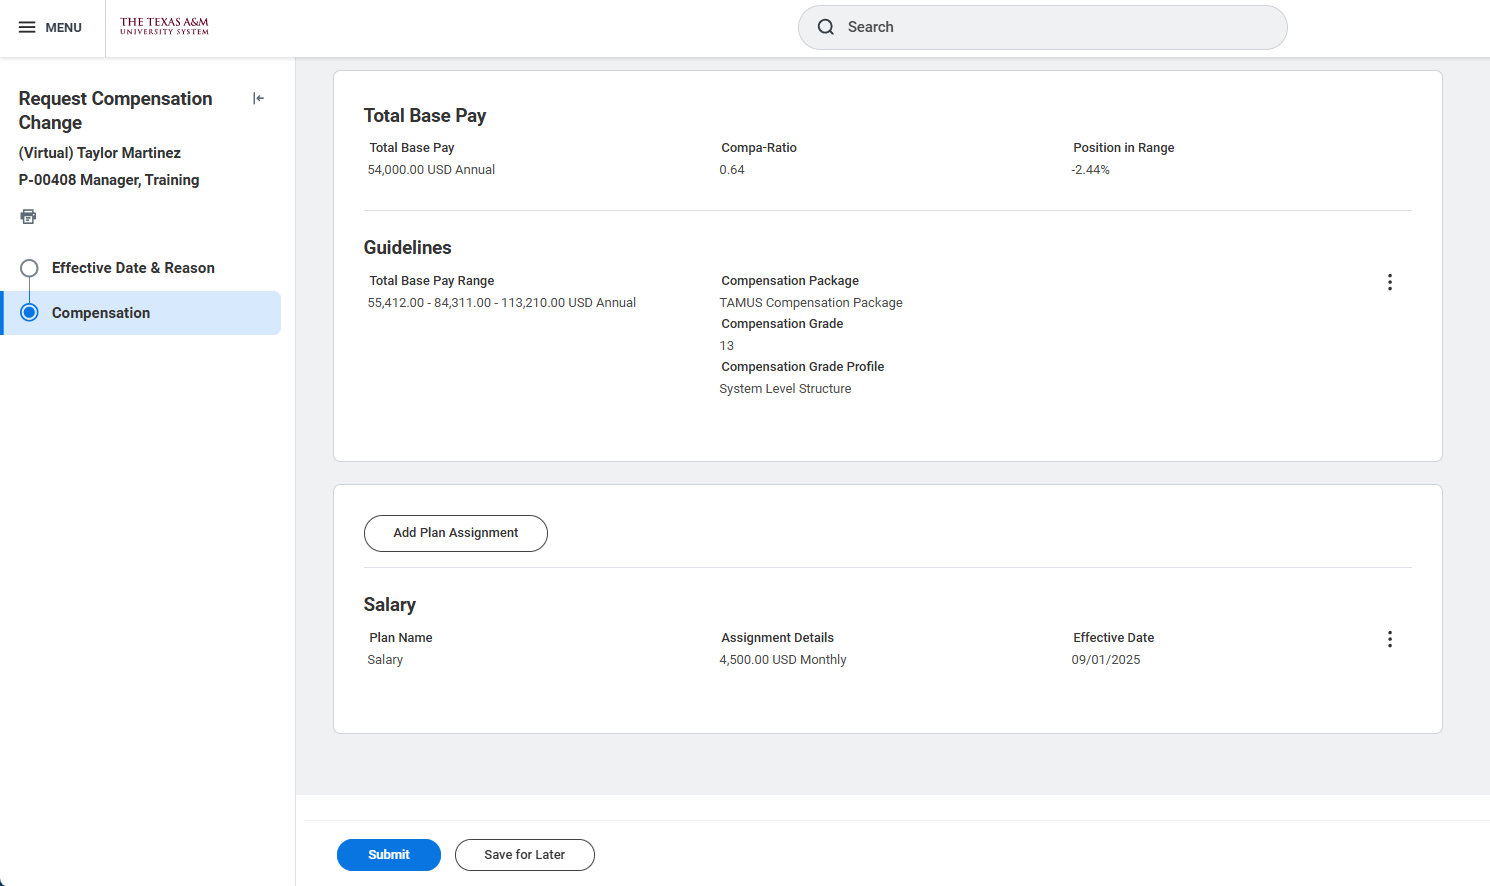
The Compensation page will note the modifications that you have made. 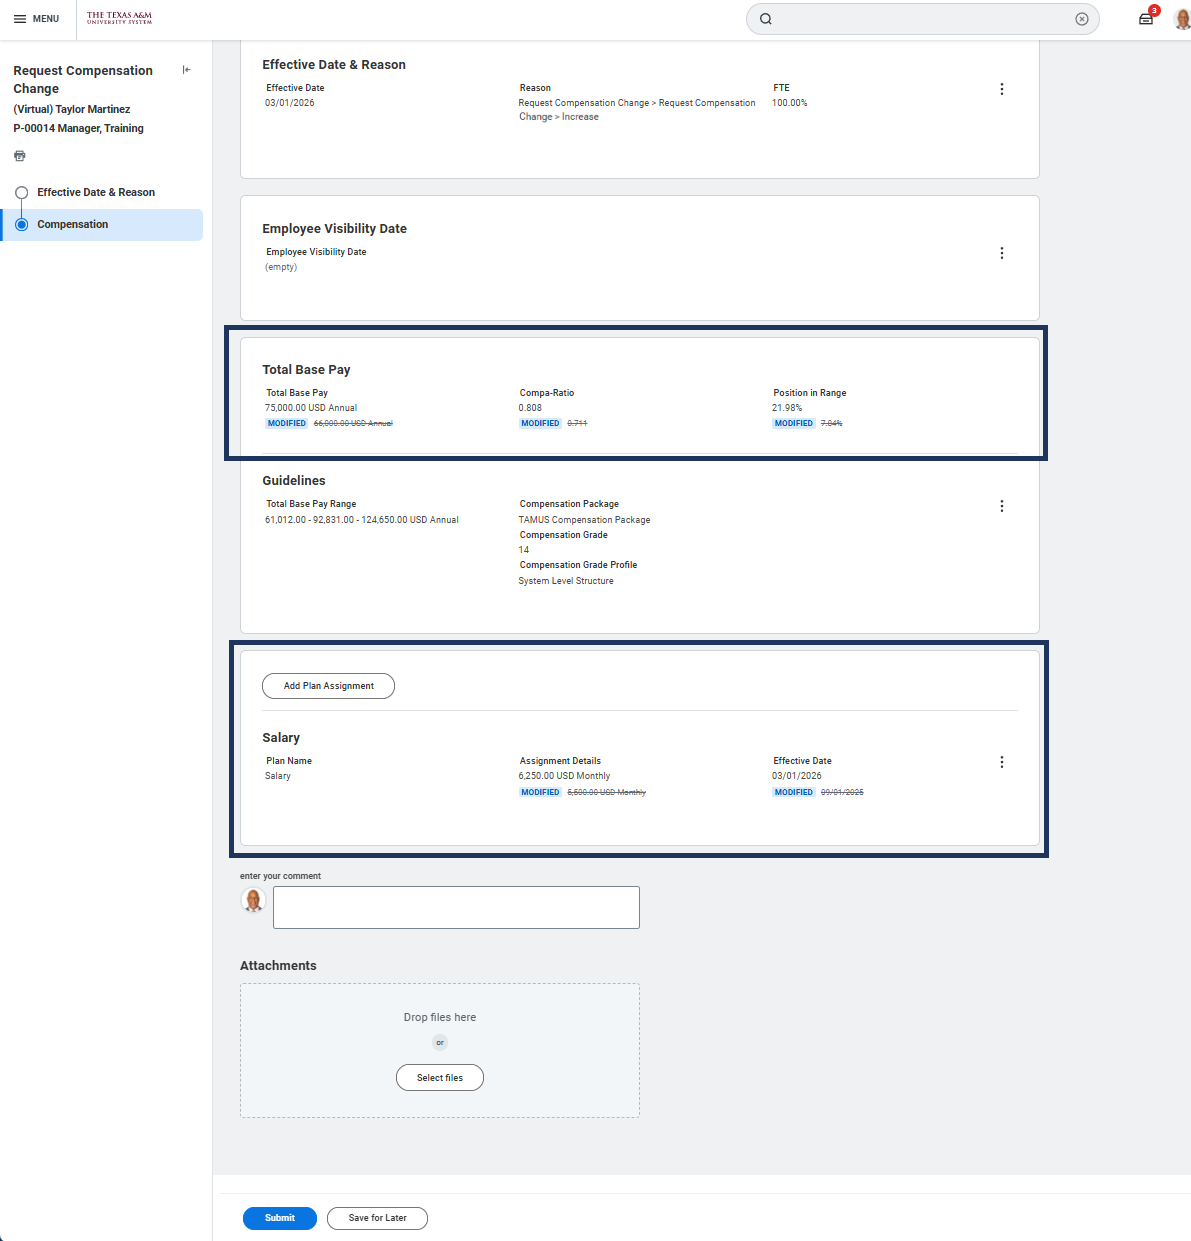
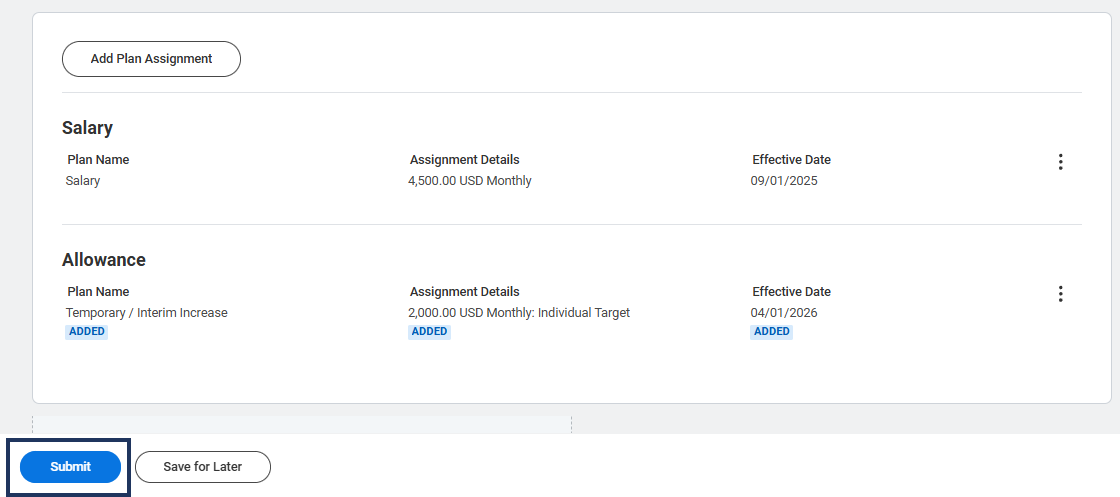
- To add a Plan Assignment, such as an Allowance, select the Add Plan Assignment button.
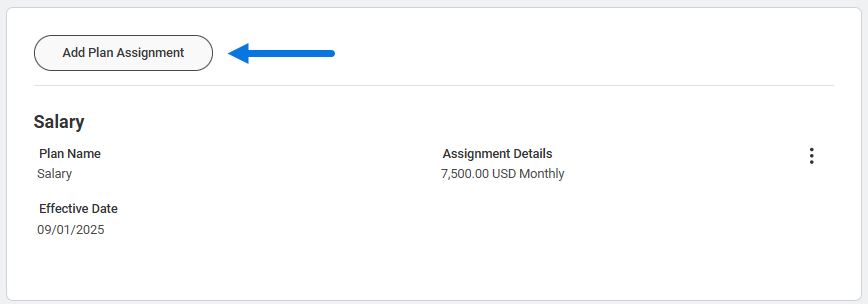
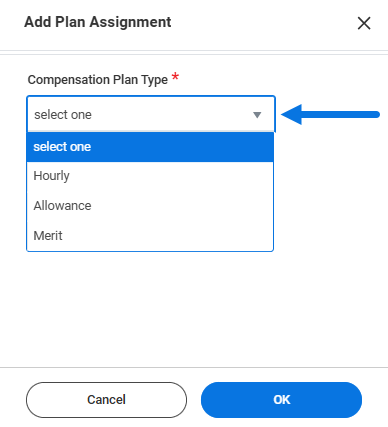
- The Add Plan Assignment slide-out will appear on the right.
- Compensation Plan Type. Select Hourly, Allowance or Merit.
IMPORTANT: Merit should not be added during the Request Compensation Change business process unless coordinated with the designated Merit Partner during the annual merit process.
-
- Compensation Plan. Select the type of allowance (e.g., Communication Allowance, Department Head Stipend, Temporary/Interim Increase, etc.).

- Select OK.
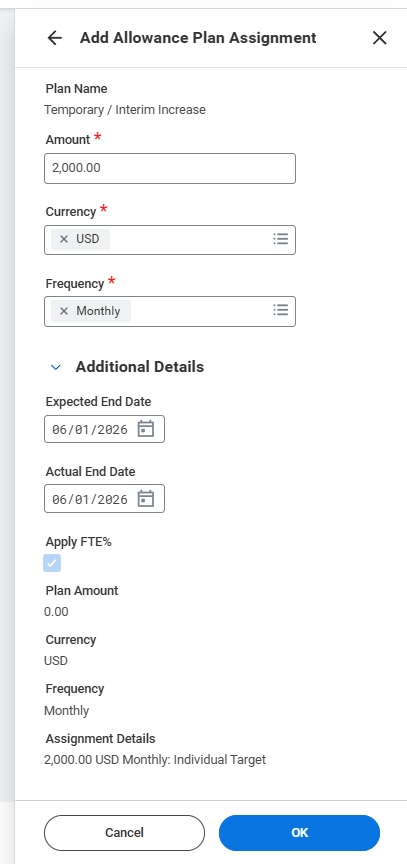
- On the next screen add the plan details:
- Amount. This is where you enter the monthly amount of the allowance being offered.
- Currency. This will always be set to USD.
- Frequency. This will always be set to Monthly.
- Additional Details. Selecting this will reveal optional fields.
- Expected End Date. This field will not terminate payment, it is only entered to indicate when you expect the payment will need to end.
- Actual End Date. Any date entered here will automatically terminate all payment on that date. It will remove the entire compensation plan for the Employee.
- Select OK.
- Select Submit.
Navigate to the Up Next tab for the next steps in the process.
Up Next
The business process will route for approval (Research Partner, Faculty Partner, Executive Approver Sponsored Research Partner or Compensation Partner), depending on the compensation added and the position type.
Note: When multiple Executive Approvers are assigned to an organization, all Executive Approvers will be required to approve select tasks to move the process forward.
No Changes to Costing Allocations Needed
The Budget Contact will receive a To Do to Assign Costing Allocation. However, Assign Costing Allocation is an optional step in this business process. If no changes are needed to costing allocations:
- Navigate to your Inbox and select the To Do Assign Costing Allocation: Compensation Change.
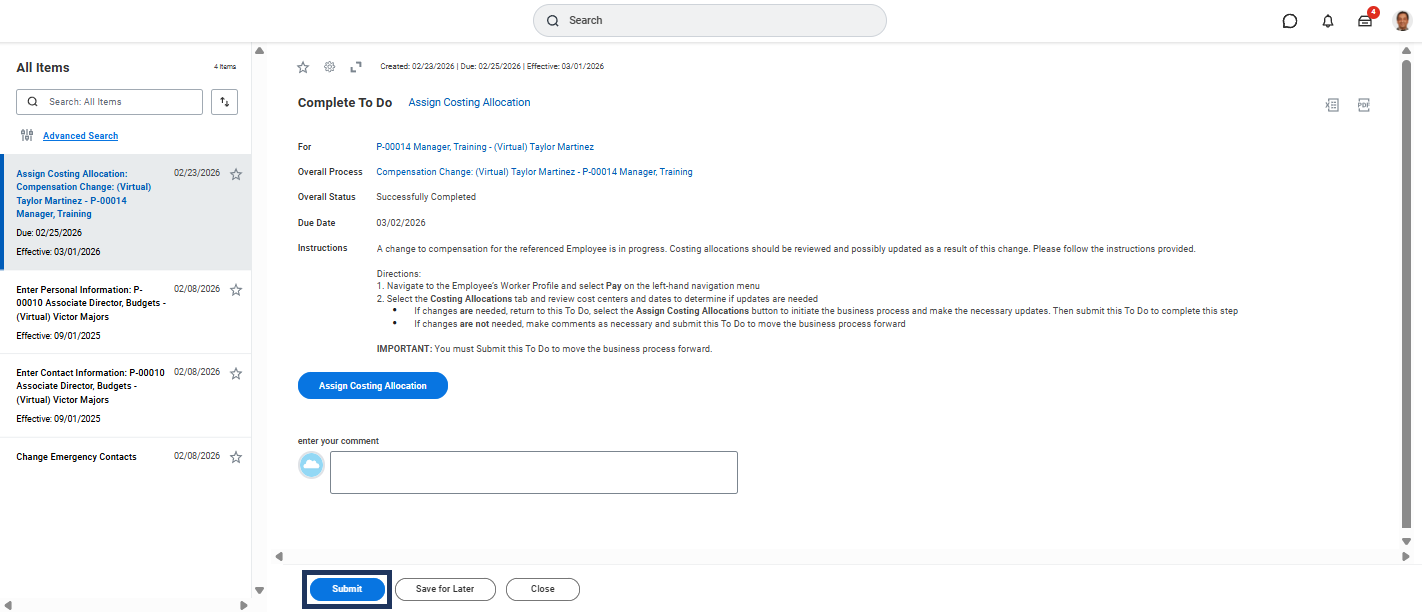
Important: Do NOT select the Assign Costing Allocations button as this will initiate the Assign Costing Allocation business process.
- Select Submit.
Updating Costing Allocations
As outlined above, the Budget Contact will receive a To Do to Assign Costing Allocation. If changes are needed to costing allocations:
- Navigate to your Inbox and select the To Do Assign Costing Allocation: Compensation Change.
- From the Inbox task, select Assign Costing Allocation only if changes need to be made.


Important: If you know that no changes are needed to accounts, dates or percentages, you should Submit the To Do without taking further action as explained above.
- From the Assign Costing Allocation page, select the correct Worker and confirm the correct Position is selected. Enter an Earning if you are only changing the costing allocations for an allowance.

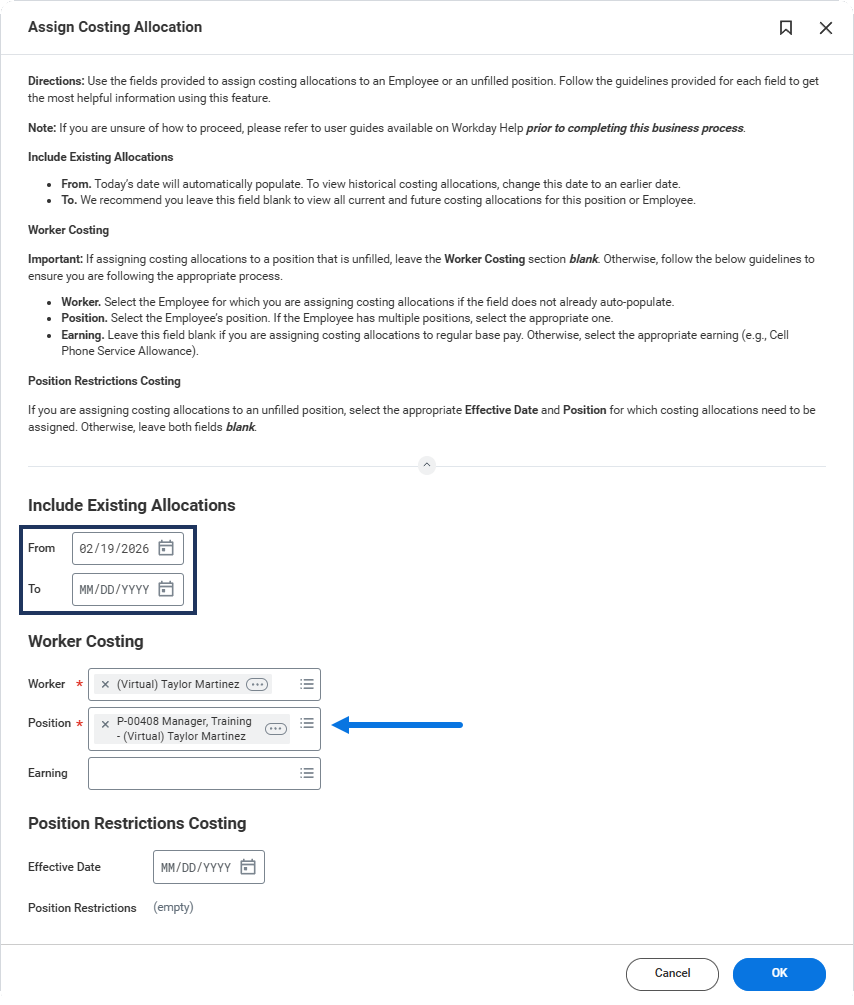
Important: The Position Restrictions Costing section should not be modified when making changes to an Employee.
- Select OK.
- Select Add.
- Complete the following fields:
- Start Date: This indicates the first date that the salary/wages will be charged to the designated account
- End Date (Optional): This indicates the last date that the salary/wages will be charged to the designated account.
- Worktags. Update the account number (e.g., Business Computing Services) as needed.
- Distribution Percentage. Update as needed. To distribute percentages across multiple cost centers, select the Plus Sign (+) icon which will create a new row. The percentages from all cost centers must add up to 100%.
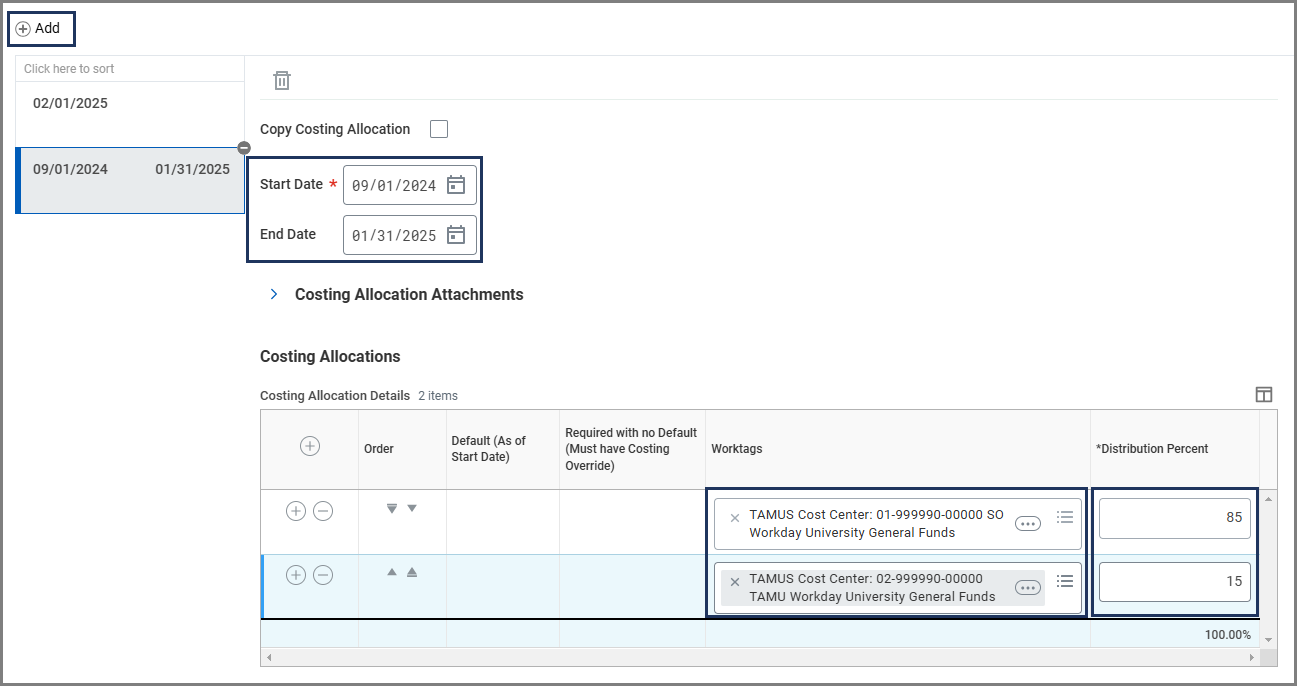
Note: A change to either the Effective Date, Percentage or TAMUS Cost Center must be made in order for the business process to route.
- Select Submit.
This completes the Request Compensation Change process.