This job aid outlines the process for a Recruiting Partner and Recruiting Coordinator to move a Candidate through the job application process.
Job Application Process (TAMU)
Last updated on May 29, 2026
This custom job aid is intended for TAMU, TAMUG, and TAMHSC.
Page Loading...
Checking SSO...
Prerequisites
An intake meeting must have taken place between the Recruiting Coordinator, Recruiting Partner, and Hiring Manager to establish the requirements for the Position in order to open a job requisition.
A job requisition must exist, be open, and must have been posted at some point. The job application process starts after a Candidate has applied through a job posting.
Important Information
- All requisitions are managed by the Recruiting Coordinator or Recruiting Partner.
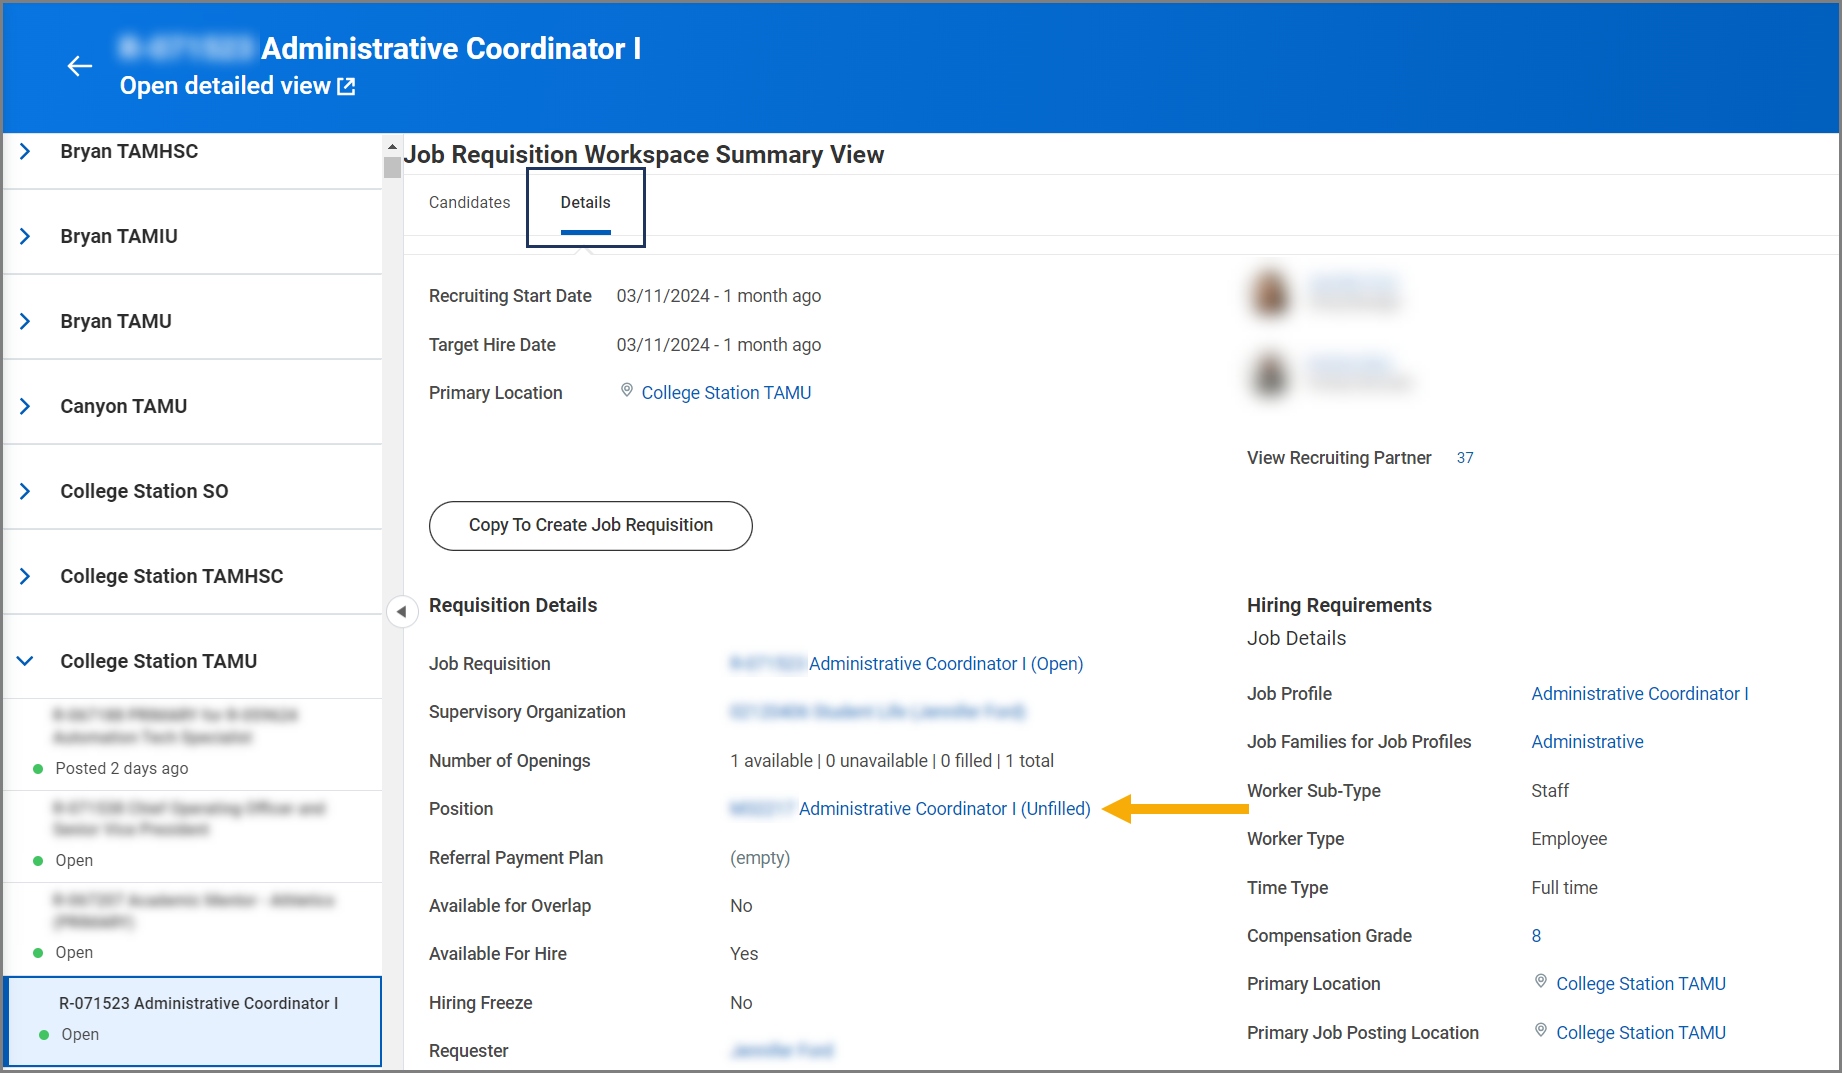
- The position linked to the job requisition must be unfilled by the Candidate’s date of hire. The Recruiting Dashboard application can be used to manage job requisitions.
- A Candidate can be dispositioned at any stage (by declining them for various reasons) and will be notified automatically via email. However, a Candidate can be reactivated after being dispositioned. If you need to do this, email jobs@tamu.edu.
- Not all candidates have to be at the same stage at the same time, but all candidates must proceed through all the stages listed below if they are to be hired.
- When documents are attached within the knockout questionnaire, they will only show up in the questionnaire’s results tab. They do not show up on the Attachments screen unless attached within that screen.
Getting Started
This job aid covers the following stages: Finding your Job Requisition(s), Initial Review, Screen, Interview, Reference Check, Offer, Background Check, and Ready for Hire.
Finding your Job Requisition(s)
There are multiple ways for the Recruiting Coordinator or Recruiting Partner to find a Job Requisition.
Searching for the Job Requisition
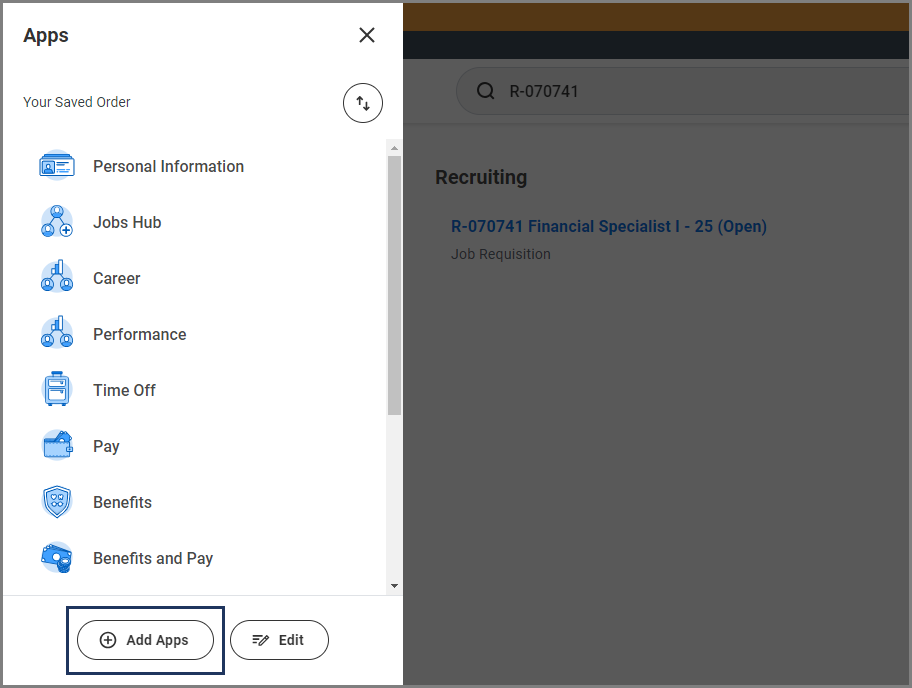
If you already know the Job Requisition number (R-0XXXX), you can simply type it into the Search Bar. In order for it to populate, you may need to select All Categories and then Staffing and/or Recruiting. In order to save this as your future search criteria, select Edit Category Preferences followed by moving the Recruiting and/or Staffing events into your Pinned Categories section and select Save.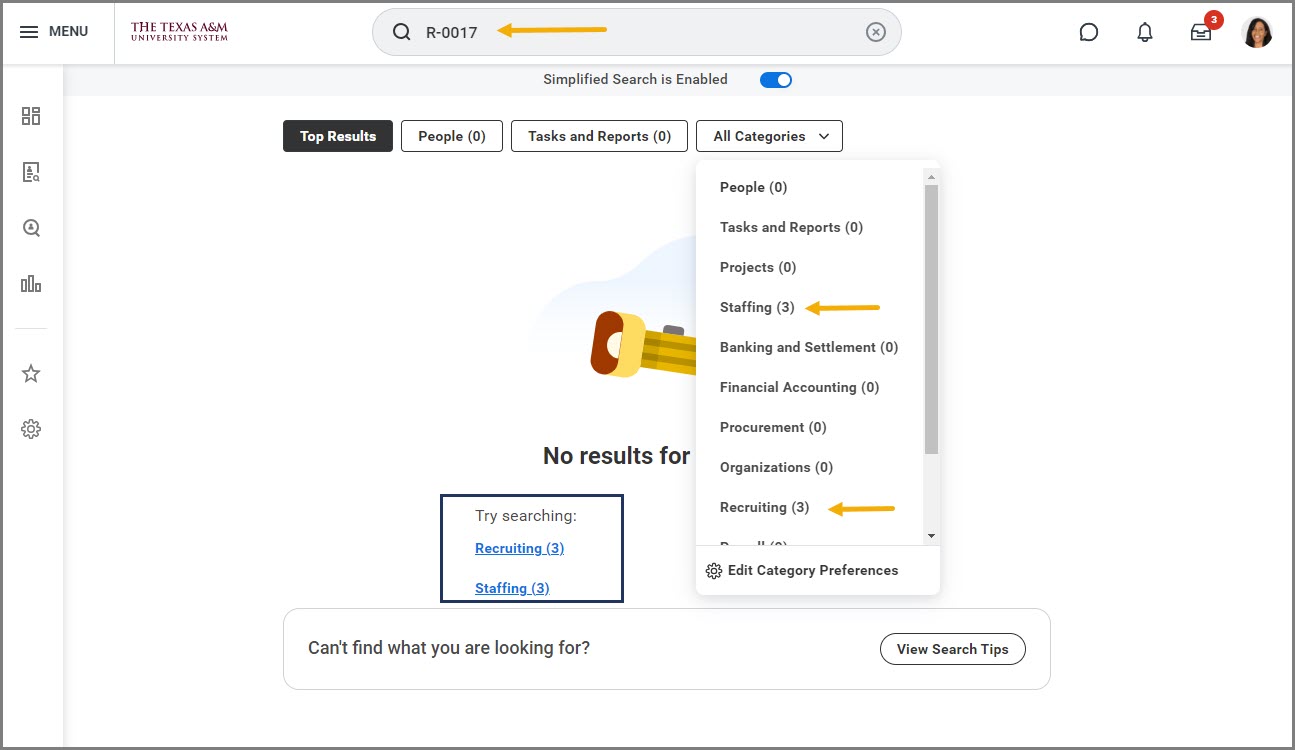
Finding the Manager’s Supervisory Organization
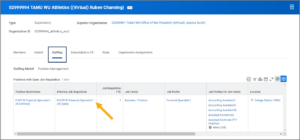
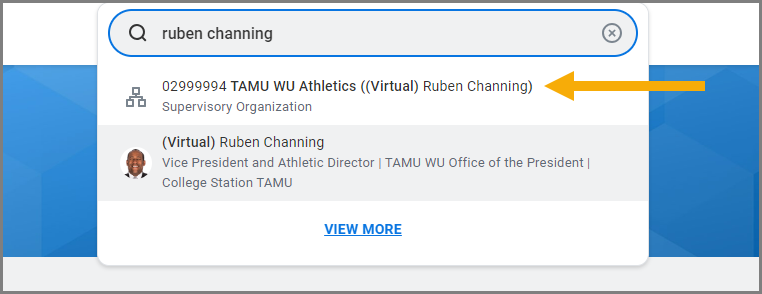
- Type in the Manager’s name into the Search Bar and select their Supervisory Organization. In order for it to populate, you may need to configure your search in order to see this automatically by moving Organizations into your Saved Categories. You can also select More Categories followed by Organizations.

- Then select the Staffing tab and select your Job Requisition.

Using the Job Requisition Workspace App
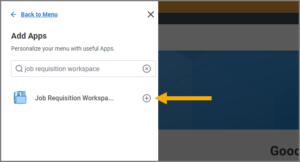
- Ensure that you have the Job Requisition Workspace App added into your Dashboard. To do so, from anywhere in Workday select Menu > Add Apps.

- Next, search for “Job Requisition Workspace” in the Find Apps field and select the Plus Sign (+) icon to add it to your Menu.
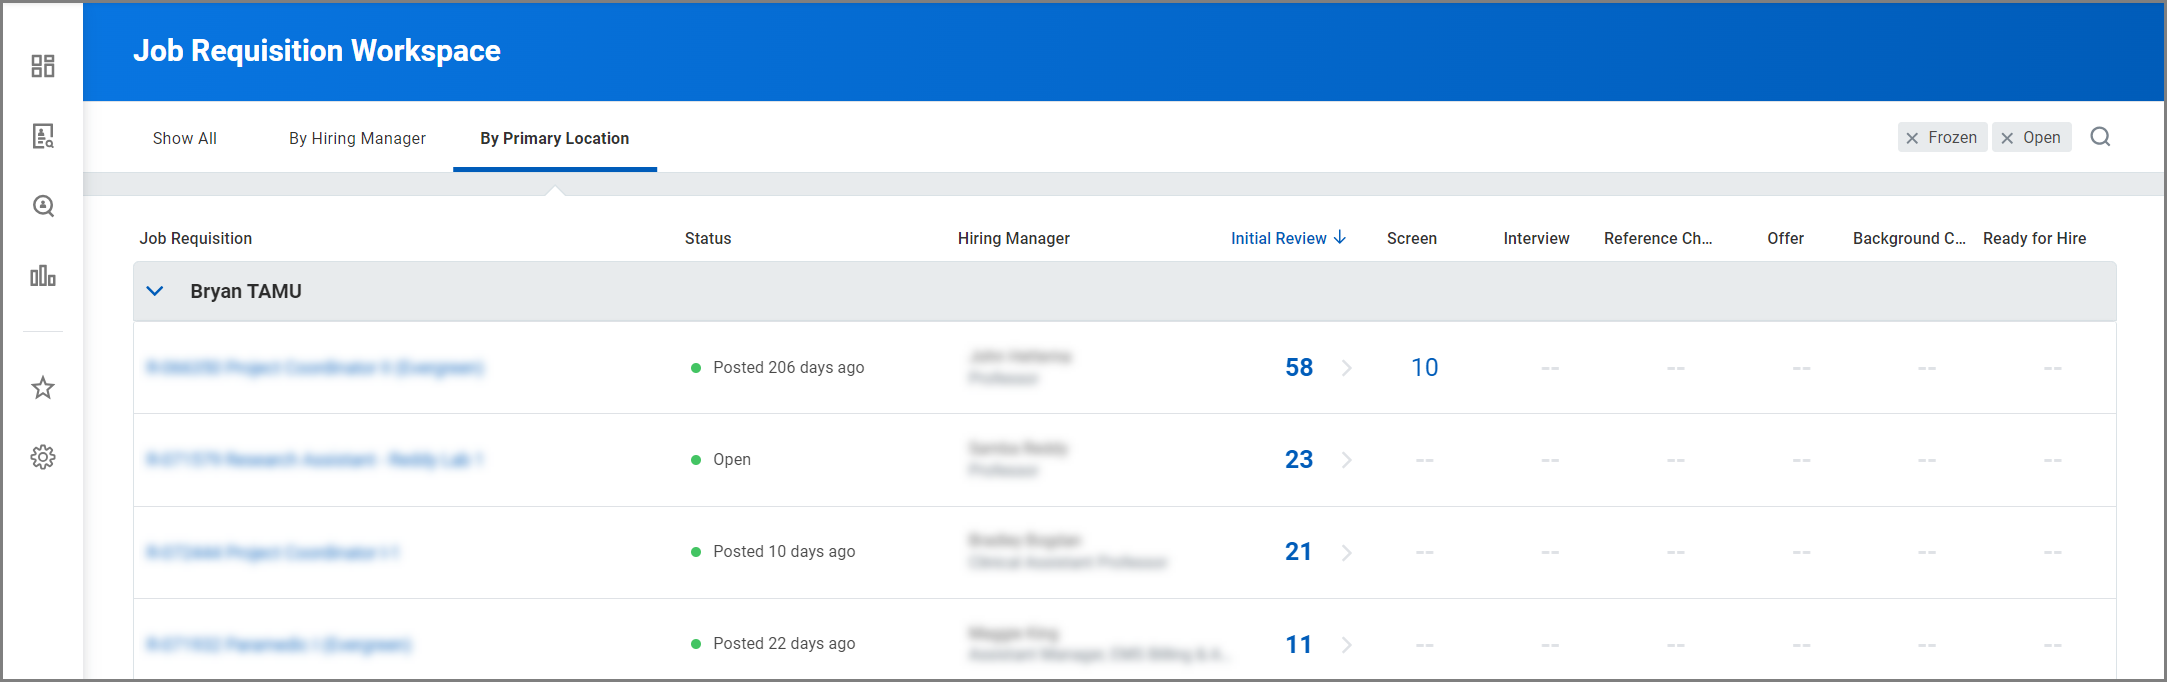
- Now select Menu > Job Requisition Workspace and you will be able to view all of your job requisitions. Select the Job Requisition you need to access.

Initial Review
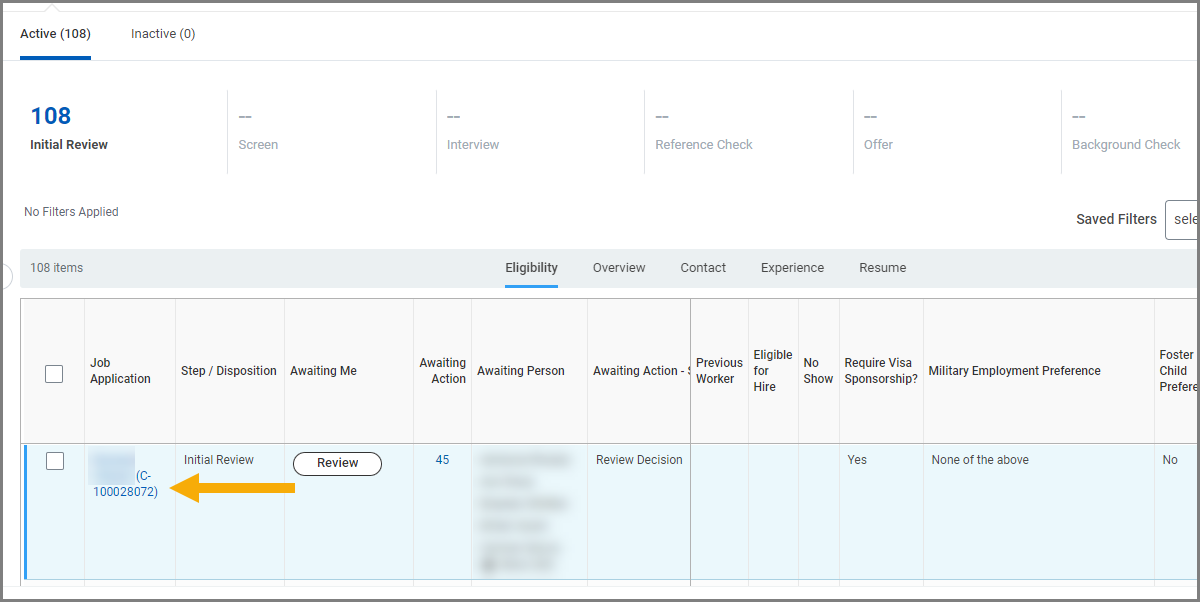
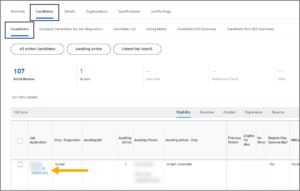
- Find the requisition you need to work on and you will see all the active Candidates. Inactive Candidates can be viewed by selecting the Inactive tab.
- If this is an Evergreen Requisition, the first step is to move applicants in Initial Review from the Evergreen to the Primary Requisition that is attached.
Note: If a Primary Requisition has not been set-up yet, create a Job Requisition and enter in the Evergreen Reference number (R-XXXXX) under the Link to Job Requisitions section. Remember to select Do Not Post in the Recruiting Instruction field, and add text after the Job Posting Title to distinguish between each Job Requisition that will be tied to the Evergreen: (Primary, #1, #2, etc.). Refer to step 7 in the Create Evergreen Requisition and Post Job (TAMU) job aid and Create Job Requisition and Post Job (TAMU) job aid for more information.
-
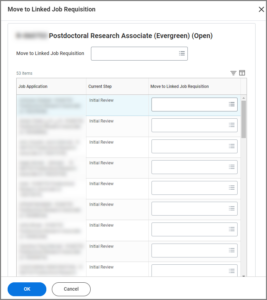
- Select the box to the left of Job Application to select all of the Candidates. Select the Related Actions icon and choose Move to Linked Job Requisition.
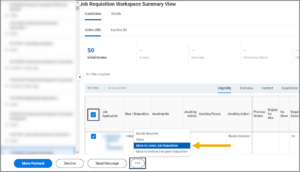
- Next, select the Primary Requisition that is tied to this Evergreen in the Move to Linked Job Requisition field and select OK.
- Then select the arrow in the top left corner of the page to return to all job requisitions. Select the Primary Job Requisition to work on your initial review.
- Select the box to the left of Job Application to select all of the Candidates. Select the Related Actions icon and choose Move to Linked Job Requisition.


Note: Do not do the initial review step on the Evergreen.
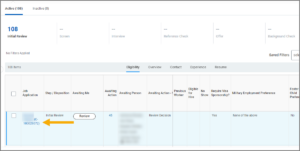
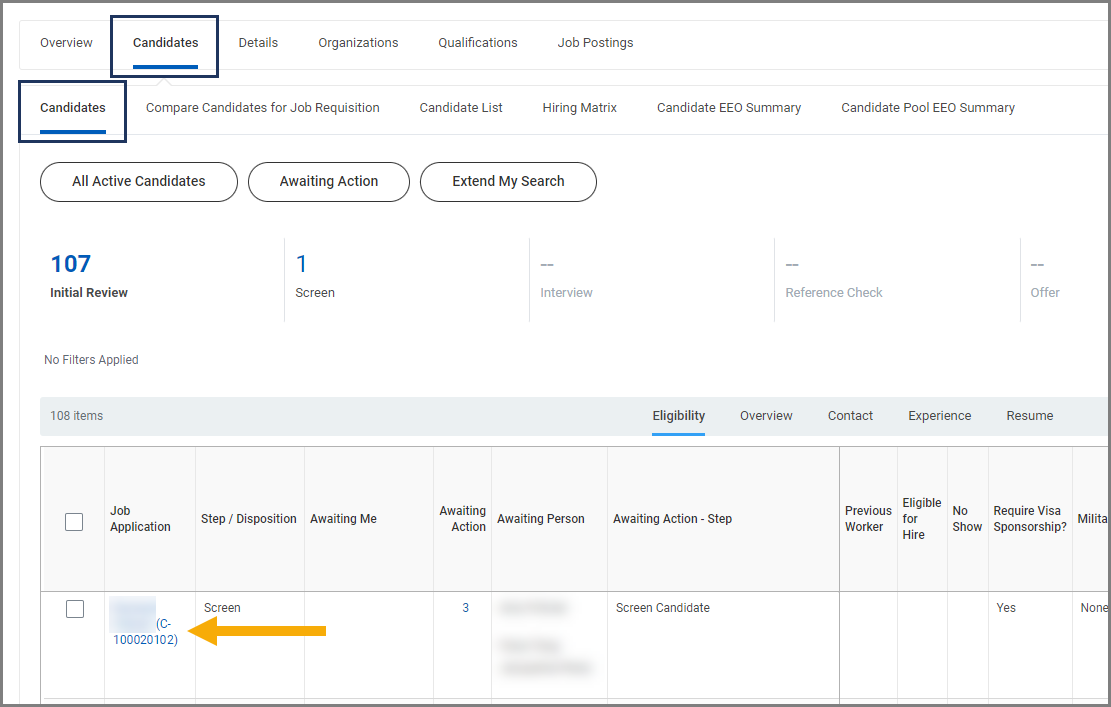
- Select the first Candidate that is in the initial review status by selecting the Candidate’s name. This will take you to the Candidates application profile.
- From here, review as much information as needed in order to determine if they meet the minimum requirements for the position. Be sure to review all tabs/attachments, such as a resume, if necessary, in order to determine if they meet a qualification.
Note: To find the minimum requirements for a position, from the job requisition, select the Details tab and then select the Position. The minimum requirements will be listed below the Required Education and Experience section in the job description.)
Assessing Equivalencies
This section describes how to assess education and experience requirements where equivalencies for education and experience need to be considered. Please refer to the Determining Education/Experience Equivalency document for more information.
- Education and Experience Equivalency. Determine if the Candidate meets the Education and Experience requirements for the position.
- If a Candidate does NOT have (Internal) after their name, check their application materials to see if they listed a system member (e.g., TAMU, AgriLife, TEEX) as an employer or has a member email. Then check if they are an active Employee in Workday. If they are an active Employee, they will need to be dispositioned with the reason of Internal Candidate – Needs to Reapply through Workday even if they meet the qualifications. If you need assistance with getting a Candidate to reapply after a job requisition has been closed, reach out to jobs@tamu.edu.
- After performing the initial review on the Candidate, you can move the Candidate appropriately.
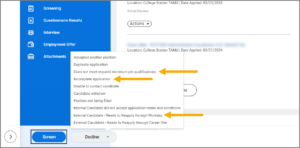
- If the Candidate meets the minimum education and experience, select Screen to move the Candidate to Screen and include in the Candidate pool.
- If there is not enough information provided in the application and the resume, select Decline and select the reason Incomplete application.
Note: This reason should only be used when there is not enough information provided in the application and resume (additional material requested in the job description is not actually required and the lack of such additional material is not a reason to use incomplete application).
-
- If the Candidate does not meet the minimum education and experience, select Decline and select the reason Does not meet minimum job qualifications.
- If the Candidate applied externally, but needs to apply as an Internal Candidate, select Decline and select the reason Internal Candidate – Needs to Reapply through Workday.

Screen
Screen is a status in the Workday Recruiting Business Process that can be executed by the Recruiting Coordinator or Recruiting Partner. This step should be discussed as part of the intake meeting to determine which role will be responsible.
Recruiting Coordinators or Recruiting Partners should assist Hiring Managers to conduct the offline screening process, using Workday to review Candidates’ application materials to assess their skills, knowledge and experience against the preferred qualifications in the position description. Talent Management has provided a Screening Matrix tool, Screening Matrix, to facilitate this process. The requirement is not to use this specific tool. However, documentation must be developed and provided to support the selection of specific Candidates for Interview.
Download the Screening Matrix and follow the directions to add the specific preferred experience/skills that will focus on the candidates to be interviewed.
The Screening Matrix only has six columns as this is not intended to be used to review all of the preferred elements, just those that will aid Managers to focus on Candidates to further move through the process.
Note: Never add the required minimum education/experience as this review is already completed and the Candidate would not be in Screen if they had not already been assessed as meeting the minimum education/experience requirements.

Note: Only those preferred elements that can be assessed/rated from the application and resume should be included. For example, interpersonal skills should not be assessed in the Screen stage; instead they should be assessed as part of the interview process.
Veteran’s Preference and Former Foster Child should also be noted on the Screening Matrix or materials.
Additional instructions are included on the Screening Matrix.
- Once the Screening Matrix, or other material documenting the Hiring Manager’s decisions on who to interview and why is established, go to the Job Requisition in Workday and open the Candidate Grid. Go to the first Candidate in the Screen status and select the Candidate’s name.
- You are now in the Candidate’s profile, type the name of the Candidate on the first line of the screening matrix and then review the application and resume to assess each of the preferred elements noted on the screening matrix. You can use your own rating system, such as 0 through 5 to assess each element. The assessment is based on the preferred elements noted, and requested additional documents, such as a cover letter, are not considered requirements of the position. A Candidate should never be rejected if a requested file is not included.
- You can move from Candidate to Candidate using the arrows in the upper right hand corner of the screen.

- Continue assessing and completing the screening matrix for all candidates currently in the Screen status. If you have applicants in the Initial Review status on your Candidate grid, they should not be included on the Screening Matrix at this time. You should wait until the Initial Review assessment is complete and they have been moved into the Screen stage.
- Once you have completed the Candidates in Screen, you can use the Screening Matrix to sort the Candidates by their score. The Screening Matrix can be used as an ongoing tool to sort and determine the Candidates that accumulate the highest scores. You can add additional Candidates to the screening matrix and re-sort throughout the process.
Up Next
If the Manager has conducted the screening process on their own, they should now provide the Screening Matrix to the HR Professional (Recruiting Partner or Recruiting Coordinator) assisting with the process to move candidates into the Interview stage in Workday.
At this stage, you are able to disposition candidates from the requisition if you are positive they will not be considered for the position. This ensures they receive timely communication so that they are no longer being considered. You may also want to keep some candidates at this stage, due to the uncertainty of the interview process in case they may be offered an interview later. Refer to Dispositioning Candidates section.
If Interview is selected next, the Recruiting Coordinator receives the inbox item Interview.
Interview
Once the Candidate is in the Interview stage, the Recruiting Coordinator does not need to take any action in Workday.
Outside of Workday, Interviews should be coordinated with your Candidates/hiring managers/interview teams. Reference checks should be conducted by the Recruiting Coordinator in the Xref program for your preferred finalist(s).
After the interviews and reference checks have been completed and the hiring manager/interview teams have determined a Candidate that they would like to hire, the next steps are:
- Submit the Laserfiche Hire/Onboarding Request so that the decision to offer the Candidate gets approval from Recruiting Partner/Dept. Head/VP HROE as necessary.
- If immediate action is needed, submit a request to jobs@tamu.edu in order to expedite the approval process.
Note: The Manager may handle this step based upon what was discussed in the Intake Meeting.
- You are able to disposition any remaining candidates from the requisition if you are positive they will not be considered after the interview process. This ensures they receive timely communication so that they are no longer being considered. You may also want to keep those Candidates at this stage that interviewed well, due to the uncertainty of the offer/background check process in case they may be offered later. Refer to Dispositioning Candidates section.
Once the offer has been approved in Laserfiche or through the immediate action process, then you can move your Candidate to the Offer stage in Workday.
Note: The Assessment and Reference stages in Workday are NOT used. Candidates should be moved directly from Interview to the Offer stage once the above steps are complete.
Review Candidate for Duplicates (Recruiting Partner Only)
If not already done during a prior stage, the Recruiting Partner will check for any duplicate records in Workday for the External Candidate. The Recruiting Partner will also review that the Candidate has met the minimum qualifications for the position, review any Nepotism concerns that may come about from the Candidate and the position, and document if they are currently a State Employee that is not a member of The Texas A&M University System.
Note: This task is not required for an Internal Candidate.
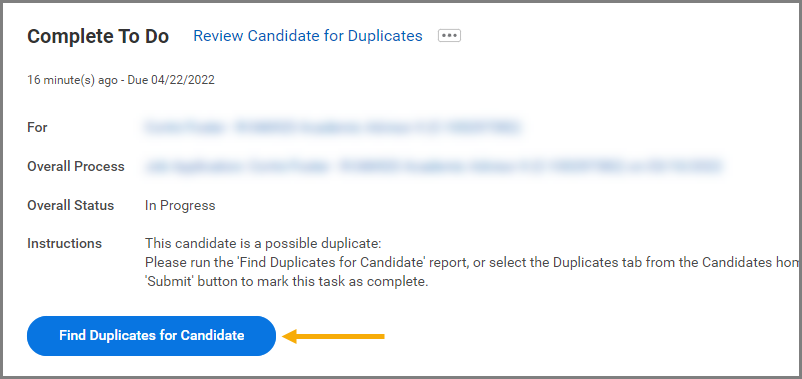
- From your inbox, select the To Do Review Candidate for Duplicates.
- Select Find Duplicates for Candidate.
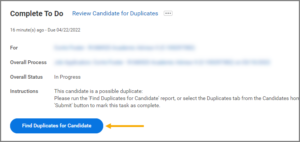
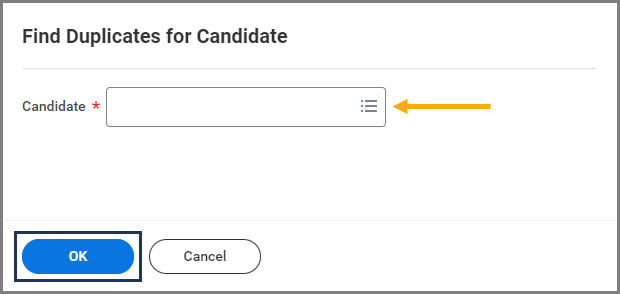
- Enter the Candidate’s name and select OK.

- Workday shows you possible duplicates for a Candidate with their names and reasons. You can merge duplicate records by selecting Merge.
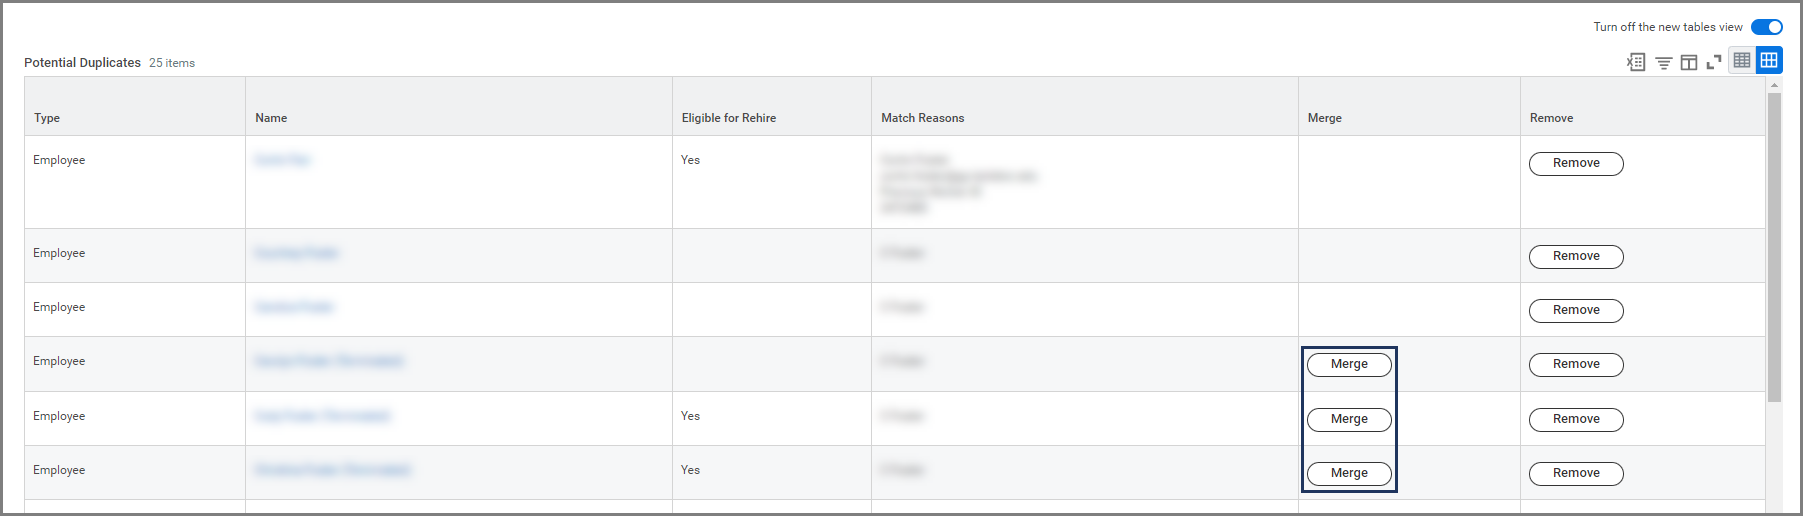
Note: The Recruiting Partner should review the Candidate’s resume, date of birth, email address(es) and any other available information carefully to confirm whether a duplicate exists, before proceeding to Merge.
- Return to the To Do in your inbox, enter comments as needed, and select Submit.
Offer
During the Offer stage, the offer is developed and approved, a document is generated, the Candidate accepts or rejects the offer, and the offer decision is made.
Initiate Offer (Recruiting Coordinator)
This step uses the Guided Editor to move through four sections: Start, Compensation, One-Time Payment and Summary.
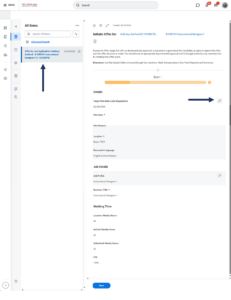
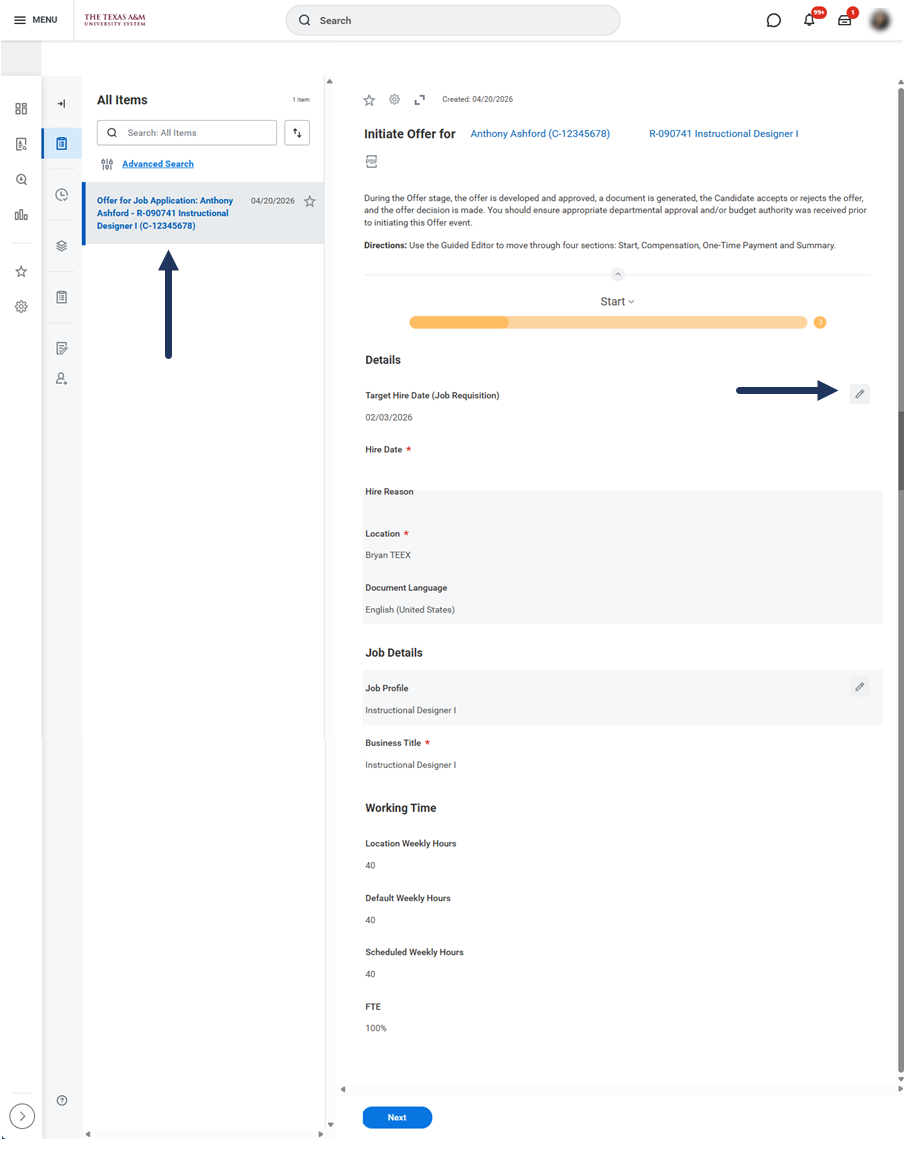
- Navigate to your Inbox, select Offer for Job Application.
- On the Start page, use the pencil icon to edit, and enter the following information.
- Hire Date. This is the proposed hire date for the Candidate. This date must not be earlier than the earliest hire date in the requisition.
- All other information will populate from the position. Verify that everything looks correct.
- Proposed End Date. This is required for a Temp/Casual Worker.
- Proposed End Date. This is required for a Temp/Casual Worker.
- Select Next.
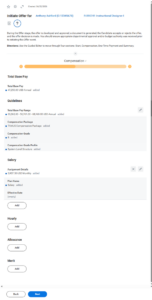
- On the Compensation page, enter the following information.
- Salary (if applicable)
- Compensation Plan. Enter salary.
- Amount. Enter the amount in dollars and cents monthly the Employee will be paid.
- Frequency. Select monthly.
- Hourly (if applicable)
- Compensation Plan. Enter hourly.
- Amount. Enter the amount in dollars and cents hourly the Employee will be paid.
- Allowances (if applicable)
- Compensation Plan. Select the type of allowance (e.g., car allowance). This would be entered into the Laserfiche Hire/Onboarding Request in the Additional Allowance/Stipend Amount section if necessary. The section will only appear in Laserfiche if one was entered.
- Amount. Enter the amount in dollars and cents the Employee will be paid.
- Frequency. Select the appropriate option.
- Salary (if applicable)
- Select Next.
- On the One-Time Payment page, complete/modify the following information in the Summary section only if it was part of the Offer agreement in the Laserfiche Hire/Onboarding Request. If it was not a part of the Offer, no fields need to be updated and you can simply select Next.
- Effective Date. This will default as the Hire Date.
- Employee Visibility Date. This is the date this information will be visible to the Employee in Workday.
- Reason. This is the reason they are receiving this payment (e.g., Award).


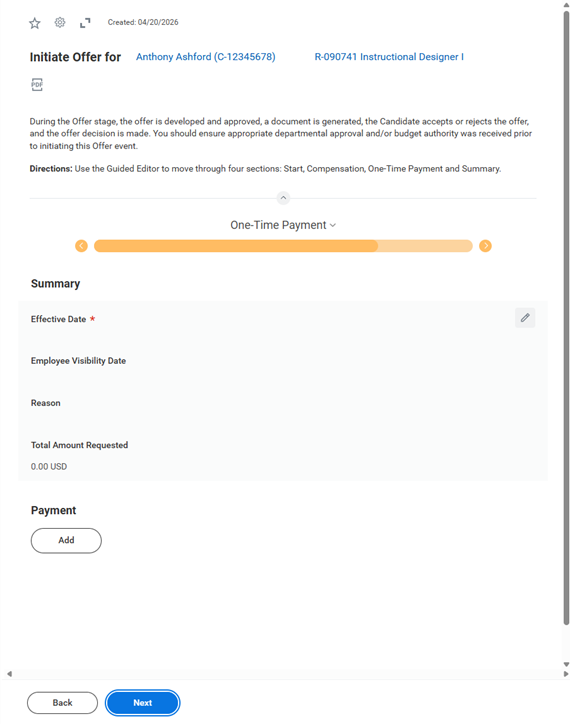
- In the Payment section, select Add.
- Payment Plan. Enter the type of plan (e.g., Education Reimbursement).
- Amount. Enter the amount in dollars and cents the Employee will be paid.
- Worktags. Enter the Cost Center from where the funds will be withdrawn if available.

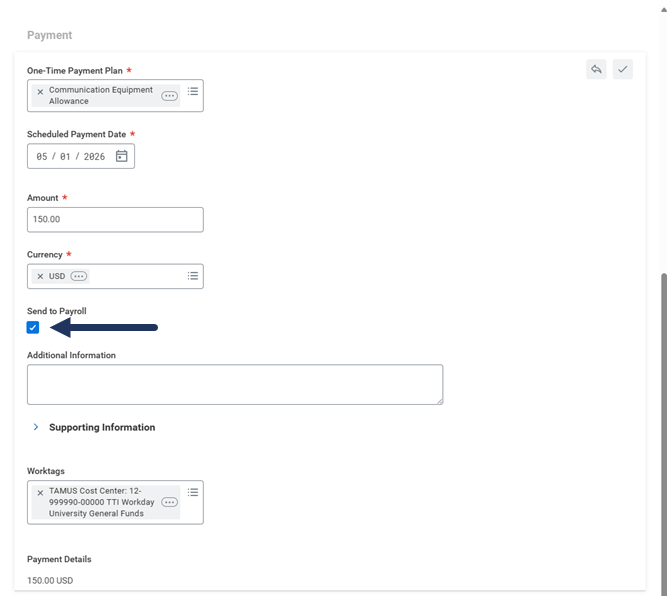
Note: You will only be able to add a payment amount after adding a Payment Plan. The Send to Payroll checkbox should be selected by default.
- Select Next to review all information entered.
- Select Submit.
Up Next
The Recruiting Partner will review the proposed offer and either Approve or Send Back if edits are necessary.
Offer for Job Application (Recruiting Partner Only)
The Recruiting Partner reviews the proposed offer.
- Select the Offer for Job Application task.

- Select Approve to move the business process forward. Select Send Back if changes are needed.

Generate Document for Offer (Recruiting Coordinator/Recruiting Partner)
Once the job is approved, the Generate Document for Offer Task is sent to the designated HR Professional(s).
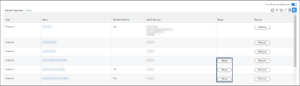
Select the Review Button from the Inbox to review, export to PDF, or add/edit the details prior to generating the offer letter.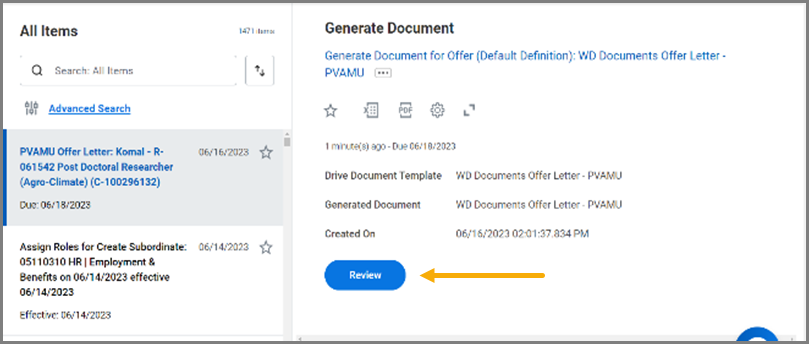
To view the offer letter in PDF form, select Preview. 
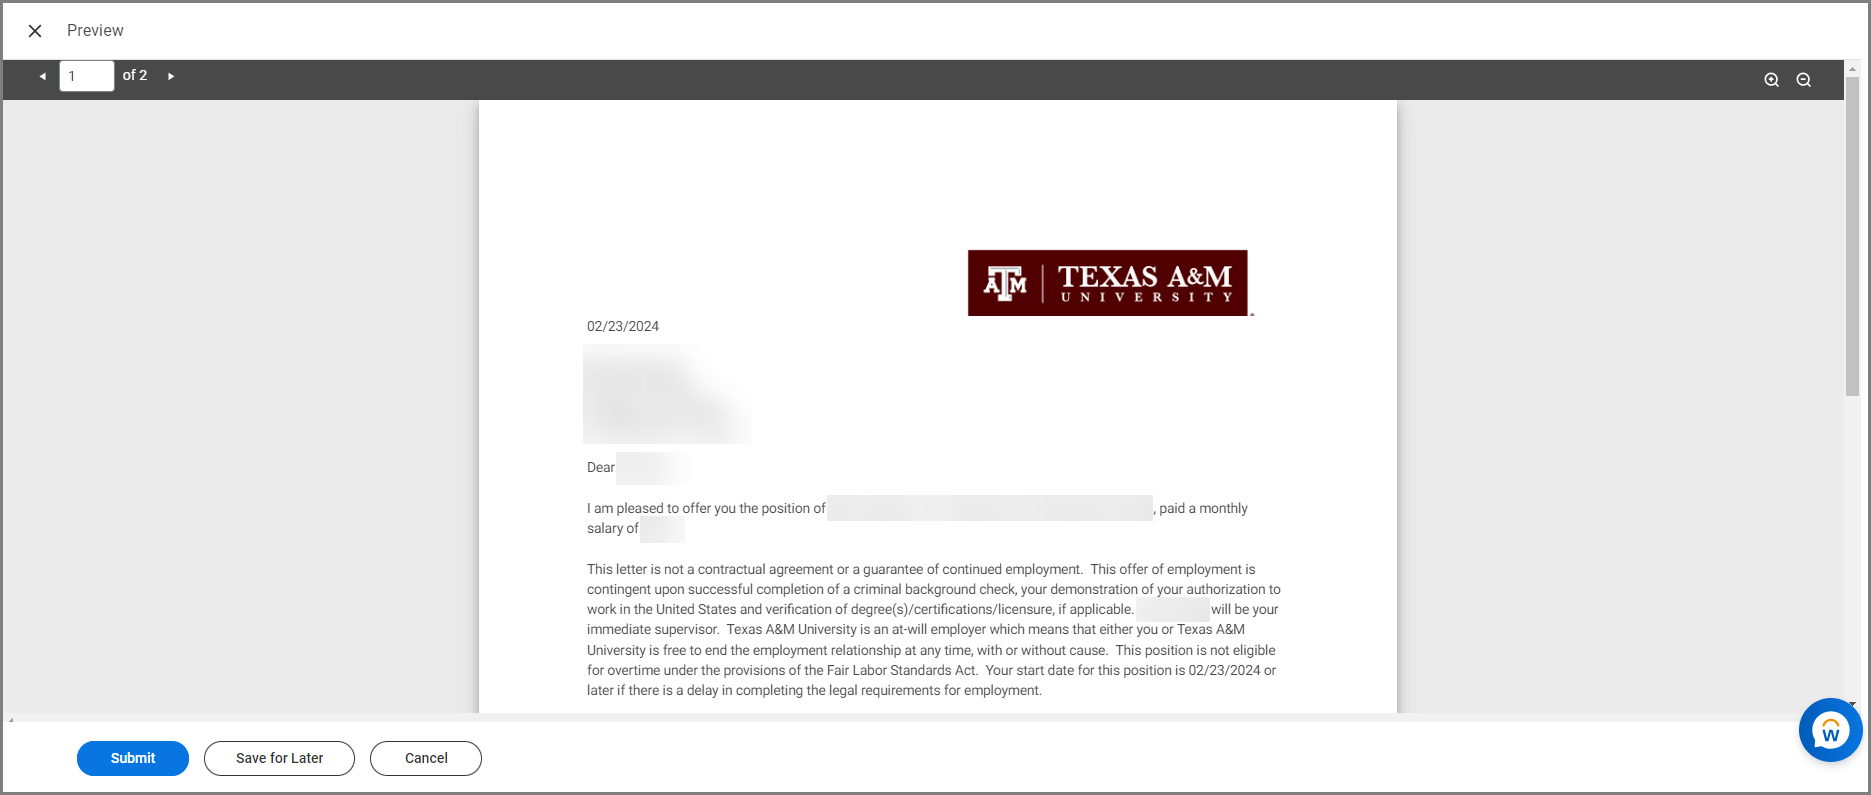
Select the X Preview Button to navigate back to the editable offer letter to make any necessary changes.
For Temp/Casual positions, you will need to remove the section regarding the position being eligible for benefits. Select Submit if there are no additional changes.
See the Job Aid – Sample Offer Letters available in SharePoint to see other sections that may be added if needed (for example, where relocation assistance has been agreed or if the position is dependent on funding by a research grant).
The Submit button may be selected from the PDF view or the Task Inbox Edit view.
If you do not want to use the Generate Document feature in Workday, you can skip the task. Skipping this task means the Candidate will not receive the offer letter from Workday.
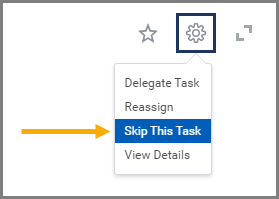
Note: If the letter is generated outside of Workday, the Recruiting Partner or Recruiting Coordinator can upload the letter to the Candidate profile for documentation purposes.
- Select Submit.
Up Next
The Candidate receives the offer letter. An internal Candidate will receive the offer letter in their Workday Inbox while external candidates will receive it on their Candidate Home account on the external career site. The Candidate will reply to their inbox task accepting or declining the offer.
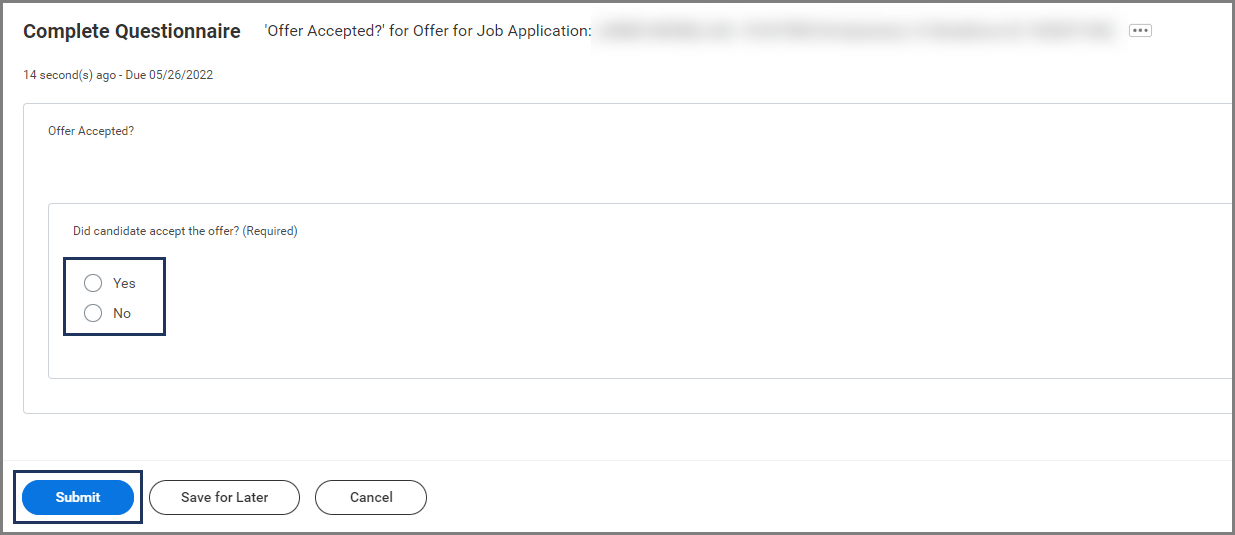
Did Candidate Accept Offer?
The Recruiting Coordinator and Recruiting Partner receive the Complete Questionnaire Offer Accepted task. The Recruiting Coordinator or Recruiting Partner should check the comments mentioned on the Candidate profile to verify what selection the Candidate has made.
- Answer whether the Candidate accepted the offer by selecting Yes or No.

- Select Submit.
Up Next
The Recruiting Coordinator and Recruiting Partner receive the Offer Decision task.
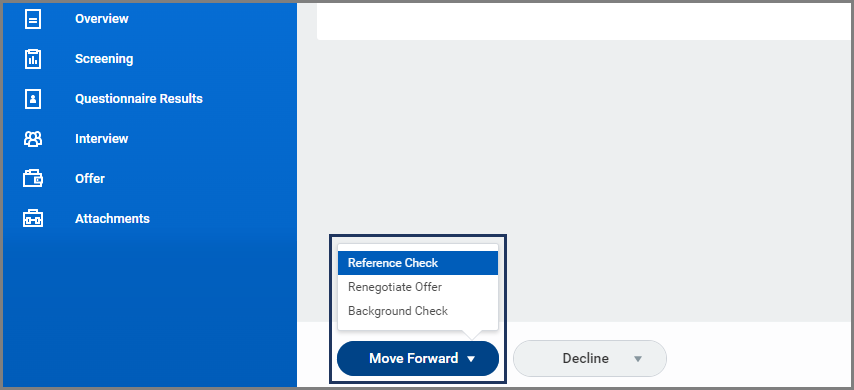
Offer Decision
You will receive an inbox task to move the Candidate forward or decline.
- Select the inbox task Offer for Job Application.
- Select Move Forward and select from the dropdown: Background Check (if you are wanting to proceed forward) or Renegotiate Offer (if a new offer amount needs to be documented).

Up Next
The remaining tasks are completed by the Recruiting Partner. The Recruiting Partner will complete a Background Check on the Candidate and move them to Ready for Hire. The Recruiting Coordinator can check the status of the Background Check on the Sterling dashboard.
Background Check (Recruiting Partner)
The Recruiting Partner receives an Inbox item to select the Background Check Package.
Note: The Candidate must move to the Background Check stage for the Inbox item to appear in the Recruiting Partner’s Inbox.
Background Check Package
- Select TAMU Standard in the Name field.

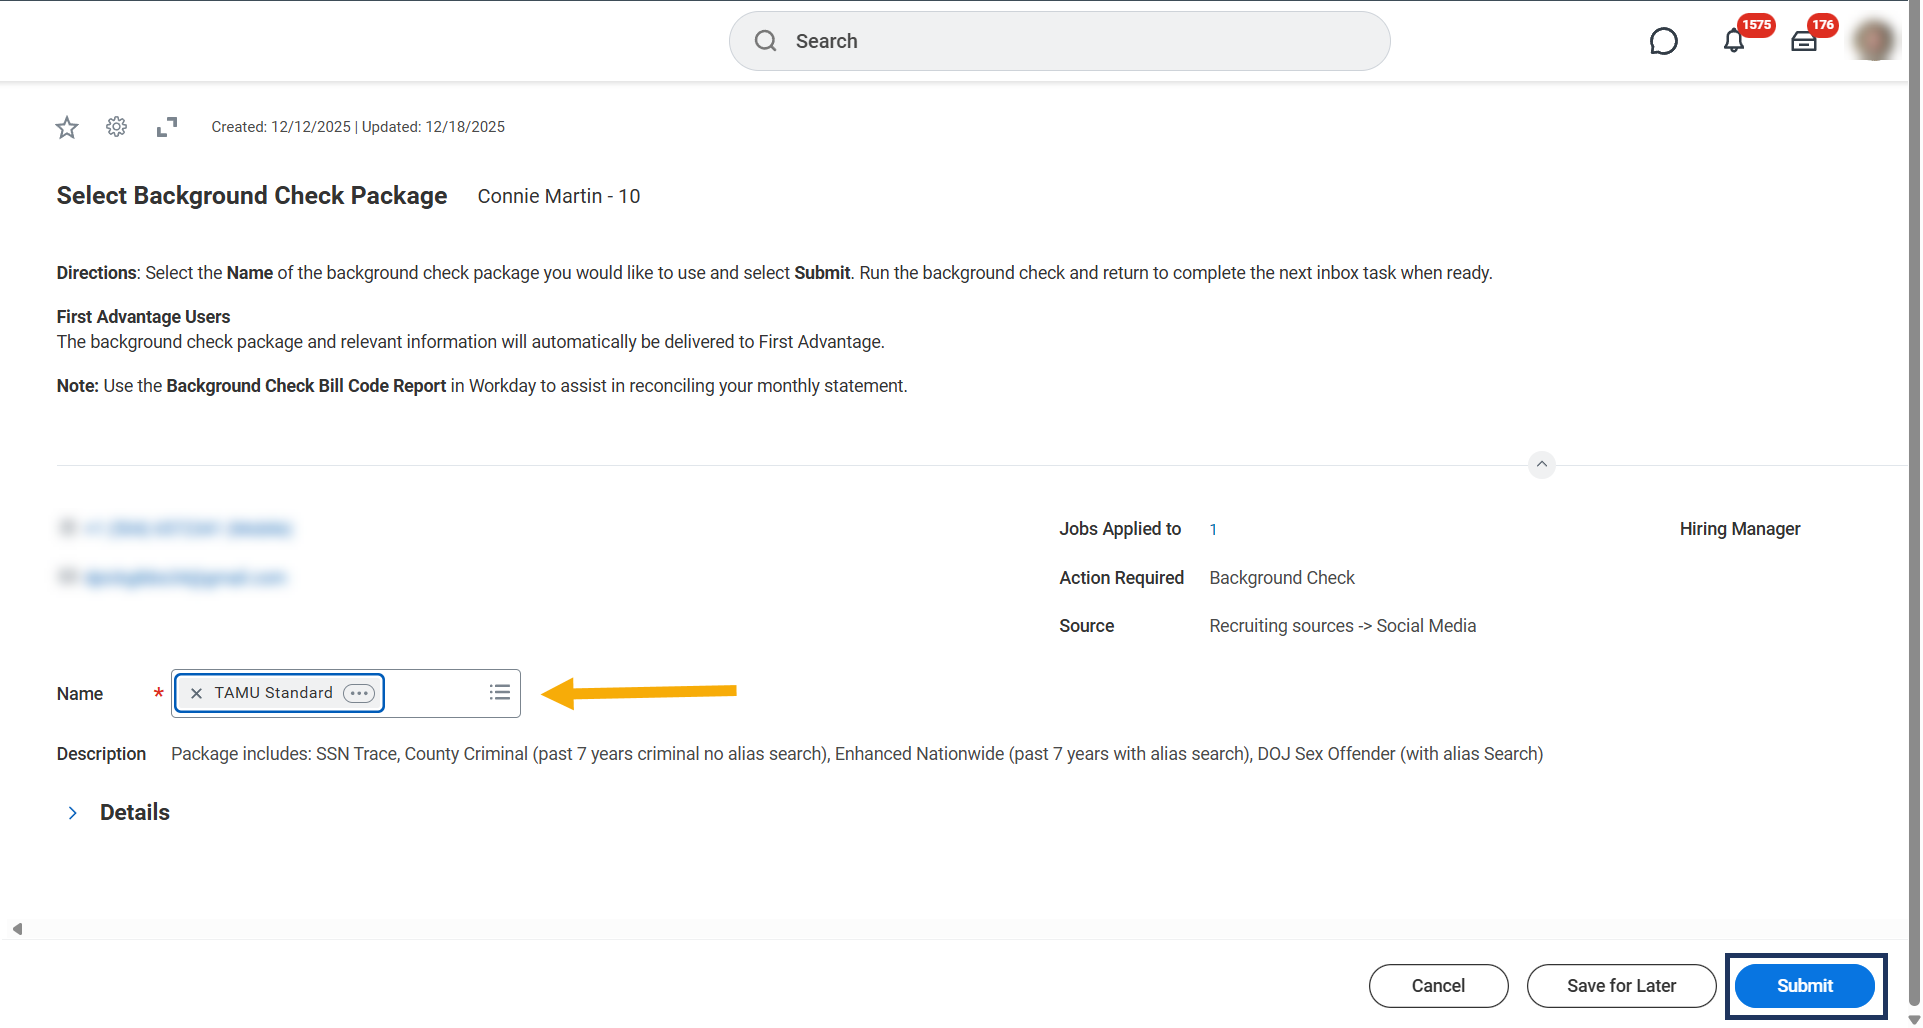
Note: The description will populate after the package is chosen.
- Select Submit.
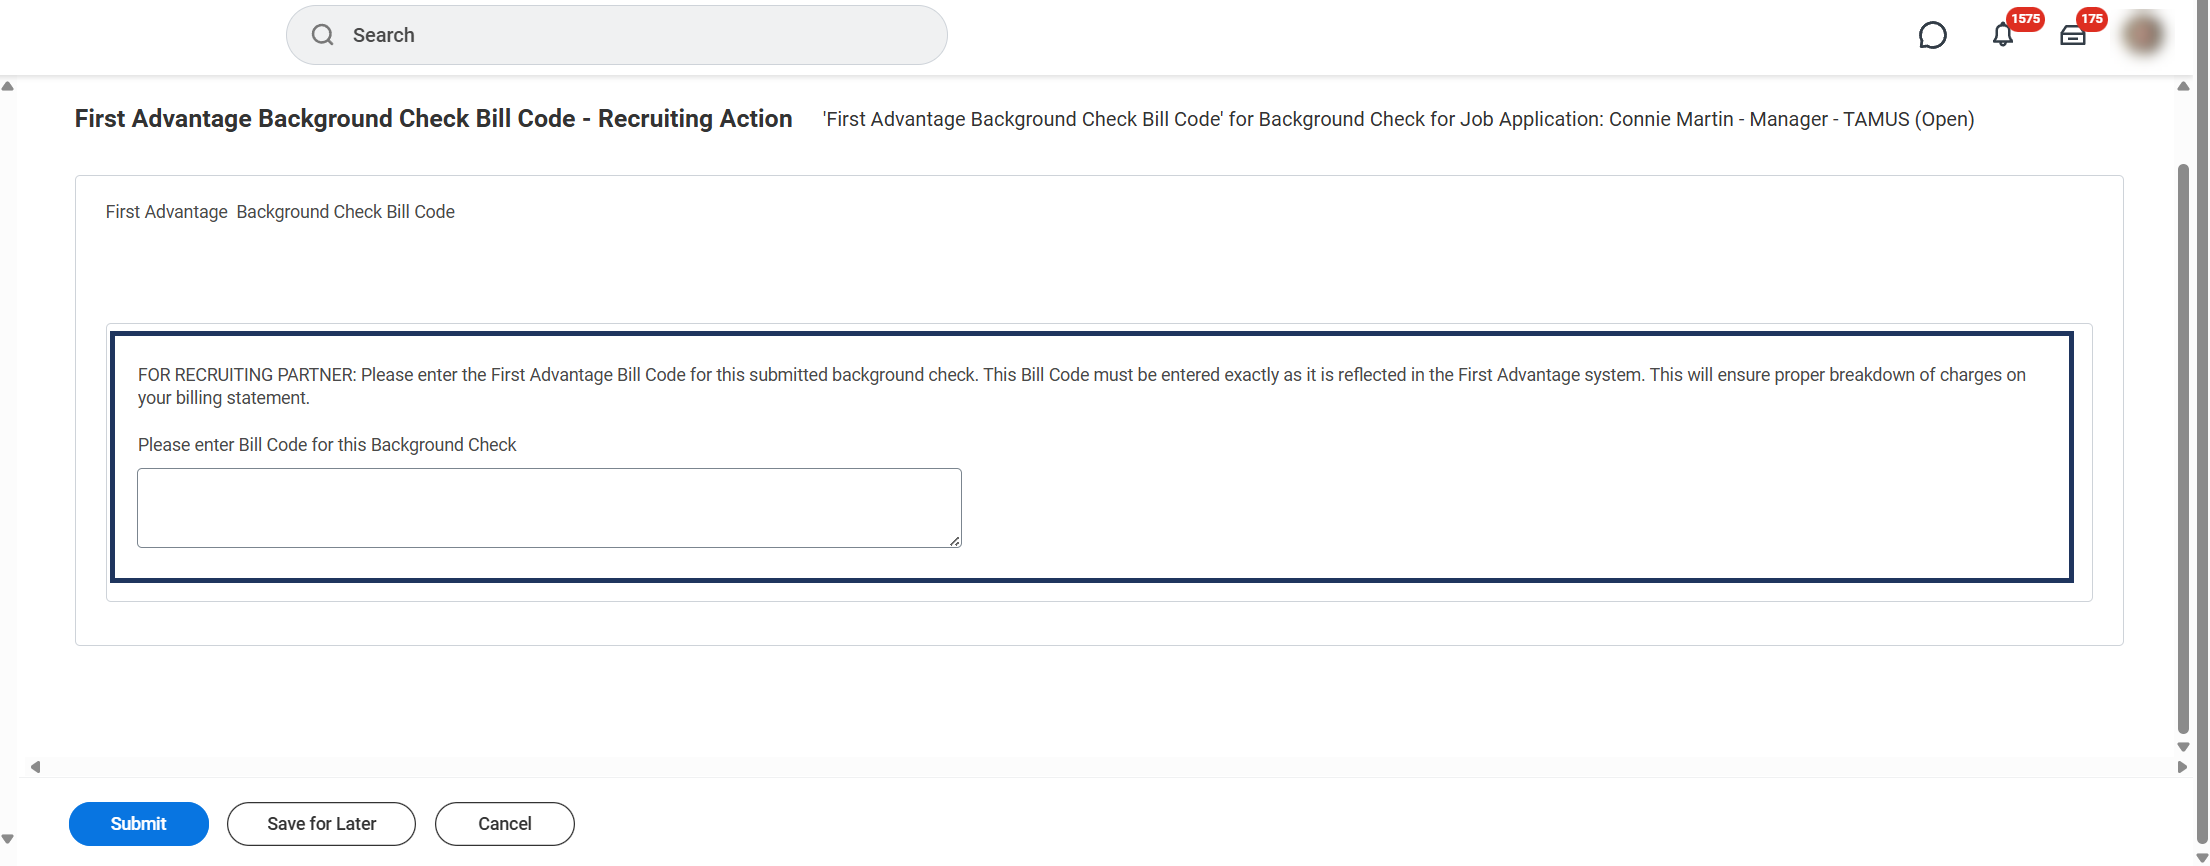
Sterling Background Check Bill Code
- Select the inbox task First Advantage Check Bill Code.
- Enter the appropriate Bill Code in the text box provided.

- Select Submit.
To Do: Update Candidate Address Length (Recruiting Partner)
Note: This is a Conditional Step that may or may not occur.
The Recruiting Partner will ONLY receive the Update Candidate Address Length To Do if the Candidate’s address in Primary Address Line 1 or Primary Address Line 2 exceeds 30 characters.
- Navigate to your Inbox.
- Select the To Do Update Candidate Address Length.
- Follow the instructions in the To Do to edit the Candidate’s contact information.
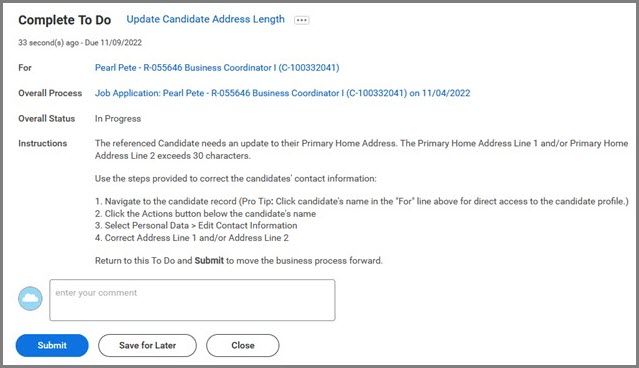
- Return to Inbox item and select Submit.
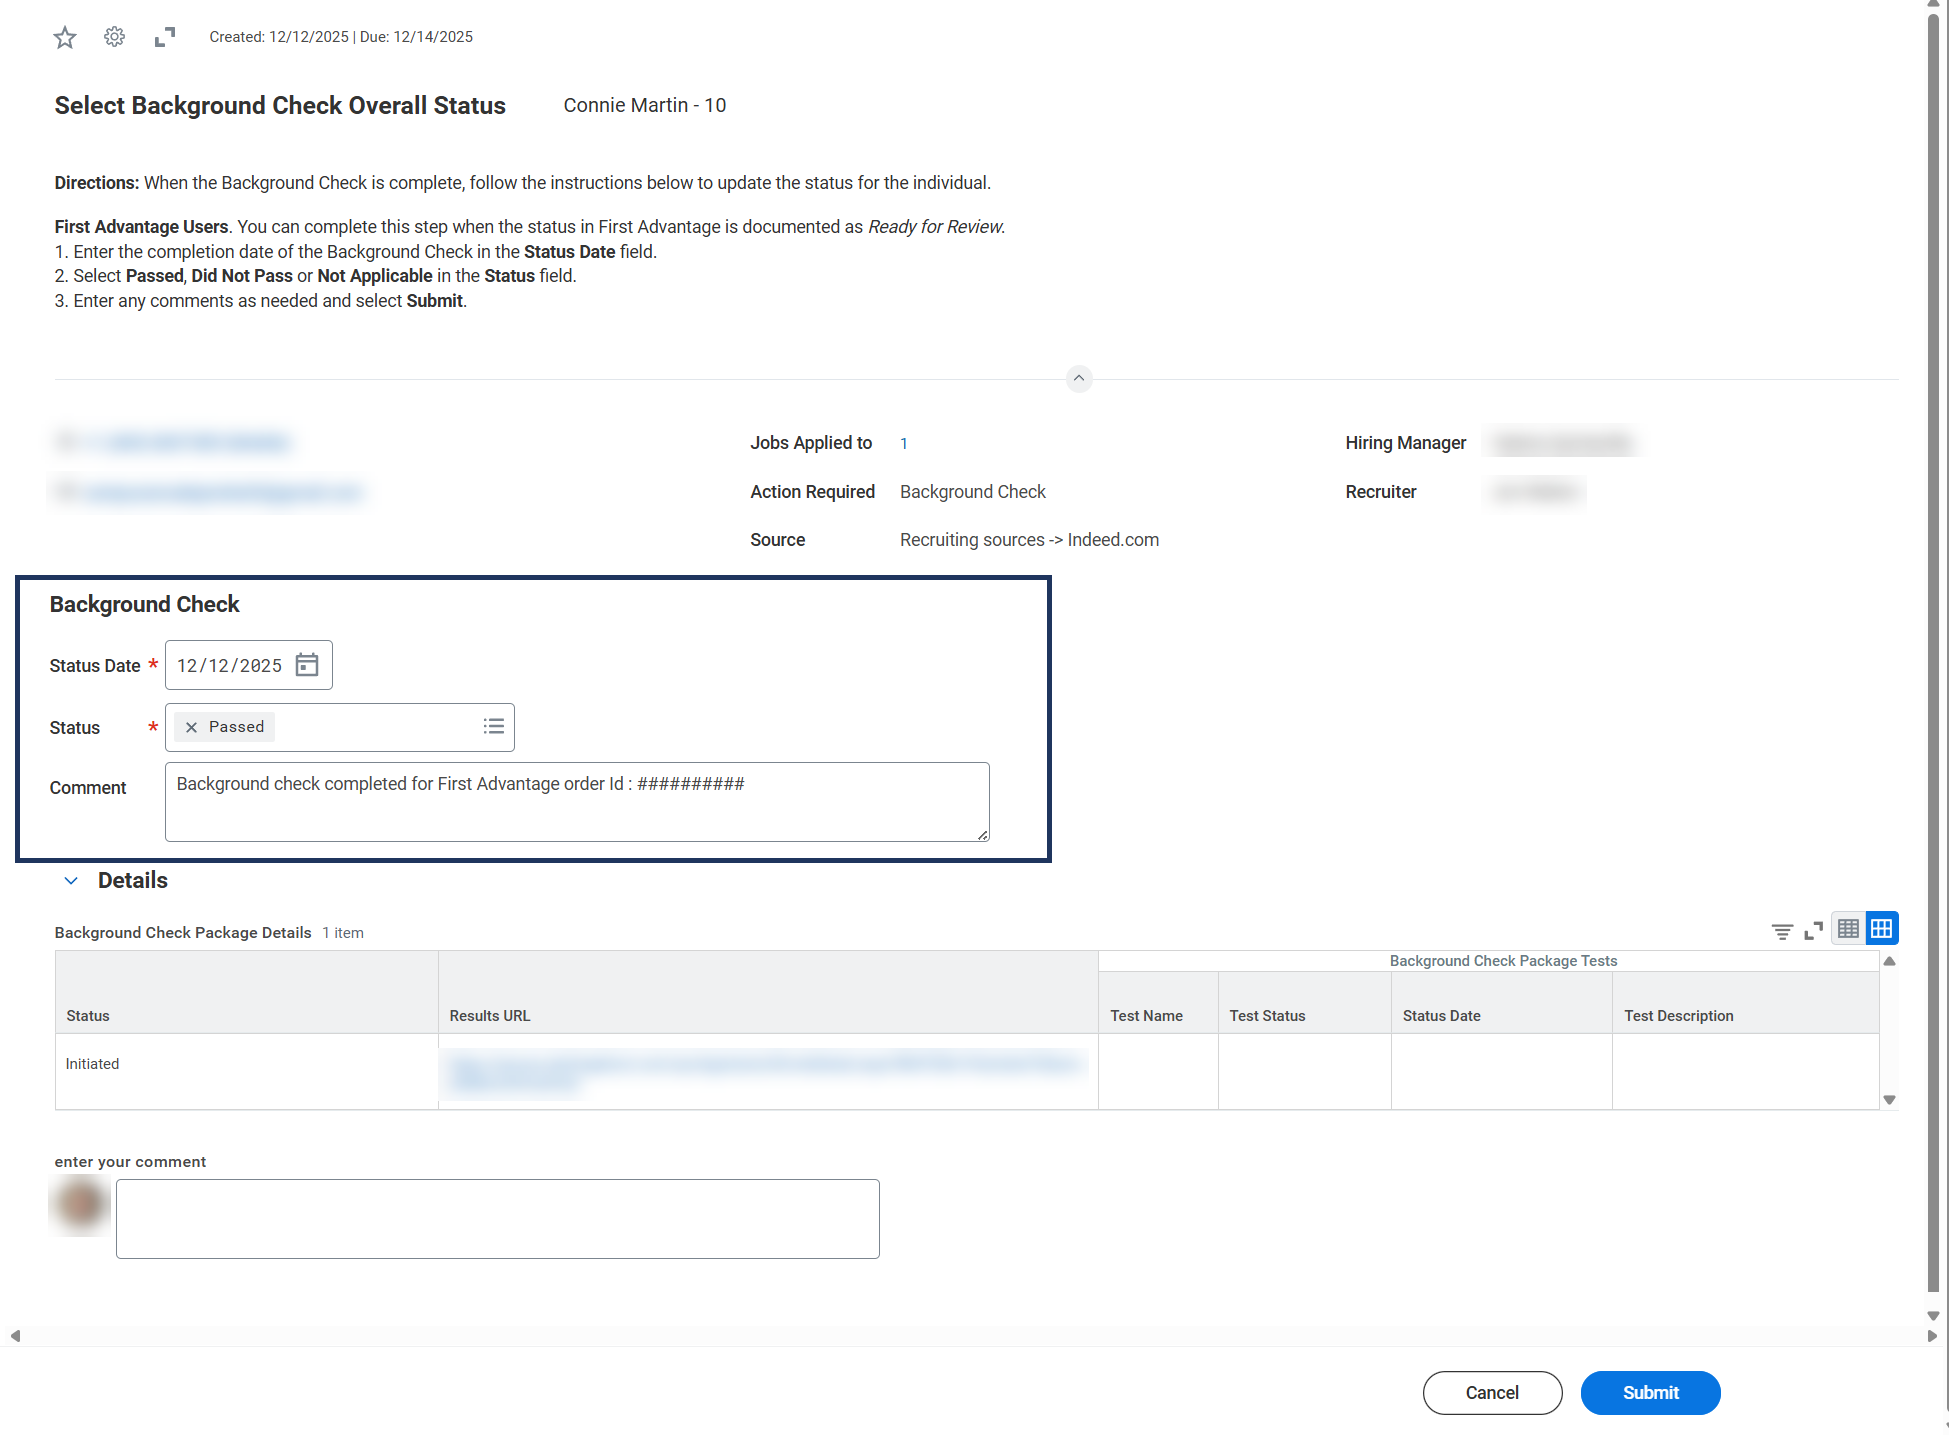
Select Background Check Overall Status
This is the inbox task you will receive to note the results of the background check.
- Enter the following information:
- Status Date. This is the date the results were received.
- Status (e.g., Pass, Did Not Pass)
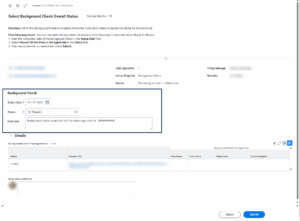
- Enter any comments, as needed.
- Select Submit.
Make Background Check Decision
This task is to move the Candidate forward or decline the Candidate.
- Select task Background Check for Job Application.
- Select Move Forward and select from the dropdown: Another Background Check, Reference Check, Offer, or Ready to Hire. The next section will assume you select Ready to Hire.
Dispositioning Candidates
You can disposition Candidates at any time during the Job Application Process to ensure they are notified that they will no longer be considered for the position in a timely manner. It is recommended that you disposition a Candidate once you are positive they will no longer be considered for the position due to the uncertainty of the entire Job Application Process.
Once your selected Candidate has been chosen and/or the background check has completed, ensure that all remaining Candidates in your requisition have been dispositioned appropriately.
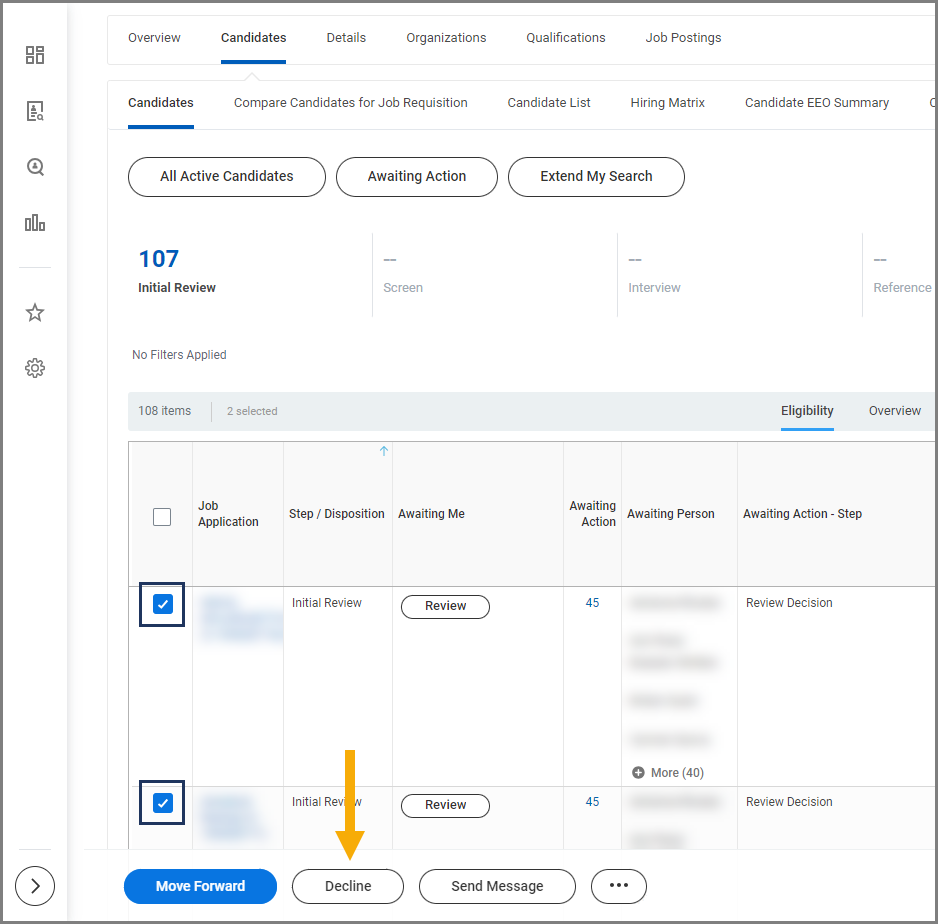
- First, select each Candidate’s checkbox that you are positive will no longer be considered for this requisition. The checkbox at the top left next to the Job Application field can be used to select all Candidate’s in the stage you are currently looking at.
- Then select Decline at the bottom of the page.
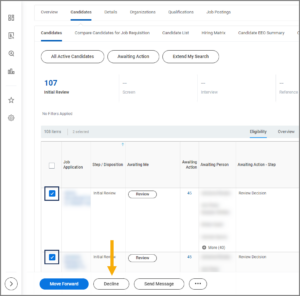
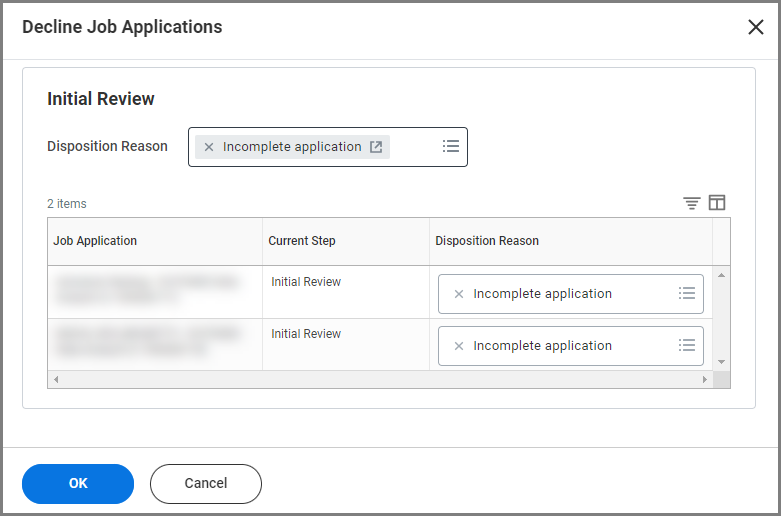
- In the Decline Job Applications window, enter the appropriate Disposition Reason that is indicated on the Screening Hiring Matrix and select OK. This will populate that Disposition Reason to every selected Candidate.

- A specific Candidate can also have their Disposition Reason updated if it is different from what was previously selected for all. Appropriate disposition reasons are populated based upon the specific stage (Initial Review, Screen, Interview, etc.) a Candidate is sitting in that job requisition.
Ready for Hire (Recruiting Partner)
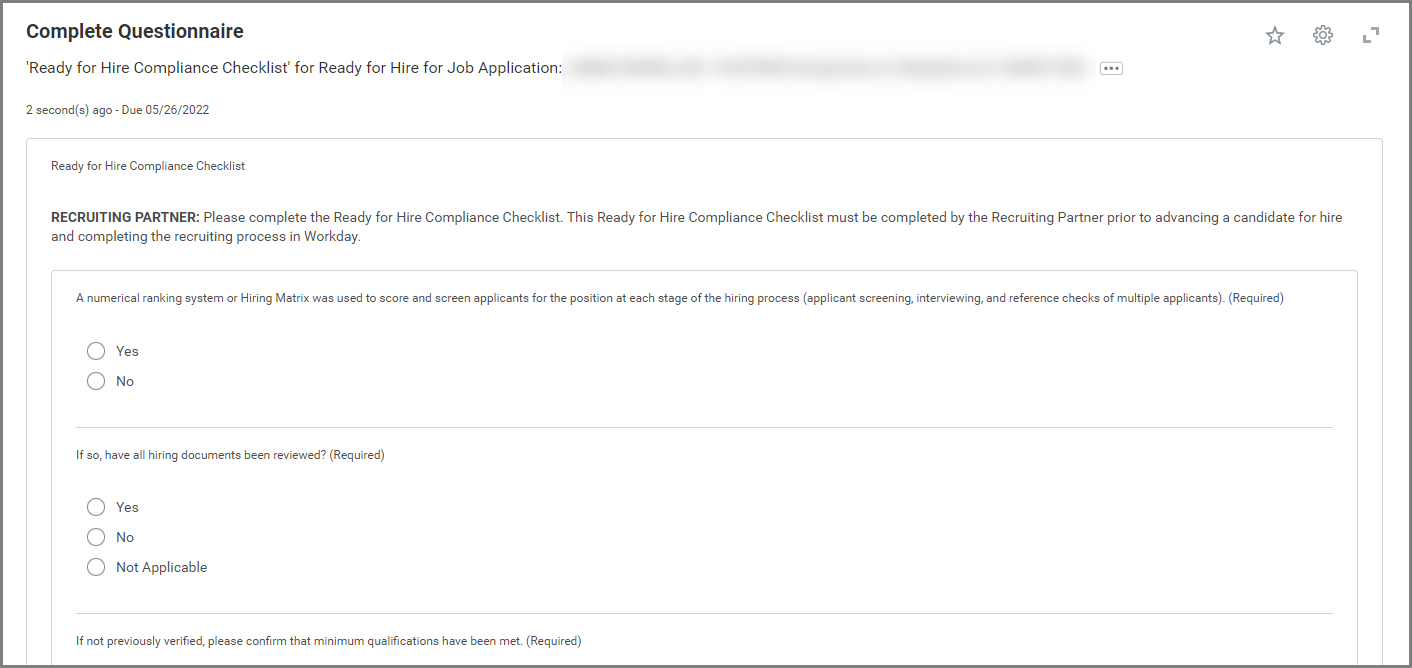
This is the last stage of the Job Application process. The Recruiting Partner receives an inbox item to complete the Ready for Hire Compliance Checklist.
REMEMBER: The Candidate must move to the Ready for Hire stage for this item to appear in the Recruiting Partner’s Inbox.
- Select the inbox task Ready for Hire Compliance Checklist and complete the questionnaire.
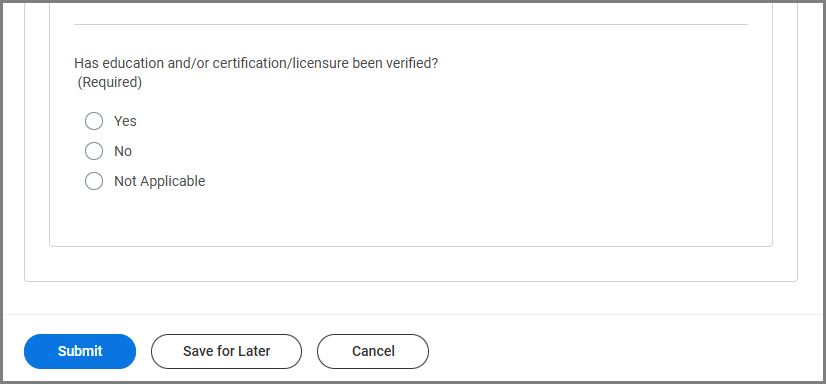
- For the question: Has education and/or certification/licensure been verified? select Yes, No or Not Applicable.
-
- Yes. This option confirms you have completed the verification outside of Workday, the job application process is completed and the Hire (External Candidates) or Change Job (Internal Candidates) business process will be initiated.
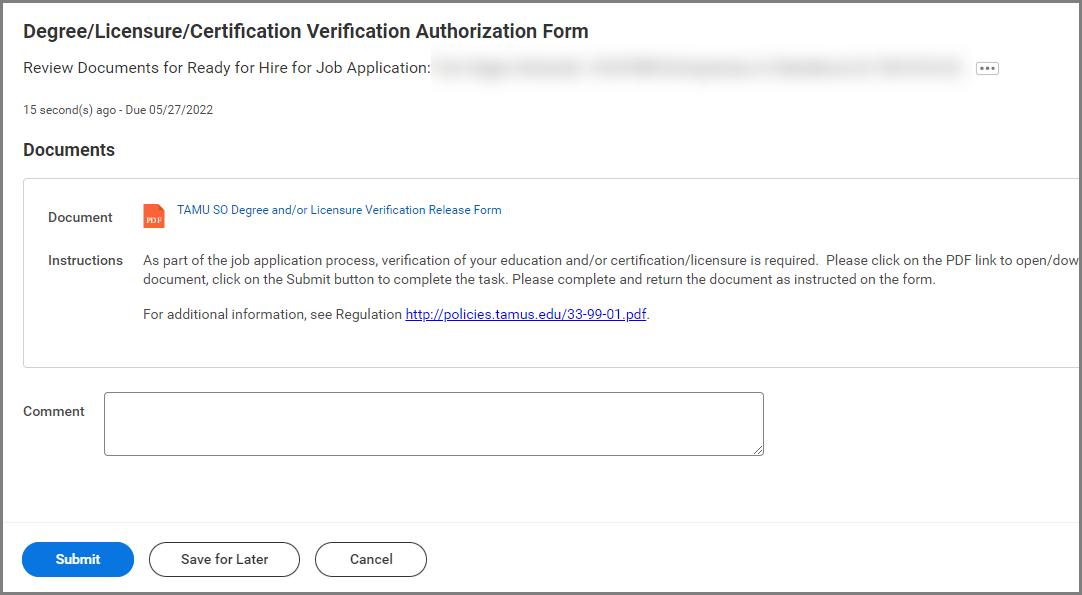
- No. This option documents the degree review has not taken place. The degree verification form goes to the Candidate to complete after the compliance checklist is submitted. You will then receive a Final Education Verification Check questionnaire to complete.
- Not Applicable. This option indicates a degree verification is not required. The Candidate has completed the job application process and the Hire (External Candidates) or Change Job (Internal Candidates) business process will be initiated.
- Select Submit.
Note: Your answer to the degree verification question will determine what happens next.
Up Next
If you selected Yes or Not Applicable, skip to the Staffing Action section of this job aid to continue.
If you selected No, the Candidate will receive the degree verification form and must submit the degree verification task (shown below) for the business process to continue to the Final Education Check Questionnaire.
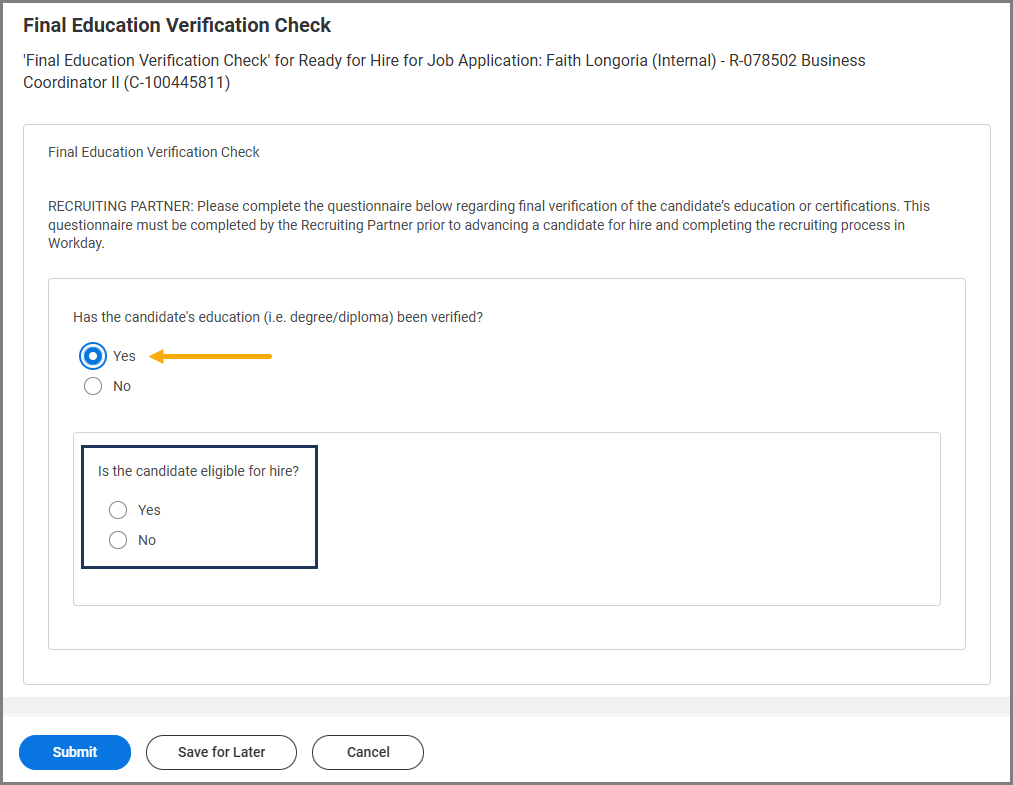
Final Education Verification Check
This is your final verification that the verification has taken place, the Candidate is eligible for hire, and degree verification (if applicable) is complete.
- Select the task Final Education Verification Check in your inbox.

- Select Yes or No.
- Yes. The Recruiting Partner receives an immediate branching question to indicate whether the Candidate is eligible for Hire.
-
- No. Recruiting Partner must acknowledge the Candidate is ready for Hire without a degree verification.
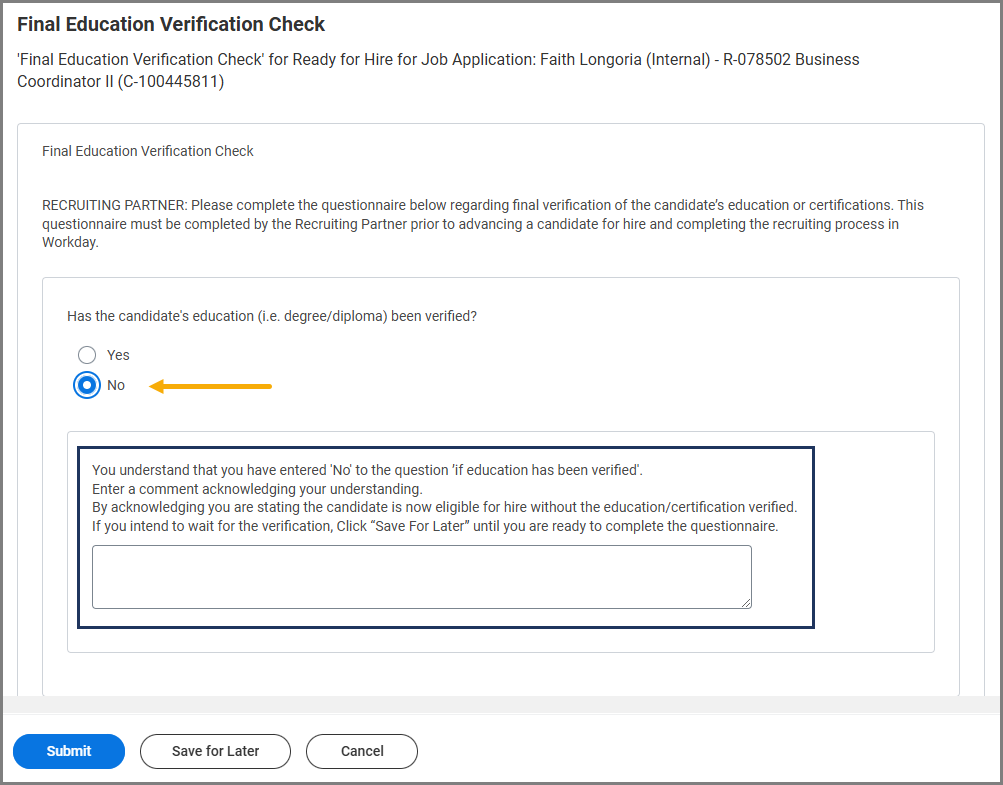
- Select Submit.
The job posting will unpost automatically, if not already done manually prior to completing the Ready for Hire stage.
Staffing Action
Once the Ready for Hire stage is complete, a staffing action will trigger to the HR Partner.
Internal Candidates
For internal Candidates the HR Partner will initiate the appropriate business process.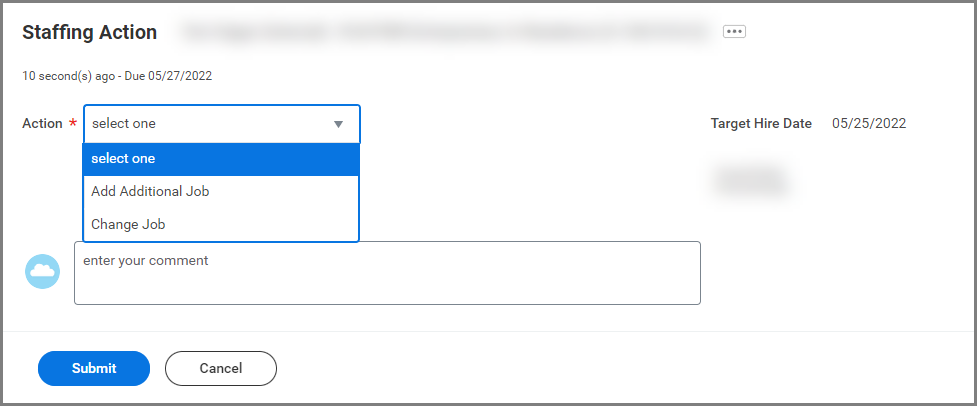
Refer to the Hire (TAMU) job aid on the Workday Help website for how to hire the Candidate in Workday.
External Candidates
For External Candidates the HR Partner will receive the task Revise Employee Hire.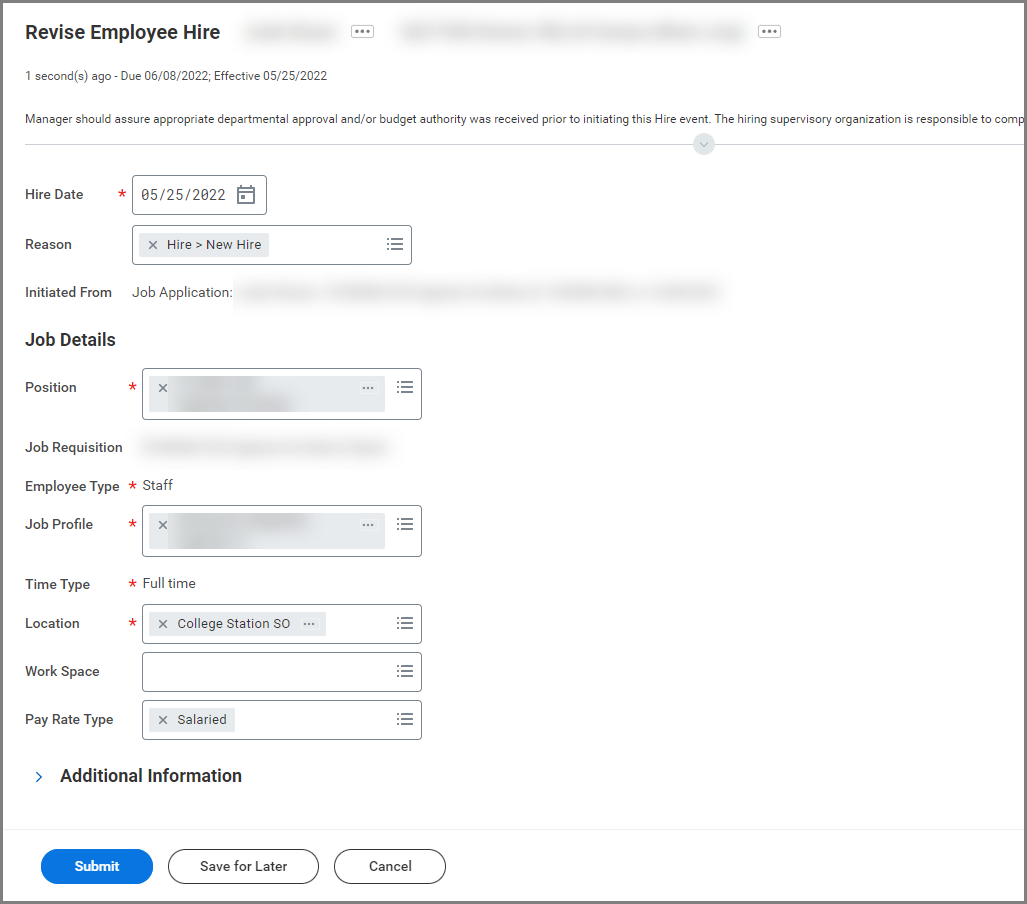
Refer to the Hire (TAMU) job aid on the Workday Help website for how to hire the Candidate in Workday.
This completes the Job Application process.