This job aid outlines the process for an Employee to view an estimation of pay after applying hypothetical changes to taxes, earnings, and deductions.
Model My Pay
Last updated on May 9, 2025
Page Loading...
Checking SSO...
Important Information
- Model My Pay is a simulation feature; it does not impact your actual pay.
- The feature has technical terminology. You will find explanations of the terms throughout the job aid.
- When modeling hypothetical scenarios, you will not be able to remove previous items such as earnings, deductions, or taxes. You can enter 0.00 in the Adjusted Value field to deduct that amount.
- Model Pay for Worker task is available to Payroll Partner and Tax Compliance Partner roles to model pay for employees they support.
Getting Started
- From the Workday Home Page, select Menu > Benefits and Pay.

- In the hub menu under Pay, select Payments.
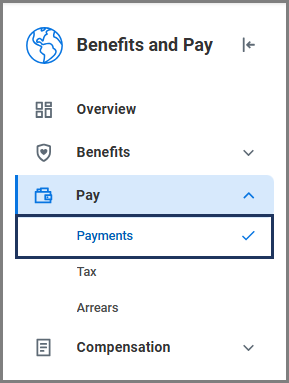
- On the Payments page, select Model My Pay.

- Select the Payment Date you want to use for your model and then select OK.

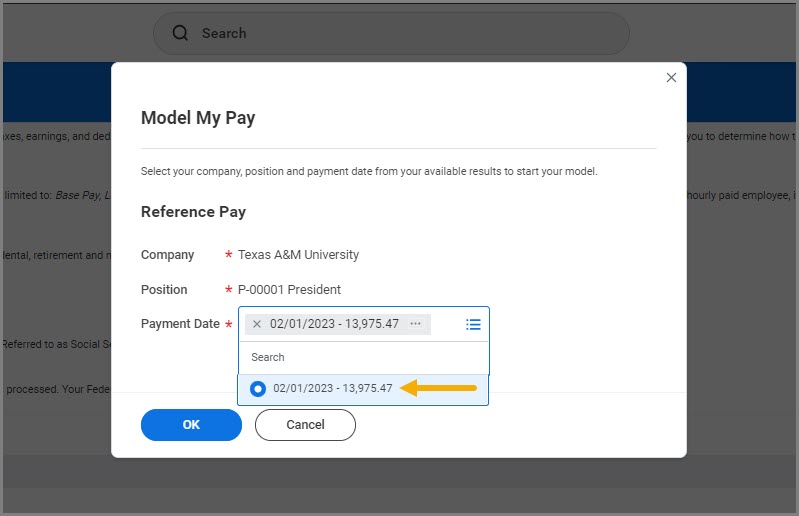
Note: You can only select payment dates from the current tax year.
Up Next
The next section will take you through the various features of Model My Pay.
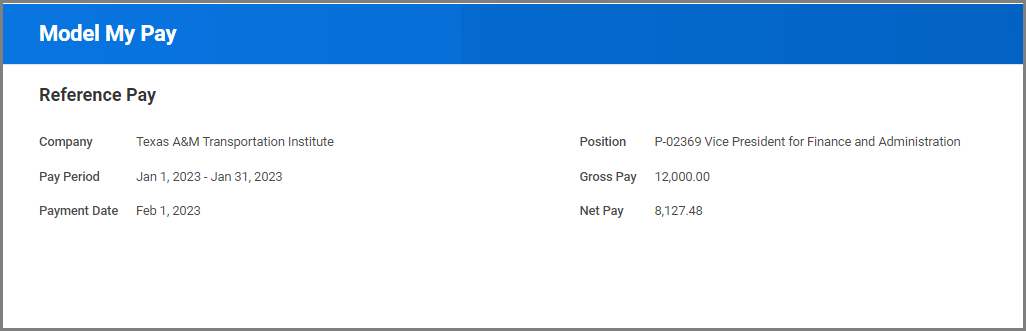
Reference Pay
The Reference Pay section provides a general overview of the paycheck you selected to model.
- Gross Pay. Gross Pay is your earned wages before payroll deductions.
- Net Pay. Net Pay describes the earned wages you get to take home after payroll deductions.
Modeling Options
The Model My Pay feature helps you to see an estimate of your pay after applying hypothetical changes to your earnings, deductions, and taxes.
The Earnings sections for both hourly and salaried Employees are different. If you are an hourly Employee, start from the Earnings (Hourly Employee) section. Salaried Employees will begin from the section called Earnings (Salaried Employee). All of the other sections during the Model My Pay task are the same.
Earnings (Salaried Employee)
The Earnings section displays your earned wages before payroll deductions (Gross Pay). Examples of Earnings include Base Pay and Longevity Pay. Base Pay is the salary or total hourly compensation a company pays an employee for regular working hours. Longevity Pay is calculated as $20.00 per month for each two years of lifetime service credit as an employee of the State of Texas, up to and including 42 years of service.
You could use the Earnings section to model a pay increase.
- Select Earnings to expand the section. The earnings you received for the selected paycheck will display.
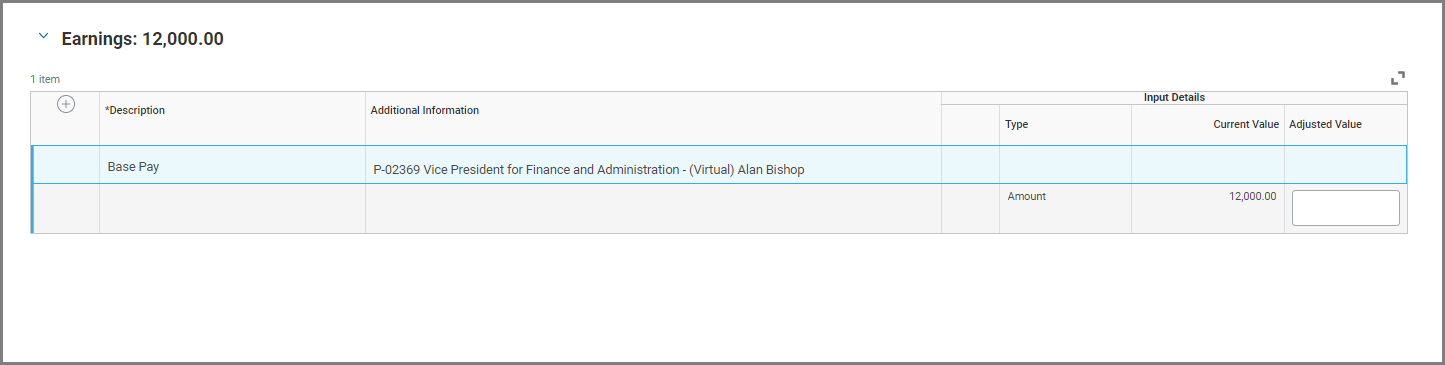
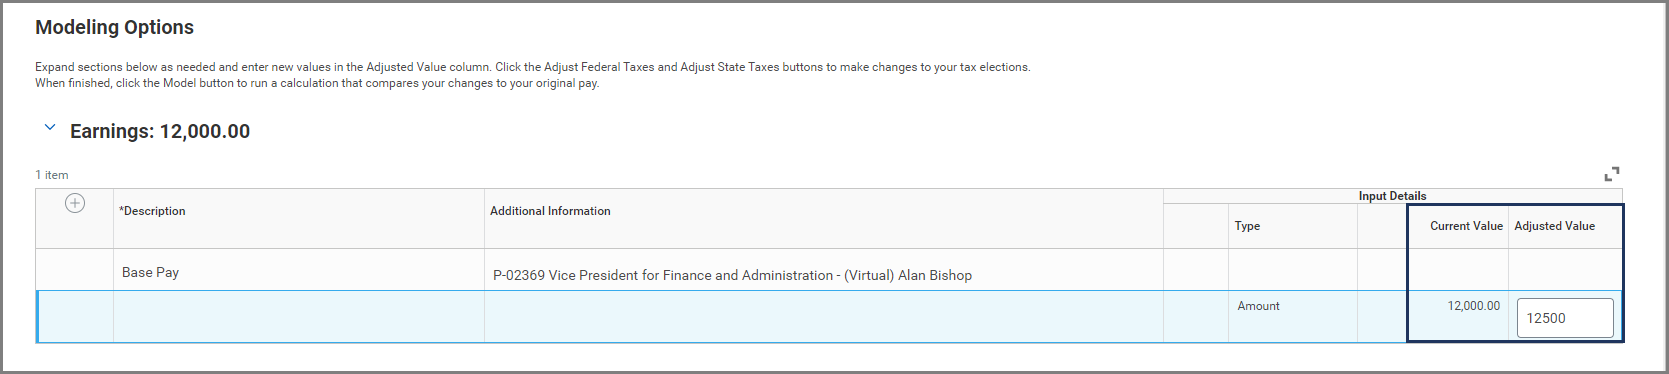
- To model an increase in pay, enter the new amount you would like to use in the Adjusted Value field. In this example, the employee currently receives 12,000 gross pay. To see an increase of $500 in salary, we will enter 12500.
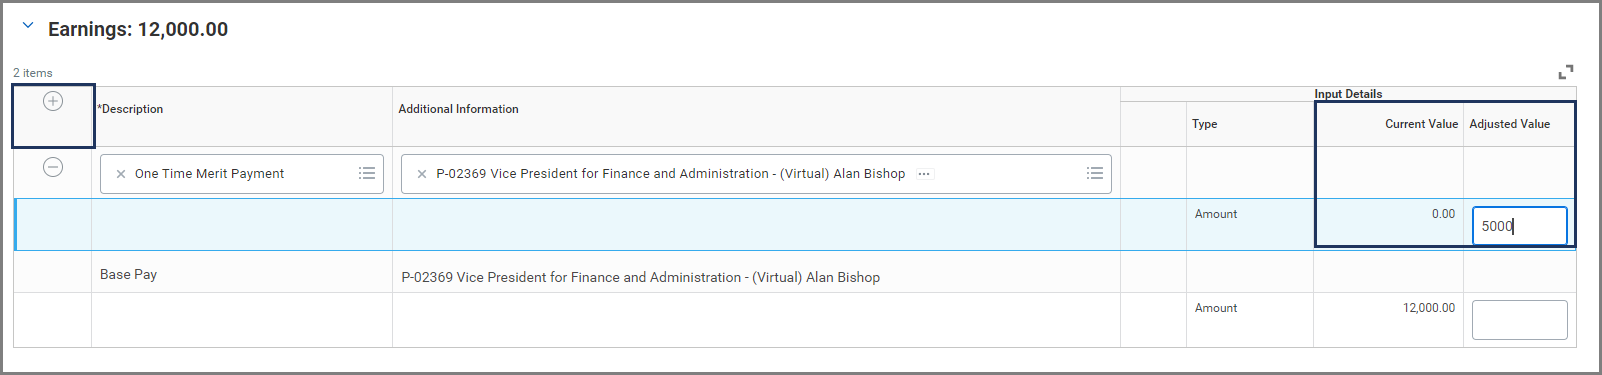
You can model other temporary increases in pay such as a One-Time merit.
- Select the Add button to insert a new row.
- Complete the following fields:
- Description. Select One Time Payment.
- Additional Information. Do not change the defaulted information. Errors will occur.
- Adjusted Value. Enter the amount of your anticipated one-time payment. See image below.
You can now select the Model button to see the results, or move to the next section to continue modeling Pre-Tax Deductions.
Earnings (Hourly Employee)
The Earnings section displays your earned wages before payroll deductions (Gross Pay). Examples of Earnings include Base Pay and Longevity Pay. Base Pay is the salary or total hourly compensation a company pays an employee for regular working hours. Longevity Pay is calculated as $20.00 per month for each two years of lifetime service credit as an employee of the State of Texas, up to and including 42 years of service.
You could use the Earnings section to model a pay increase.
- Select Earnings to expand the section. The earnings you received for the selected paycheck will display.
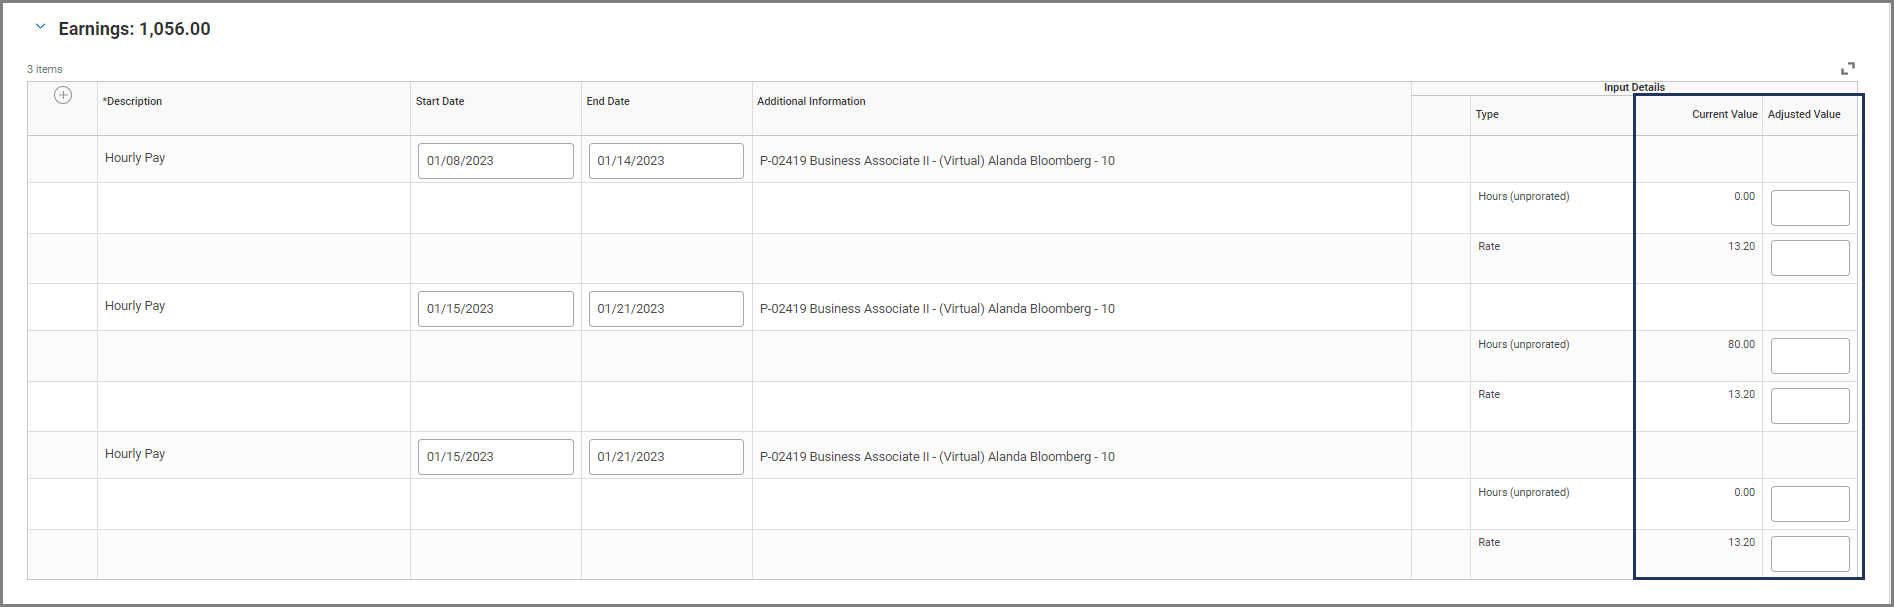
- To model an increase in pay, enter the new amount you would like to use in the Adjusted Value field. In this example, the Employee currently receives 13.20 an hour. To see an increase of $544 in the Employee’s total hourly compensation, we will enter 20.00.

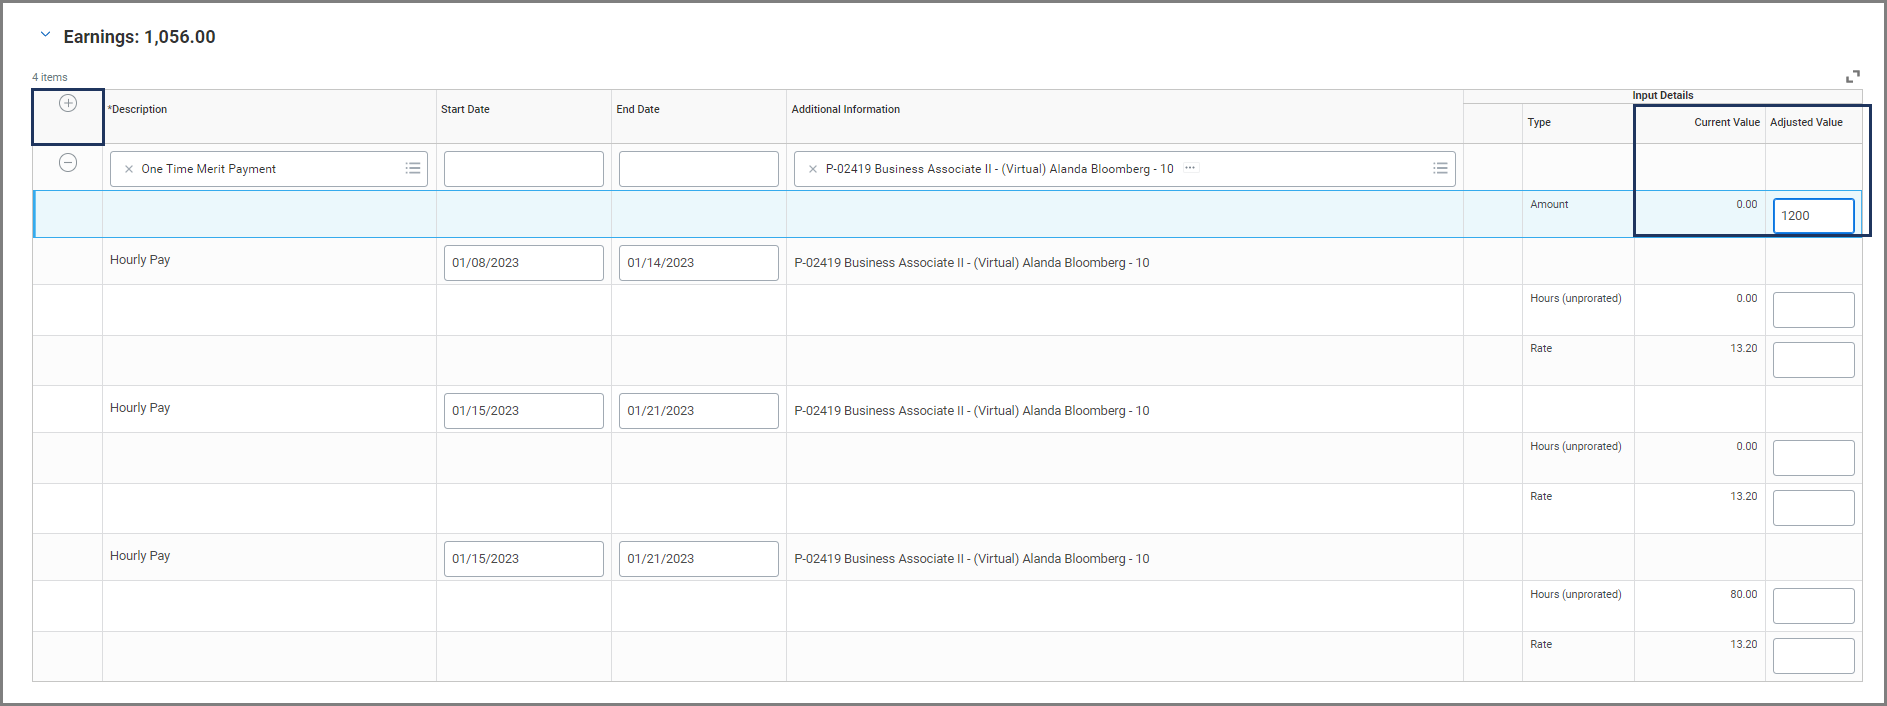
You can model other temporary increases in pay such as a One-Time merit.
- Select the Add button to insert a new row.
- Complete the following fields:
- Description. Select One Time Payment.
- Additional Information. Do not change the defaulted information. Errors will occur.
- Adjusted Value. Enter the amount of your anticipated one-time payment. See image below.
You can now select the Model button to see the results, or move to the next section to continue modeling Pre Tax Deductions.
Pre Tax Deductions
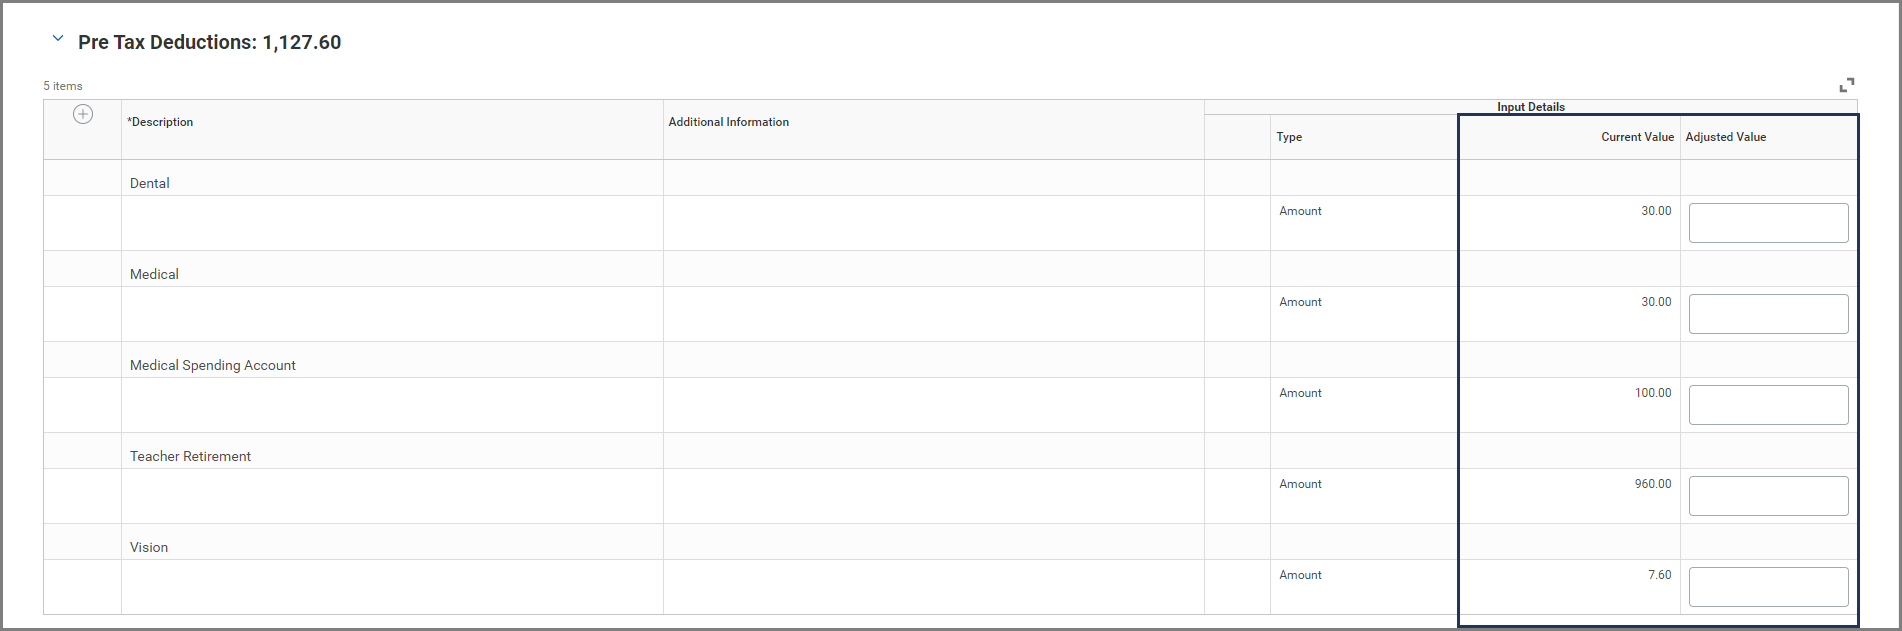
The Pre Tax Deductions section displays any payroll deductions you receive before any taxes are withheld from your paycheck. Examples of Pre Tax Deductions can include retirement, dental, life and medical insurance. You may also see items like parking fees and your Wellness credit.
You can use the Pre Tax Deductions section to model a change in Benefits. In this example we are going to show adding a new benefit of AD&D.
- Select Pre Tax Deductions to expand the section. The Pre Tax Deductions you received for the selected paycheck will display.
- Select the Add button to insert a new row.
- In the newly added row, fill out the following sections:
- Description. Select AD&D.
- Additional Information. Leave this section blank.
- Adjusted Value. Enter the amount of the anticipated cost.
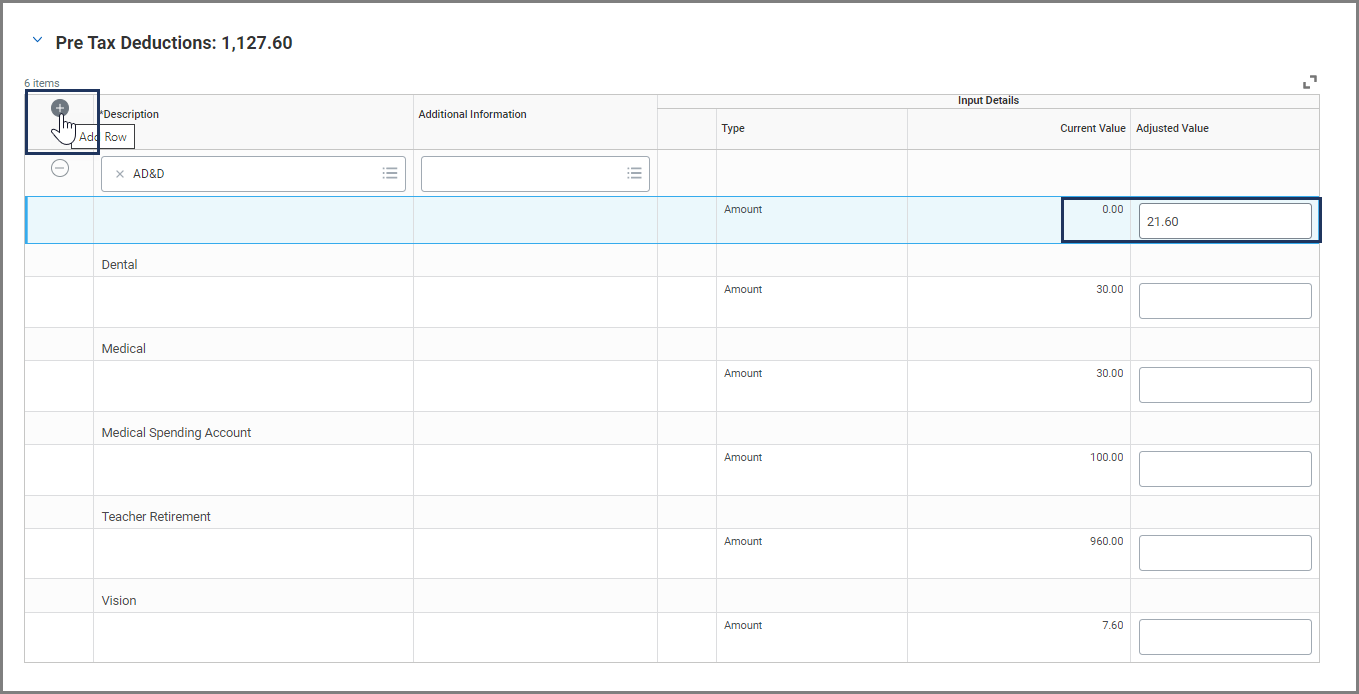
Note: When you are modeling your Pre Tax Elections, if you add additional benefits, the amount you enter may be lower or higher than the rate projected during Open Enrollment.
To model a Pre Tax Deduction removal, enter 0.00 in the Adjusted Value field. In this example, the employee currently pays 7.60 for vision insurance . To model the removal of Vision insurance, we will enter 0.00.
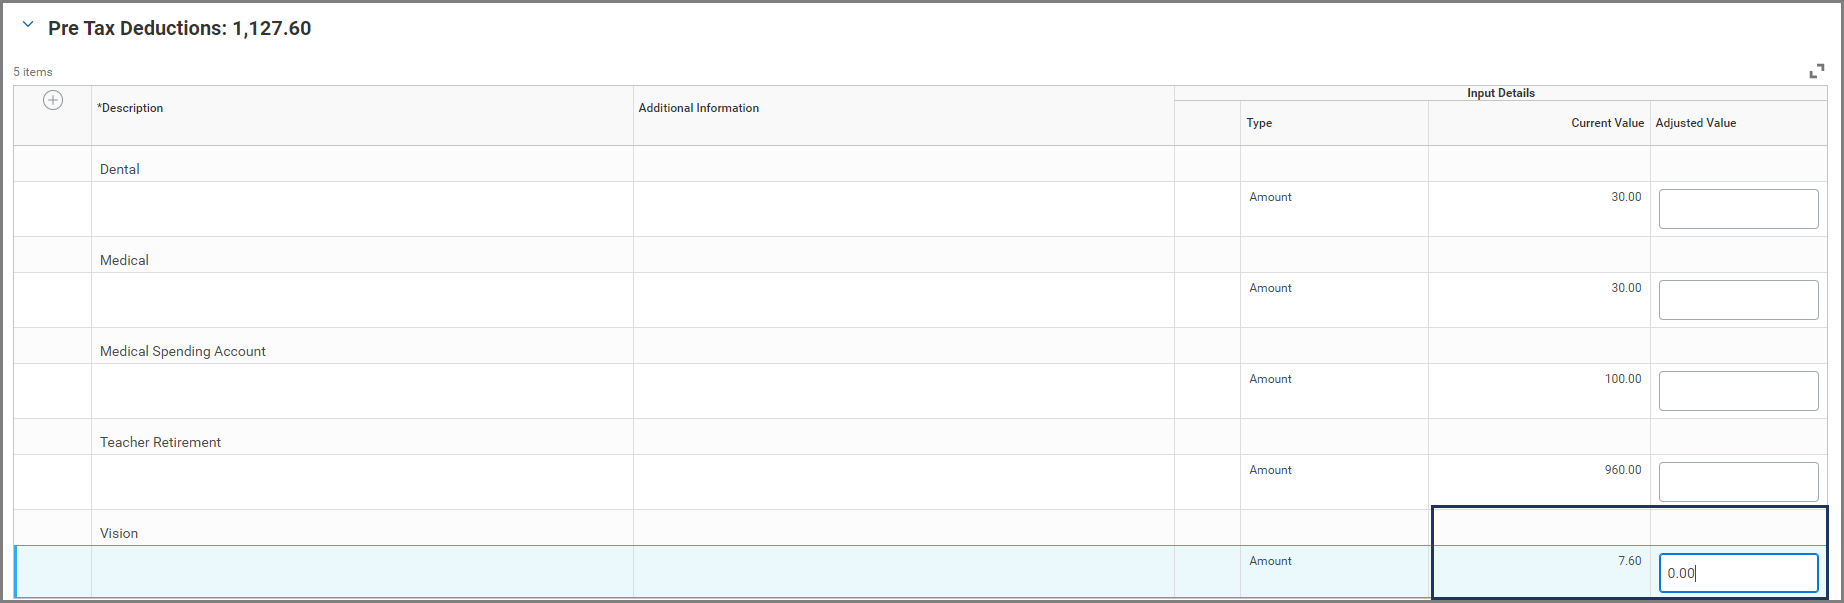
You can now select the Model button to see the results, or move to the next section to continue modeling Post Tax Deductions.
Post Tax Deductions
The Post Tax Deductions section displays any payroll deductions you receive after any taxes are withheld from your paycheck. Examples of Post Tax Deductions can include Long Term Disability and Optional Life.
You could use the Post Tax Deductions section to model Charitable giving. In this example, we are going to show giving to the State Employee Charitable Campaign.
- Select Post Tax Deductions to expand the section. The Post Tax Deductions you received for the selected paycheck will display.

- Select the Add button to insert a new row.
- In the newly added row, fill out the following sections:
- Description. Select Charitable Donation- State Employee Charitable Campaign.
- Additional Information. Leave this section blank.
- Adjusted Value. Enter the amount you would like to donate.
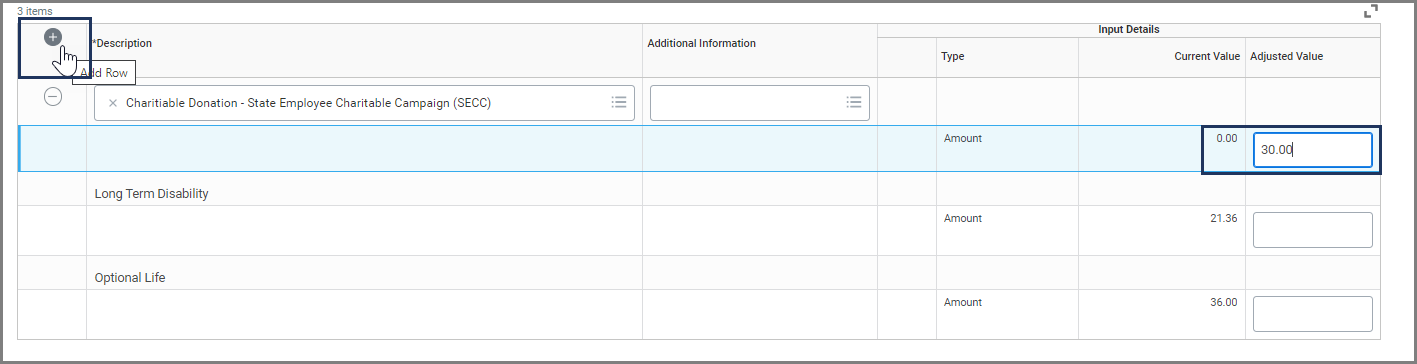
Note: When you are modeling your Post Tax Elections, if you add additional benefits, the amount you enter may be lower or higher than the rate projected during Open Enrollment.
You have completed changing your Post Tax Deductions. You can now select the Model button to see the results, or move to the next section to continue modeling Tax Elections.
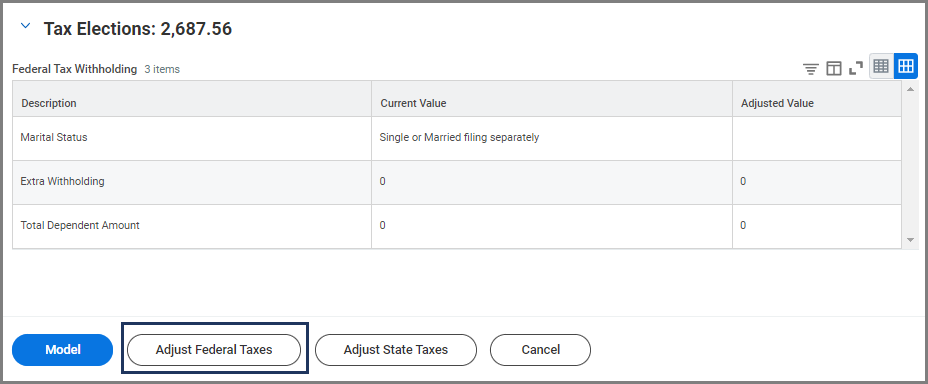
Tax Elections
The Tax Elections section displays the amount deducted from your paycheck to pay employment taxes. This includes OASDI (referred to as Social Security), Medicare and Federal Withholdings.
You could use the Tax Elections section to make adjustments to your Federal Taxes .
- Select the Adjust Federal Taxes button.
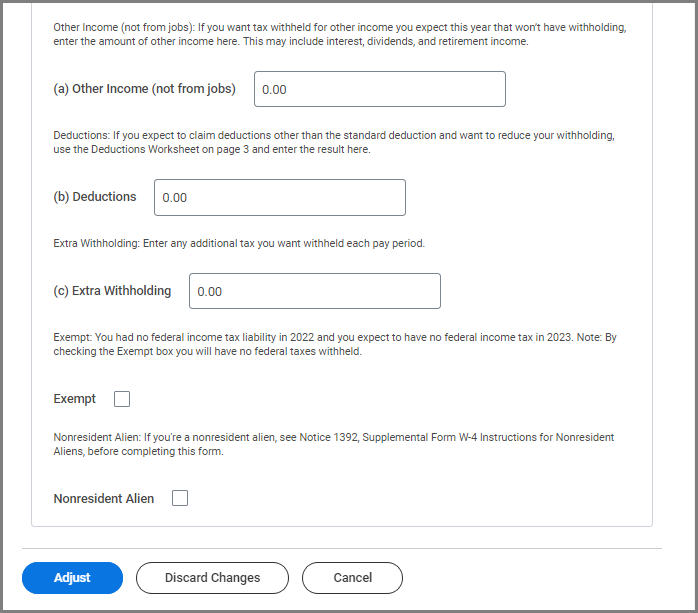
Important: If you select the Adjust Federal Taxes button, and later decide that you would not like to make any changes. You will be required to start from the beginning.
- Enter your W-4 Data and select the Adjust button to display the changes in the Adjust Value column.
You have completed changing your Tax Elections.
Select the Model button to model the scenarios you have created.
Modeled Pay Comparison
You can now view the results of your modeled pay. The Earnings, Pre Tax, Post Tax and Tax Election fields sections are expandable. The differences between Reference Pay and Modeled Pay are available in a bar graph, in addition to the numerical differences between the Gross and Net Pay.

- Print the results by selecting the Print Button.
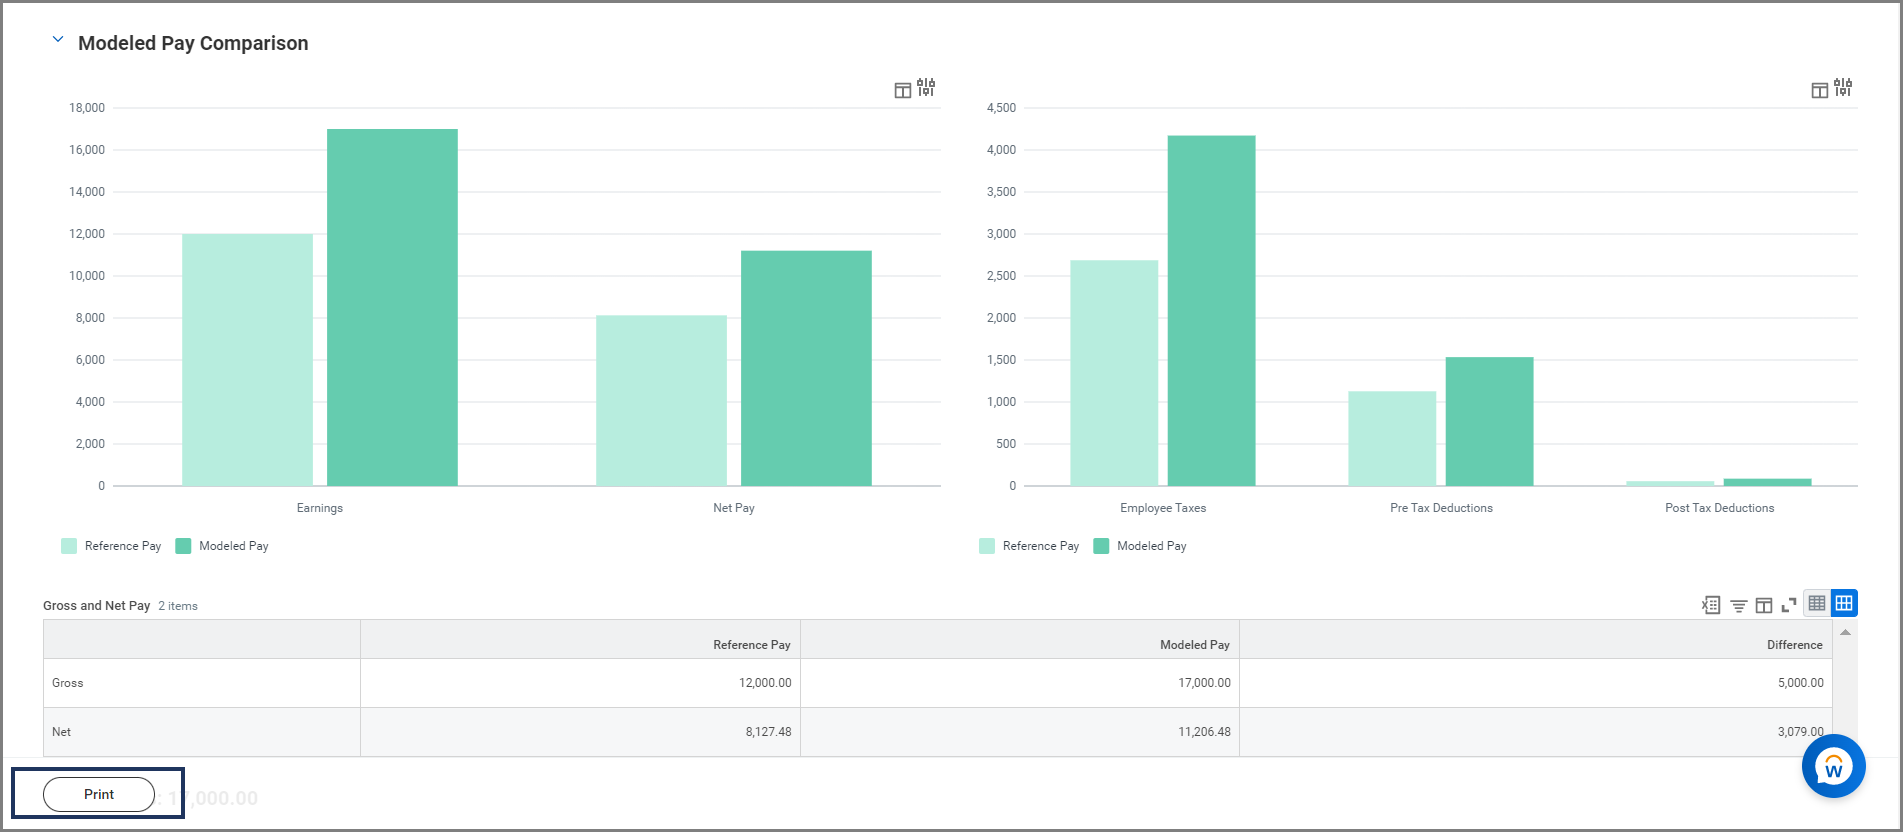
- If you would like to recreate another scenario, scroll up to the top of the page and select the Rerun Model My Pay Button.
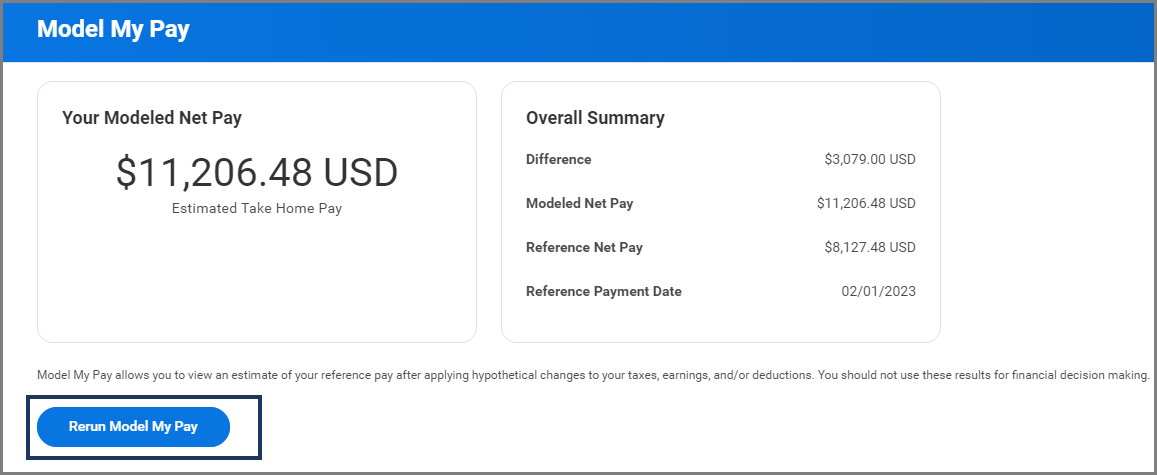
This completes the Model My Pay task.
Additional Resources
If you need guidance for making adjustments to your Federal and State taxes, refer to the Edit Your W-4 job aid and the reference guide Reading Your Workday Payslip.