This job aid outlines the process for an Employee to request absence, cancel an Absence request and correct an Absence request that was approved or sent back by the Manager.
Managing Your Absence
Last updated on February 4, 2026
Page Loading...
Checking SSO...
Prerequisites
- In order to be able to request an Absence in Workday, you must be hired into a position in which you are eligible for Time Off and/or Leave of Absence.
- If you want to change the Absence request, you can cancel the request or ask your Manager to select Send Back. Alternatively, you can wait until it is approved and then follow the Edit an Absence Request process described in this job aid.
- You can only initiate the Edit Absence after it has been approved. Otherwise, you can ask your Manager to select Send Back on the request and then make necessary changes without canceling the process.
Important Information
Absences can only be requested for the current and prior fiscal year. Please contact your Absence Partner for any adjustments needed prior to the start of last fiscal year.
Absence:
- The functional area in Workday pertaining to time off (including time off correction), leave of absence, view your time off, and time off balance.
- The term used to describe any absence from work. There are 2 categories of absences in Workday, Time Off and Leave/Leave of Absence.
- Time Off: A paid absence of less than 30 days.
- Leave/Leave of Absence: An unpaid absence that is full-time, continuous and for a duration of 30 days or more.
FMLA Qualified Absences
Use this decision tree to help you determine which course of action to take when requesting a leave of absence.
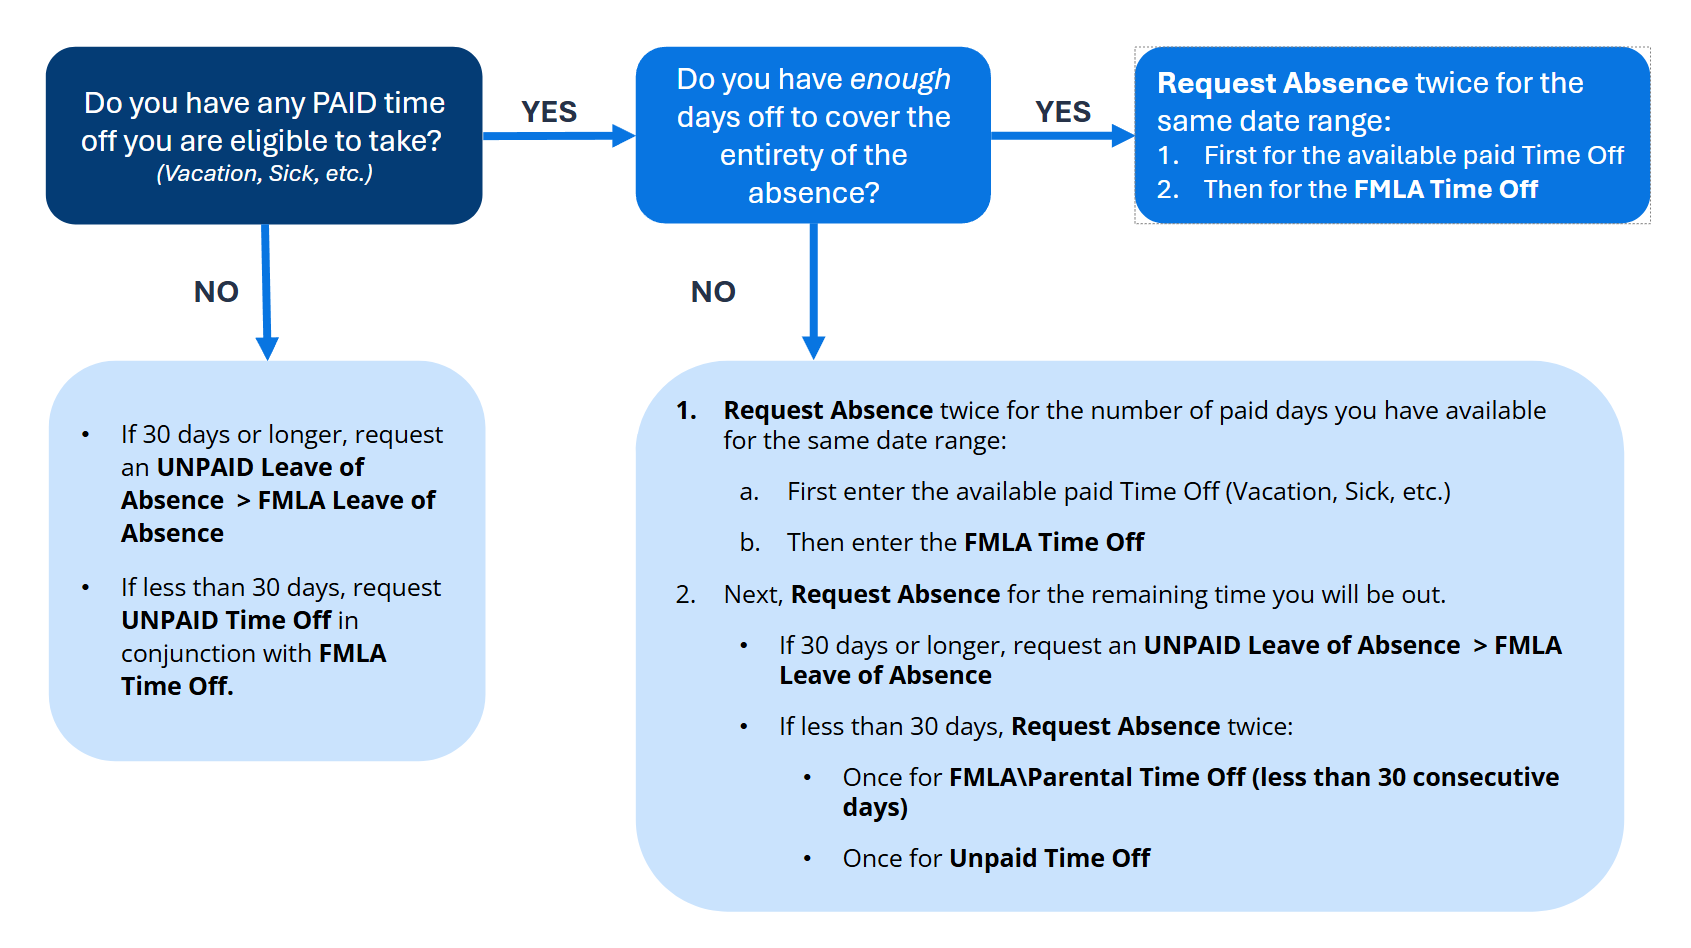
Do you have any paid time off you are eligible to take? (Vacation, Sick, etc.)
-
-
- IF YES: Do you have enough days off to cover the entirety of the absence?
- IF YES: Request Absence twice for the same date range
- First enter the available paid Time Off (Vacation, Sick, etc.)
- Then enter the FMLA Time Off
- IF NO:
- Request Absence twice for the number of paid days you have available for the same date range:
- First enter the available paid Time Off (Vacation, Sick, etc.)
- Then enter the FMLA Time Off
- Next, Request Absence for the remaining time you will be out.
- If 30 days or longer, the Absence Partner will have to initiate and submit the UNPAID Leave of Absence (absent 30+ consecutive days) > FMLA Leave
- If less than 30 days, Request Absence twice:
- Once for FMLA\Parental Time Off (less than 30 consecutive days)
- Once for Unpaid Time Off
- Request Absence twice for the number of paid days you have available for the same date range:
- IF YES: Request Absence twice for the same date range
- IF YES: Do you have enough days off to cover the entirety of the absence?
-
-
-
- NO:
- If 30 days or longer, the Absence Partner will have to initiate and submit the UNPAID Leave of Absence > FMLA Leave of Absence.
- If less than 30 days, Request Absence twice:
- Once for FMLA\Parental Time Off (less than 30 consecutive days)
- Once for UNPAID Time Off
- NO:
-
Getting Started
Request an Absence
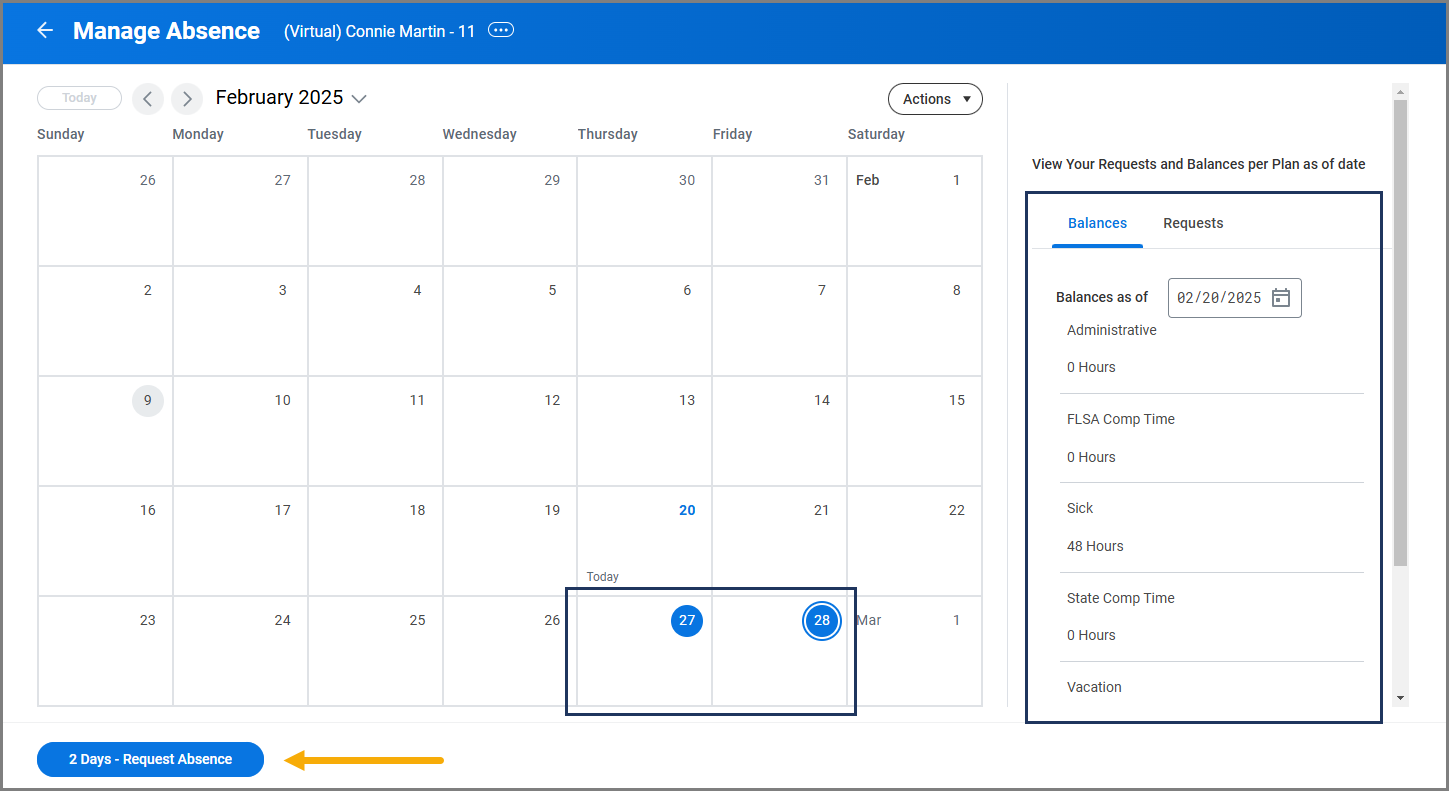
If you want to view Time Off and Leaves of Absence on the same page, open the Manage Absence calendar view.
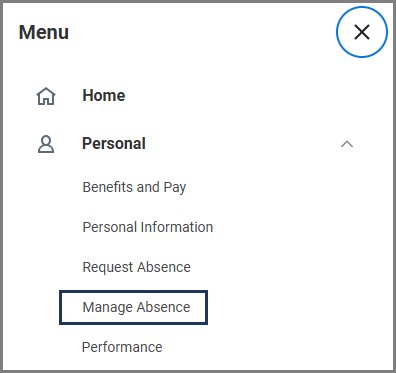
- Select the Manage Absence application, from the Workday menu.

- On the Manage Absence Calendar, select the day(s) you will be absent.
Note: You can see your balances as of the selected date to the right of the calendar.
- Select the Request Absence button (which will be preceded by the number of days you are requesting off).
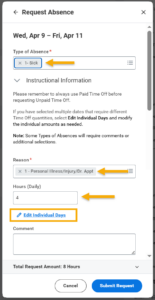
- In the Request Absence pop-up window, complete the following fields:
- Type of Absence. Only Types for which you are eligible will appear (e.g., vacation, sick, other).
- Reason. This is required for certain Absence Types.
- Hours (Daily). You will need to populate this field with the number of hours for your absence request. IMPORTANT: This is not the total hours but the hours per day you will be absent.
- Note: You can select Edit Individual Days if the hours of Time Off on multiple dates that are selected will differ. This feature allows you to enter in a partial day if desired.
- Comment. Enter comments for your Manager as needed; remember not to include private information.
- Select Submit Request.
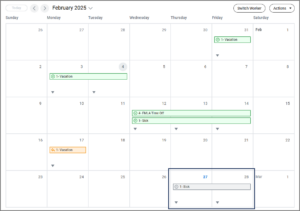
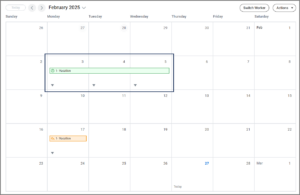
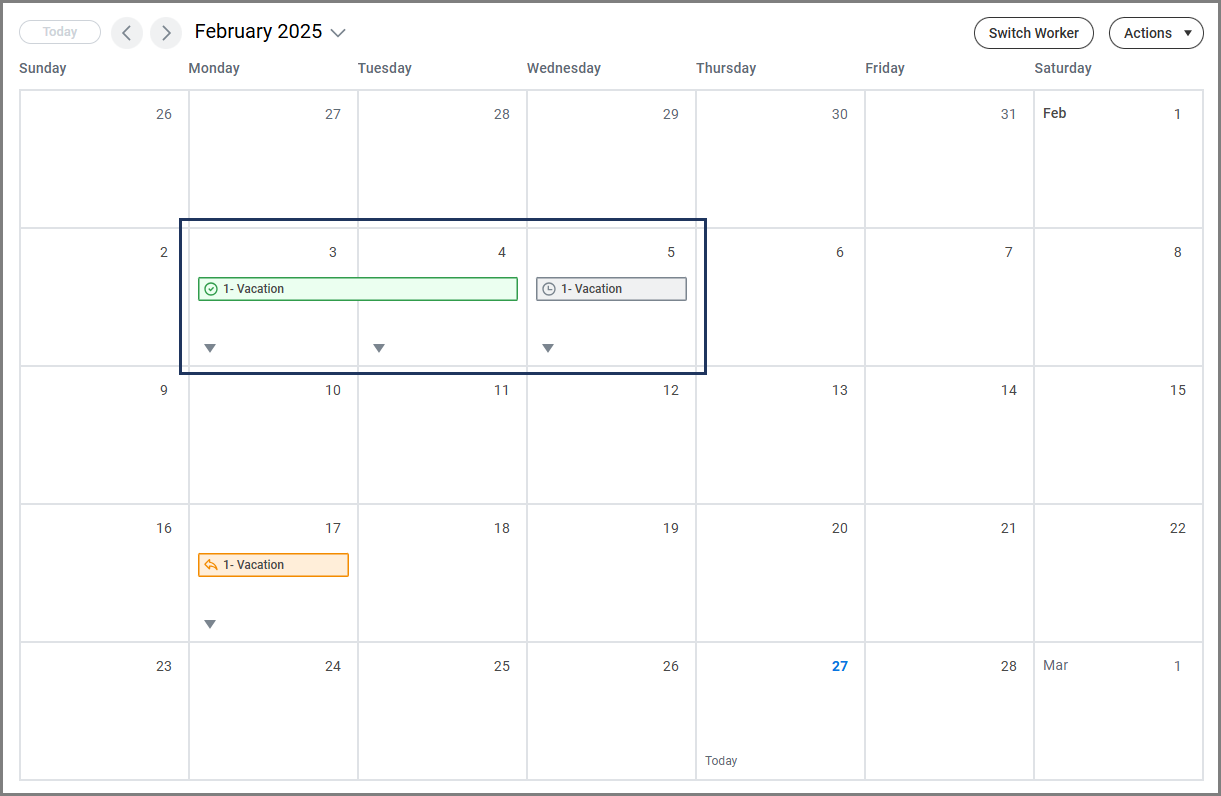
- The Manage Absence Calendar now displays your Absence request.
- Approved requests are green (with a green check mark), those waiting approval are gray and those that have been sent back for changes are orange.
- A successful FMLA request should have two concurrent green rows for the dates being requested, one for the FMLA request and one for the paid or unpaid time off request. Refer to the Important Information tab of this job aid for more information on requesting FMLA absences.


Up Next
Your Manager will receive an inbox item to take action on your request. Your request can be approved, sent back, denied or canceled.
Note: Any requests involving FMLA, Parental or Emergency Time Offs will also route to your Absence Partner for approval once the request is approved by your Manager. Some Members may elect not to route these requests to the Absence Partner.
You have completed the Request Absence business process.
Cancel an Absence Request
- Select the Manage Absence application, from the Workday menu.
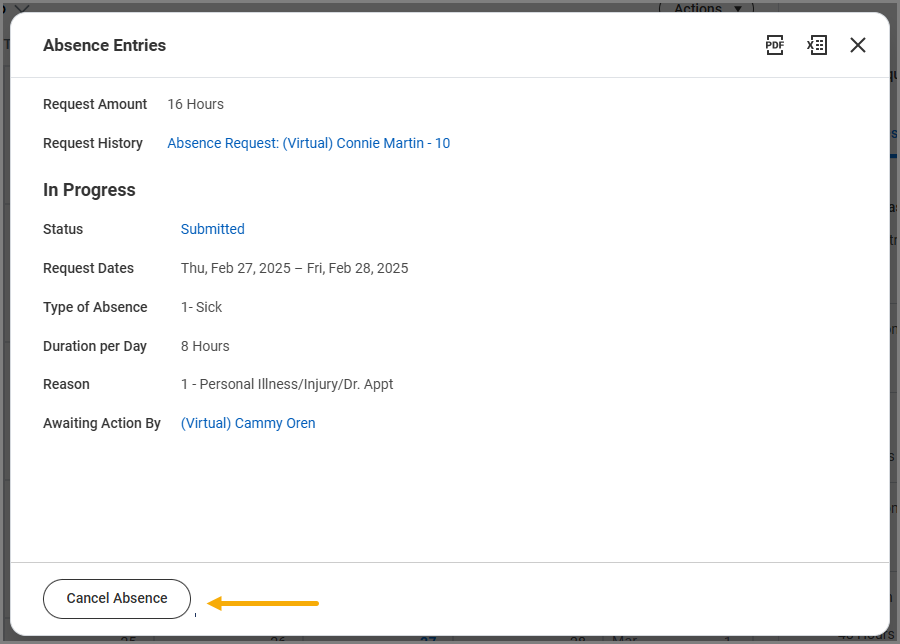
- Select the absence request you would like to cancel.

Note: The request shown here is not yet approved, indicated by the gray color and no green check mark. This means it is eligible for you to cancel the request.
- Select Cancel Absence (which will cancel the entire request).
Note: If you need to remove a day from a multi-day request, use the Edit an Absence Request process in the section below.
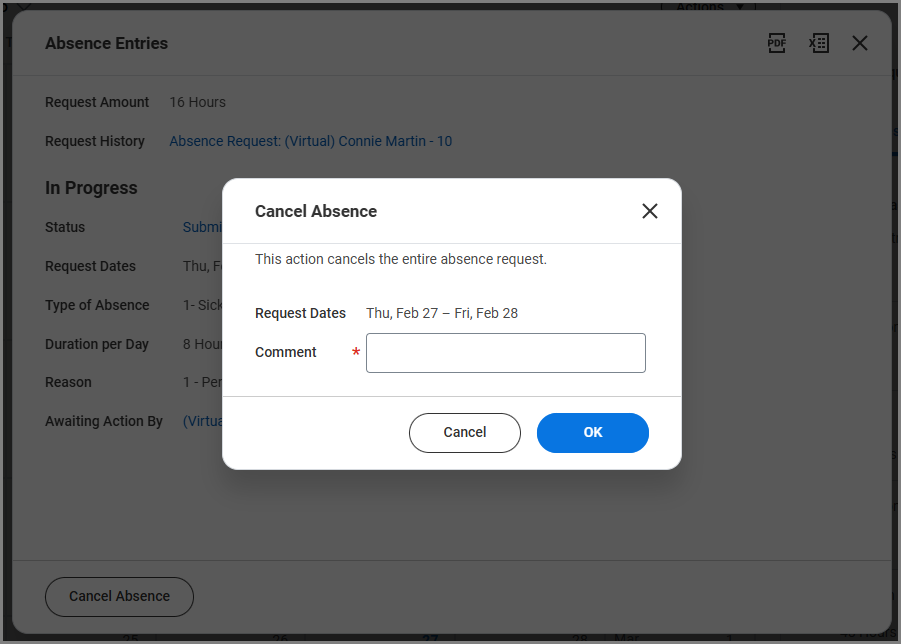
- Enter comments for your Manager.
- Select OK.

-
You will be returned to the Manage Absence calendar.
-
If your request was already approved, you will receive a confirmation message stating You have submitted and that manager approval is required for cancellation. The event will change from green to gray on the absence calendar and will be removed once the cancellation is approved by your manager.
-
If your request was not yet approved, you will receive a confirmation message stating Event Canceled. The request will be immediately removed from the calendar.
-
You have successfully canceled your absence request.
Edit an Absence Request
- Select the Manage Absence application, from the Workday menu.
- Select the absence request you would like to edit.
- Verify the specific date(s) you wish to correct and select Edit.
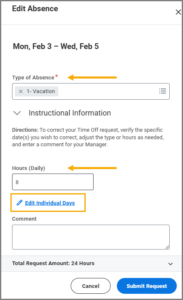
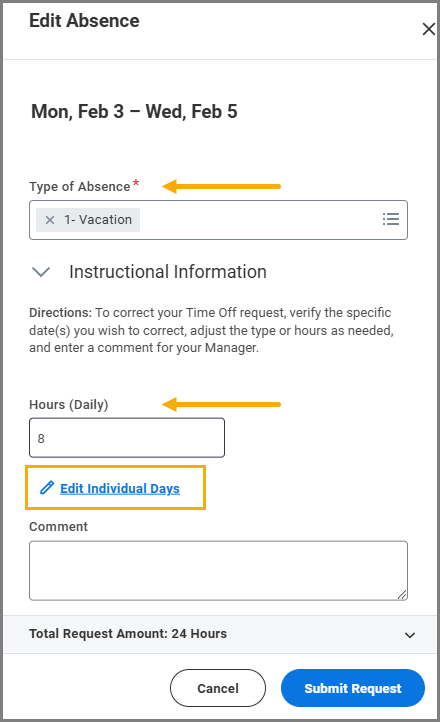
- Edit any of the following fields:
- Type of Absence.
- Hours (Daily).
- Comment. Enter comments for your Manager.
- Select the Edit Individual Days link to edit specific days.
- Enter comments for your Manager.
- Select Submit Request.
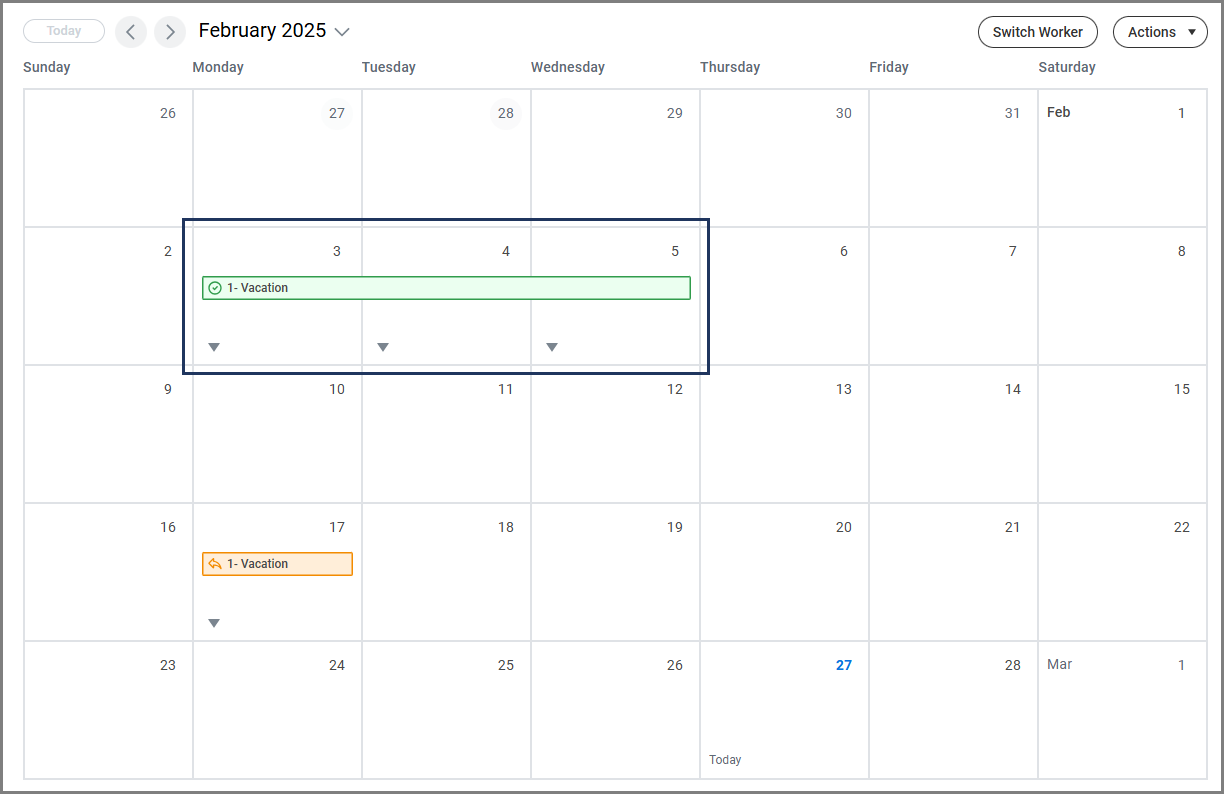
Example: The screenshots below show the Edit Individual Days option to remove the third day of their requested and approved absence for Vacation and the Manage Absence calendar after the Edit Absence Request is submitted.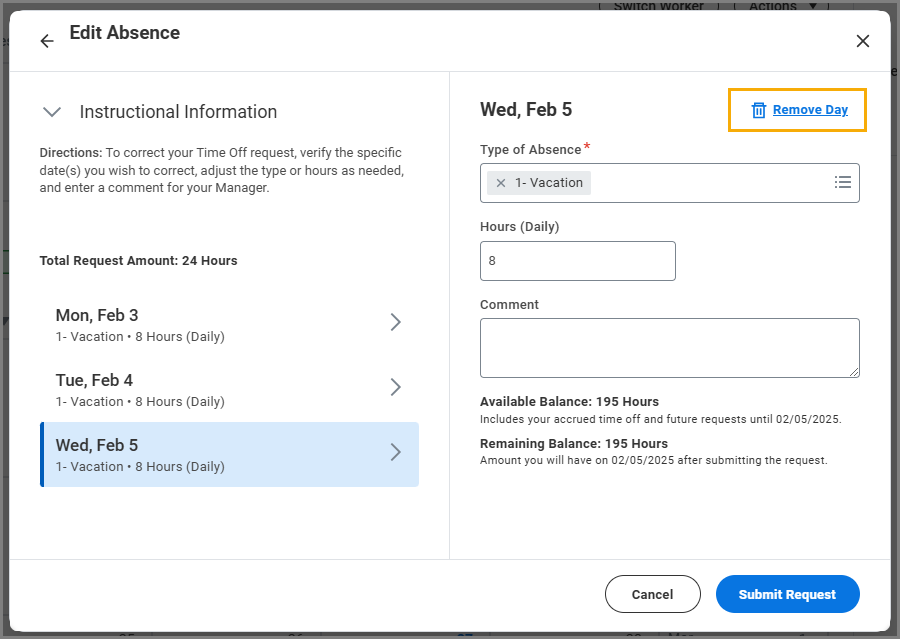
You have successfully edited your absence request.
Up Next
- Your Manager will receive an inbox item to approve these changes.
- If your Member has opted into this routing, your Faculty Partner will receive an inbox notification when a Leave of Absence is requested by or for Faculty.
- Your Absence Partner will receive an inbox item to take action on any request involving FMLA, Parental or Emergency Time Off, Military Training/Duty, and unpaid Time Off.