This job aid outlines the process for a Recruiting Partner and Recruiting Coordinator to move a Candidate through the job application process.
Job Application Process
Last updated on April 22, 2026
Page Loading...
Checking SSO...
Prerequisites
A job requisition must exist that is currently posted. The job application process starts after a Candidate has applied through a job posting.
Important Information
- All requisitions are managed by the Recruiting Coordinator, Recruiting Partner, and Manager (when applicable) of the Supervisory Organization in which the job requisition is housed.
- The position linked to the job requisition must be unfilled by the Candidate’s date of hire. The Recruiting Dashboard application can be used to manage job requisitions.
- A Candidate can be dispositioned at any stage by declining them for various reasons and will be notified automatically via email. However, a Candidate can be reactivated after being dispositioned.
- When documents are attached within the knockout questionnaire, they will only show up in the questionnaire’s results tab. They do not show up in the attachments screen unless attached within that screen.
Getting Started
This job aid covers the following stages: Initial Review, Interview, Offer, Background Check, Reference Check, and Ready for Hire.
Initial Review
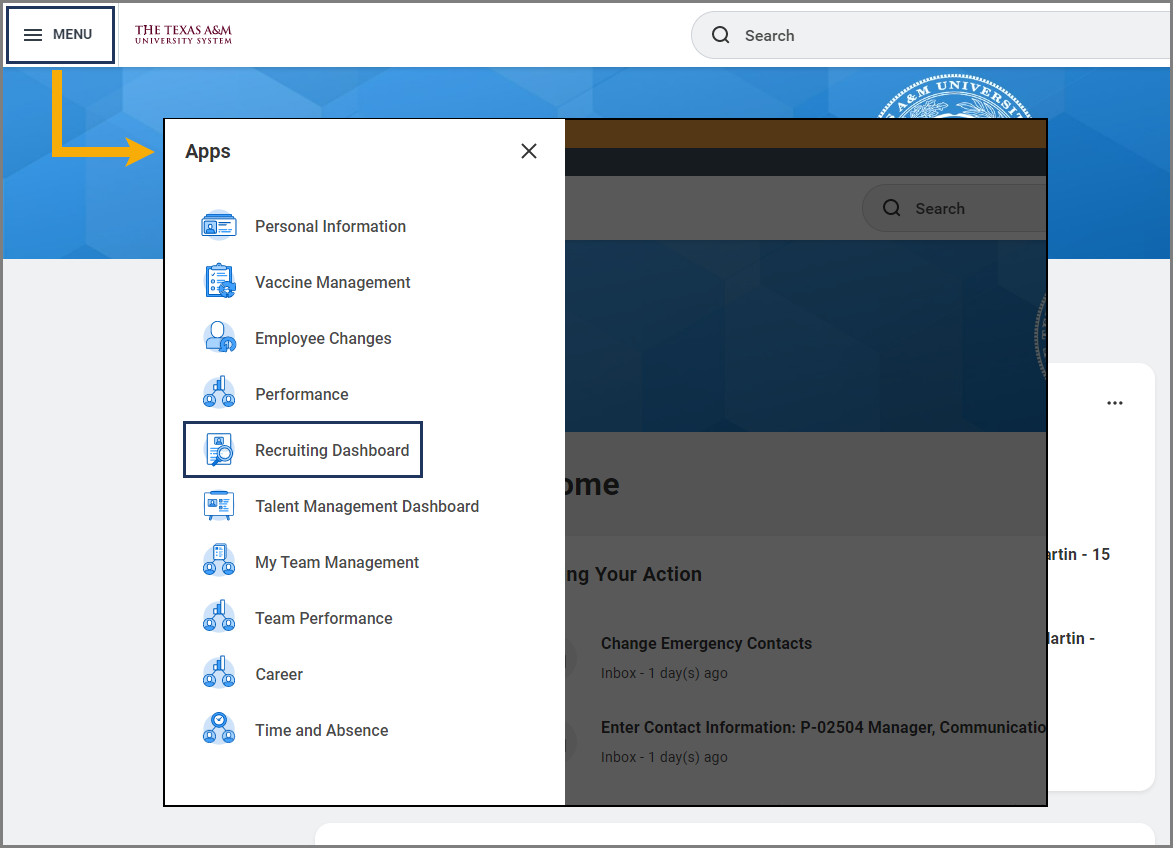
- From the Workday Homepage, select Menu > Recruiting Dashboard.

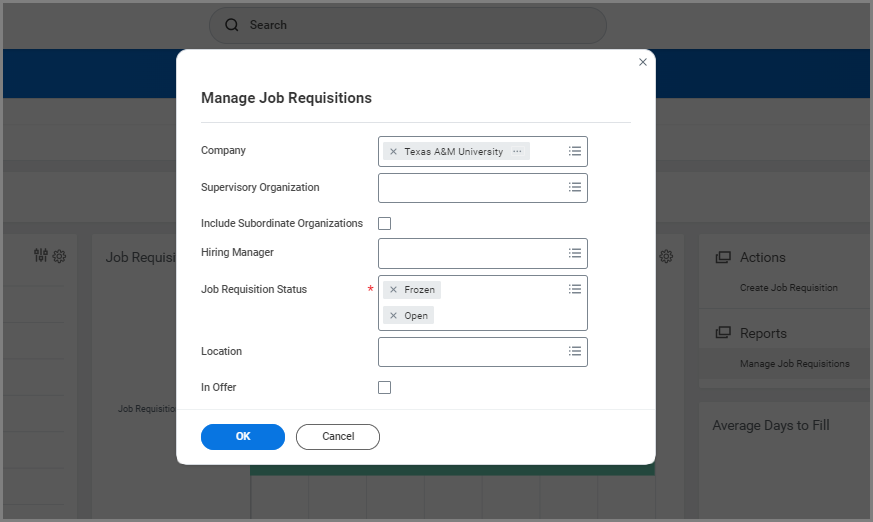
- Under the Job Requisitions tab, select Manage Job Requisitions under Reports.
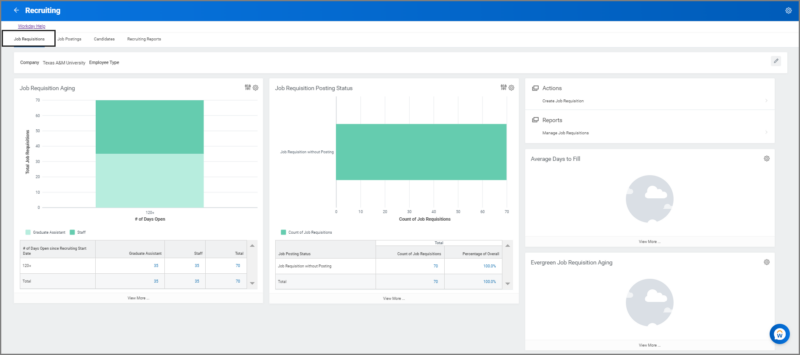
- In the Manage Job Requisitions window, complete the Job Requisition Status field. If desired, fill in any other fields that will narrow down your search results.

- Find and select the job requisition you need to access.
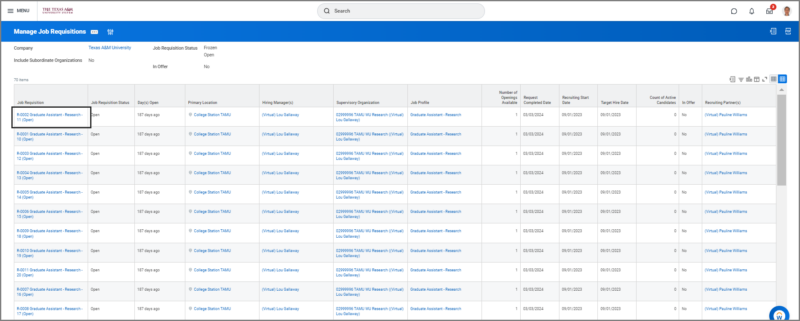
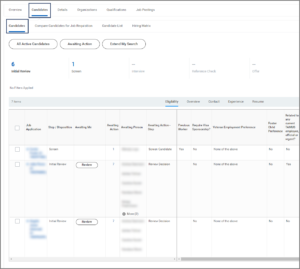
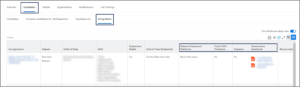
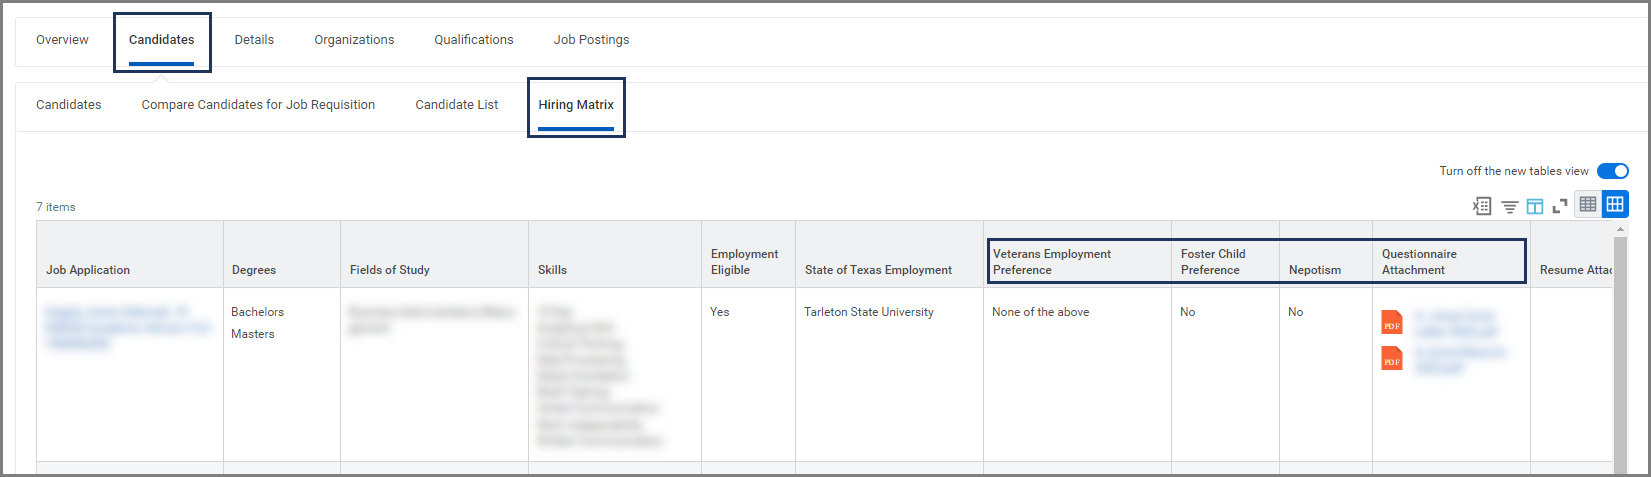
- Select the Candidates tab and the Candidates tab underneath it to view all candidates who have applied for the requisition.
- Select the Hiring Matrix tab to view questionnaire responses and applications for minimum qualifications.
- To move candidates to the next stage, navigate back to the Candidates tab. Select the checkbox next to each Candidate’s name (you can select multiple candidates). Then select Move Forward.
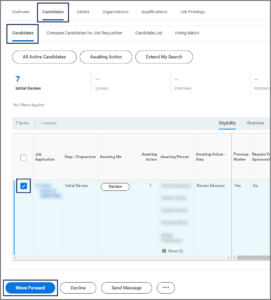


Note: You can disposition candidates as well. First, select each Candidate’s checkbox. Then select Decline at the bottom of the page. In the Decline Job Applications window, enter the appropriate Disposition Reason and select OK.
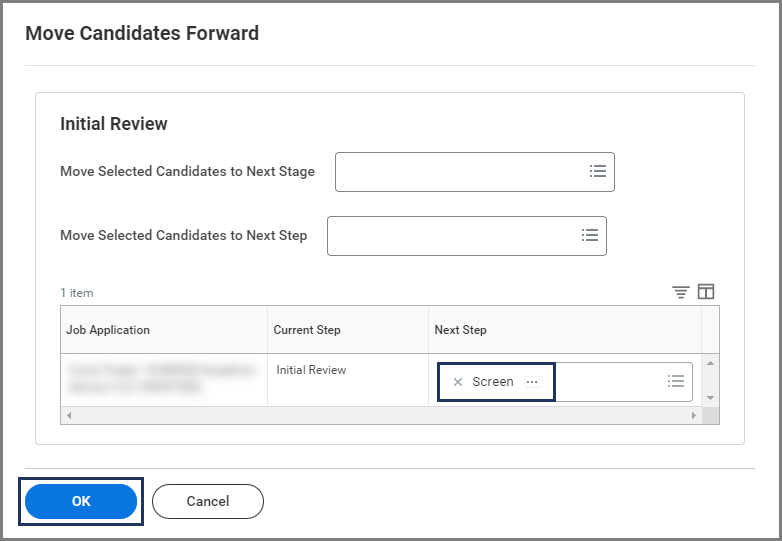
- The Move Candidates Forward window will display. The Next Step field will default to Screen.
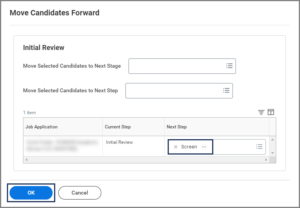
- Select OK.
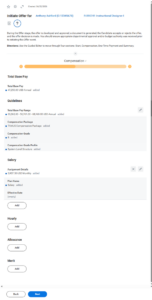
The Review Candidates page will display, showing which Action Step is being awaited on which person. In the below image, the next Action Step is for the Manager to screen the Candidate.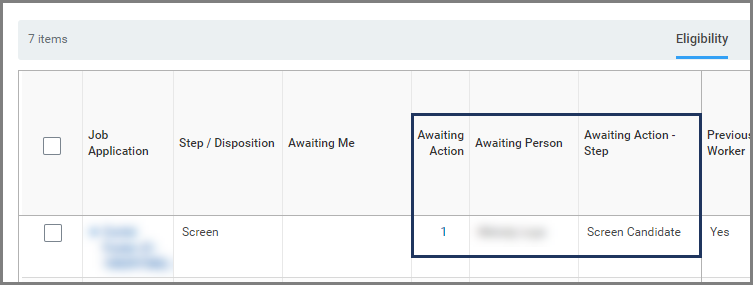
Up Next
The Manager or Recruiting Coordinator and Recruiting Partner receive an inbox task to screen the Candidate and then move the Candidate forward to Interview or Reference Check depending on member preferences.
For information on how the Manager screens a Candidate, see the job aid Job Application Process (Managers) on the Workday Help website.
Note: Recruiting Coordinators and Recruiting Partners can screen Candidates and move them forward or decline from within the grid to advance the business process.
If Interview is selected next, the Recruiting Coordinator and Manager receive the inbox item Interview.
Offer
During the Offer stage, the offer is developed and approved, a document is generated, the Candidate accepts or rejects the offer, and the offer decision is made. You should ensure appropriate departmental approval and/or budget authority was received prior to initiating this Offer event.
You, the Recruiting Coordinator, and Recruiting Partner receive an inbox item to initiate the offer. Any one of these individuals can complete this stage.
IMPORTANT: Be sure to communicate with your department how managers are involved in this process.
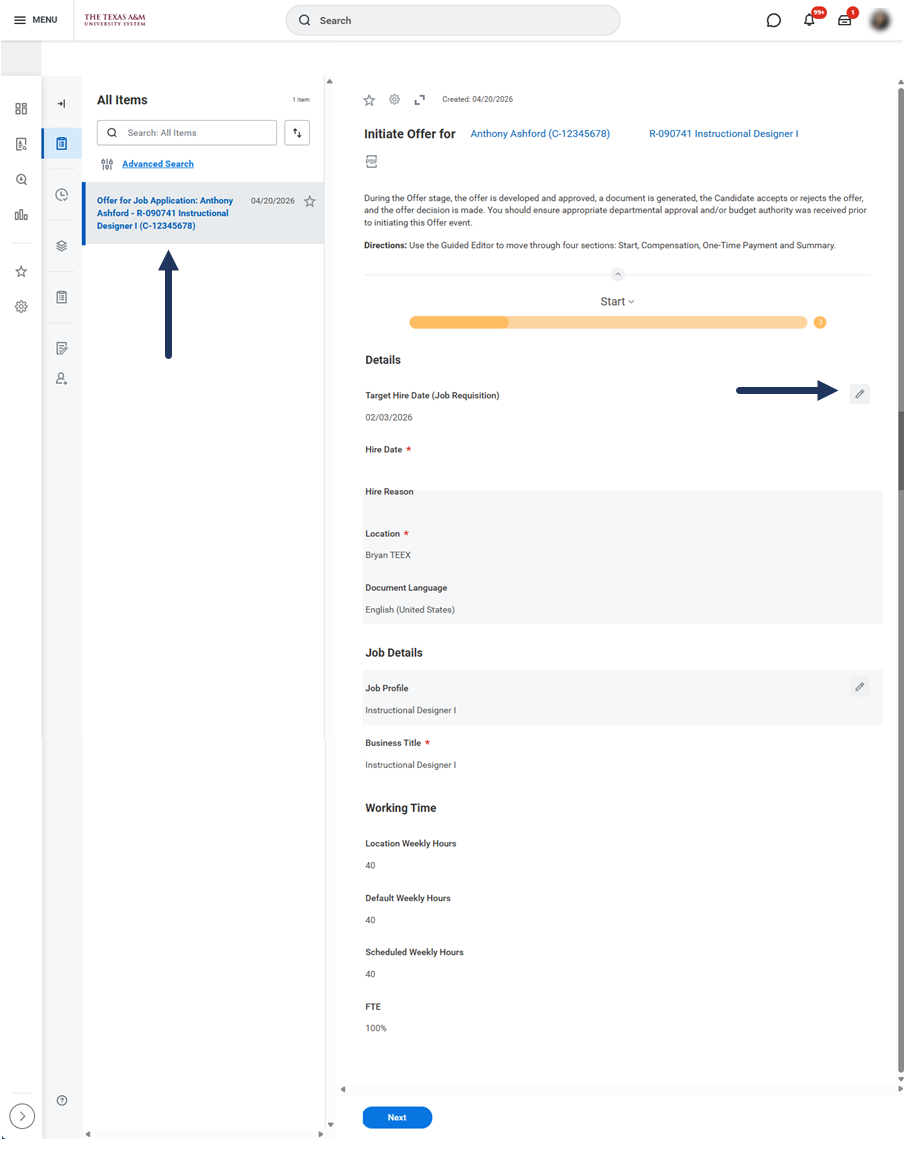
Initiate Offer
This step uses the Guided Editor to move through four sections: Start, Compensation, One-Time Payment and Summary.
- Navigate to your Inbox, select Offer for Job Application.
- On the Start page, use the pencil icon to edit.
- Enter the following information.
- Hire Date. This is the proposed hire date for the Candidate. This date must not be earlier than the earliest hire date in the requisition.
- Location. This defaults from the job requisition.
- Document Language. This defaults to English.
- Proposed End Date. This is required for a Temp/Casual Worker.
- Business Title. This Defaults from the job requisition.
- Select Next.
- On the Compensation page, enter the following information.
- Salary (if applicable)
- Compensation Plan. Enter salary.
- Amount. Enter the amount in dollars and cents monthly the Employee will be paid.
- Frequency. Select monthly.
- Hourly (if applicable)
- Compensation Plan. Enter hourly.
- Amount. Enter the amount in dollars and cents hourly the Employee will be paid.
- Allowances (if applicable)
- Compensation Plan. Select the type of allowance (e.g., car allowance).
- Amount. Enter the amount in dollars and cents the Employee will be paid.
- Frequency. Select the appropriate option.
- Salary (if applicable)
- Select Next.
- On the One-Time Payment page, complete/modify the following information in the Summary section.
- Effective Date. This will default as the Hire Date.
- Employee Visibility Date. This is the date this information will be visible to the Employee in Workday.
- Reason. This is the reason they are receiving this payment (e.g., Award).

- In the Payment section, select Add.
- Payment Plan. Enter the type of plan (e.g., Education Reimbursement).
- Amount. Enter the amount in dollars and cents the Employee will be paid. You will only be able to add a payment amount after adding a Payment Plan.
- Worktags. Enter the Cost Center from where the funds will be withdrawn if available.


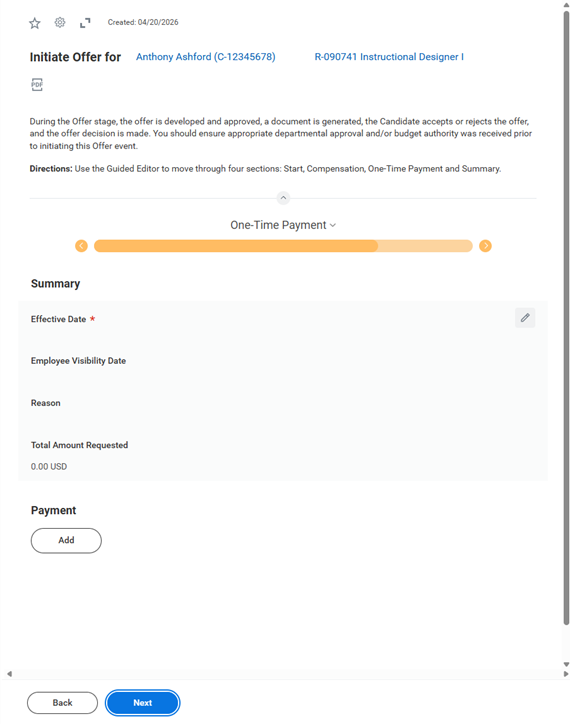
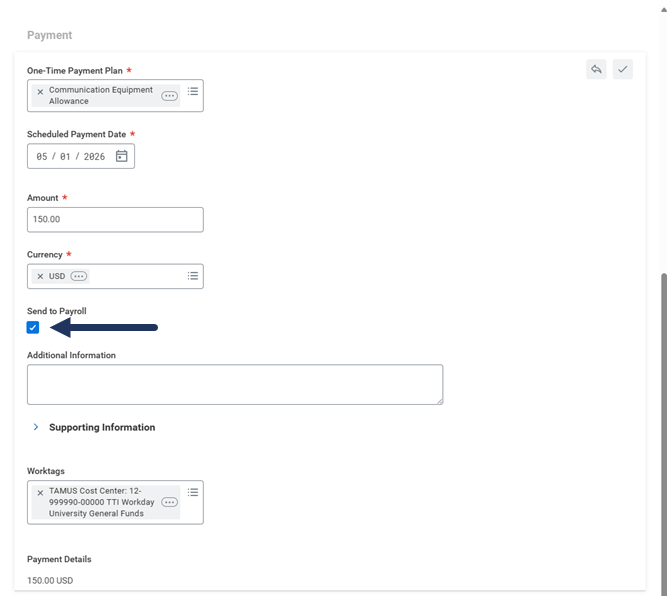
Note: The Send to Payroll checkbox should be selected by default.
- Select Next to review all the information entered.
- Select Submit.
To Do: Get Approval for Proposed Offer
Next you will receive a To Do that reminds you to follow all of your departmental procedures for getting necessary approvals outside of Workday (if applicable) for the proposed offer.
Note: This is for members who require additional approvals beyond those configured in Workday.
- Select the To Do Get approval for proposed offer.
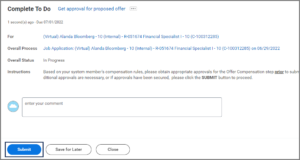
- Select Submit after completing any member specific processes for approvals.

IMPORTANT: This To Do needs to be submitted to route the process to the Recruiting Partner for a consolidated approval.
Up Next
The Recruiting Partner will review the proposed offer and either Approve or Send Back if edits are necessary.
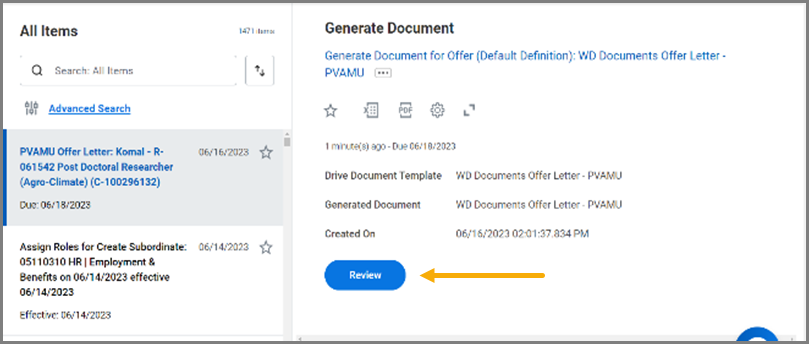
Generate the Offer Document
Once the job is approved, the Generate Document for Offer Task is sent to the designated HR resource(s).
Select the Review Button from the Inbox to review, export to PDF, or add/edit the details prior to generating the offer letter.
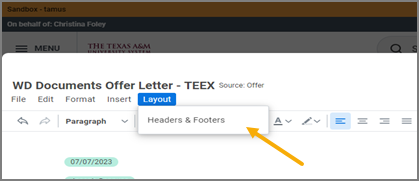
You may update the header/footer information and logo by selecting the Layout menu item and Header / Footer
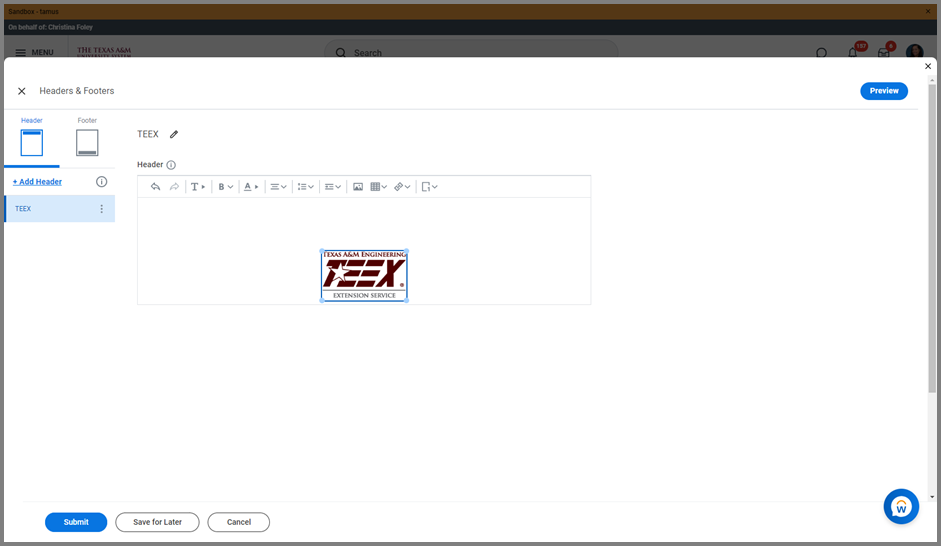
To view the offer letter in PDF form, select the Preview Button. Offer letters vary by member with their own branding. You will see the offer letter template for your own member.
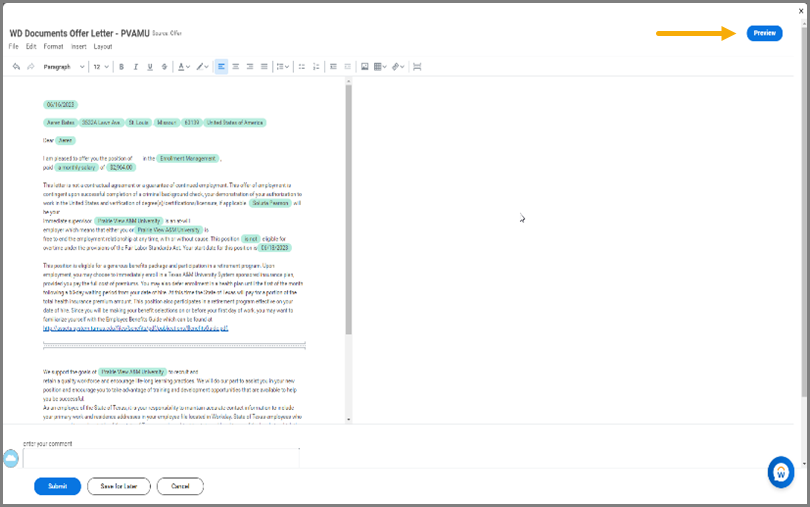

Select the X Preview Button to navigate back to the editable offer letter or the Submit Button if there are no additional changes.
The Submit Button may be selected from the PDF view or the Task Inbox Edit view.
If you do not want to use the Generate Document feature in Workday, you can skip the step. Skipping this step means the candidate will not receive the offer letter from Workday.
Note: If the letter is generated outside of Workday, the Recruiting Partner or Recruiting Coordinator can upload the letter (generated outside of Workday) to the Candidate profile for documentation purposes.
- Select Submit.
Up Next
The Candidate receives the offer letter. An internal Candidate will receive their offer letter in their Workday Inbox while external Candidates will receive it on their Candidate Home account on the external career site. The Candidate will reply to their inbox task either accepting or declining the offer.
Did Candidate Accept Offer?
Next you will need to answer whether the Candidate accepted the offer.
- Select the inbox task Complete Questionnaire Offer Accepted.
- Select Yes or No.
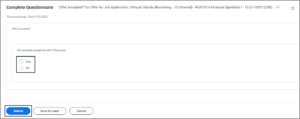
- Select Submit.

Up Next
The Recruiting Coordinator, Recruiting Partner, and Manager receive the Offer Decision task.
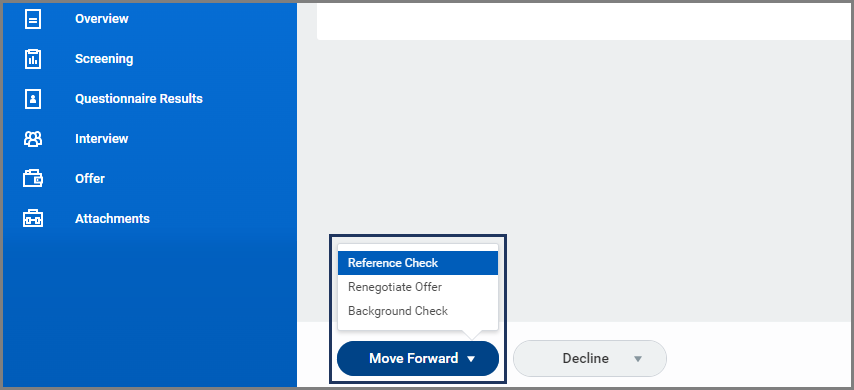
Offer Decision
You will receive an inbox task to move the Candidate forward or decline.
- Select the inbox task Offer for Job Application.
- Select Move Forward and select Reference Check, Background Check, or Renegotiate Offer.

Reference Check
During the reference check you will do three things. First you will conduct the reference check, next you will document contact information inside of Workday for whom you contacted, and lastly you will make a decision to move the Candidate forward or decline.
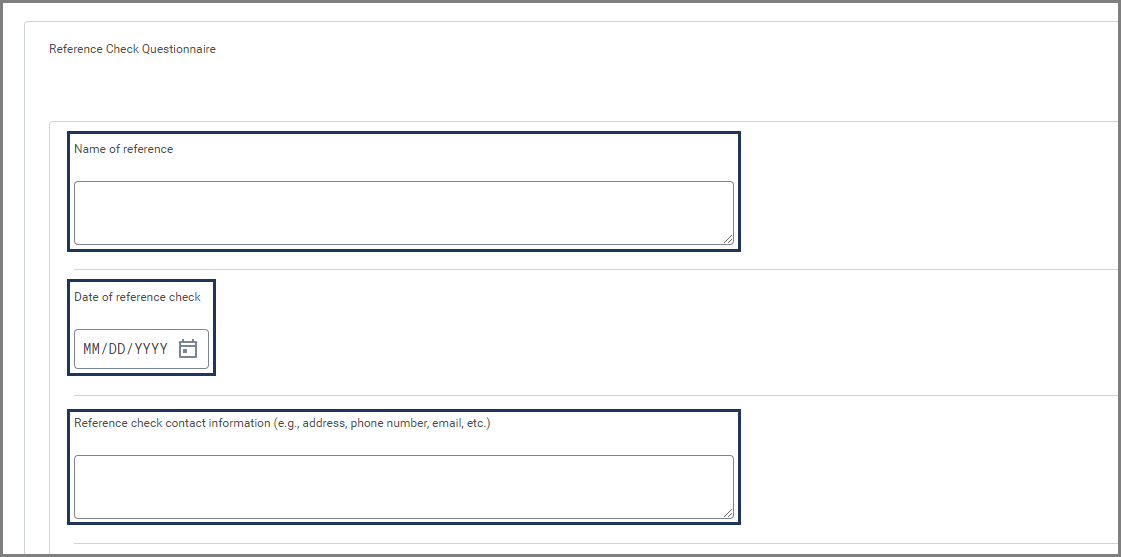
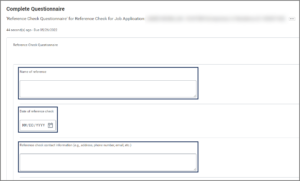
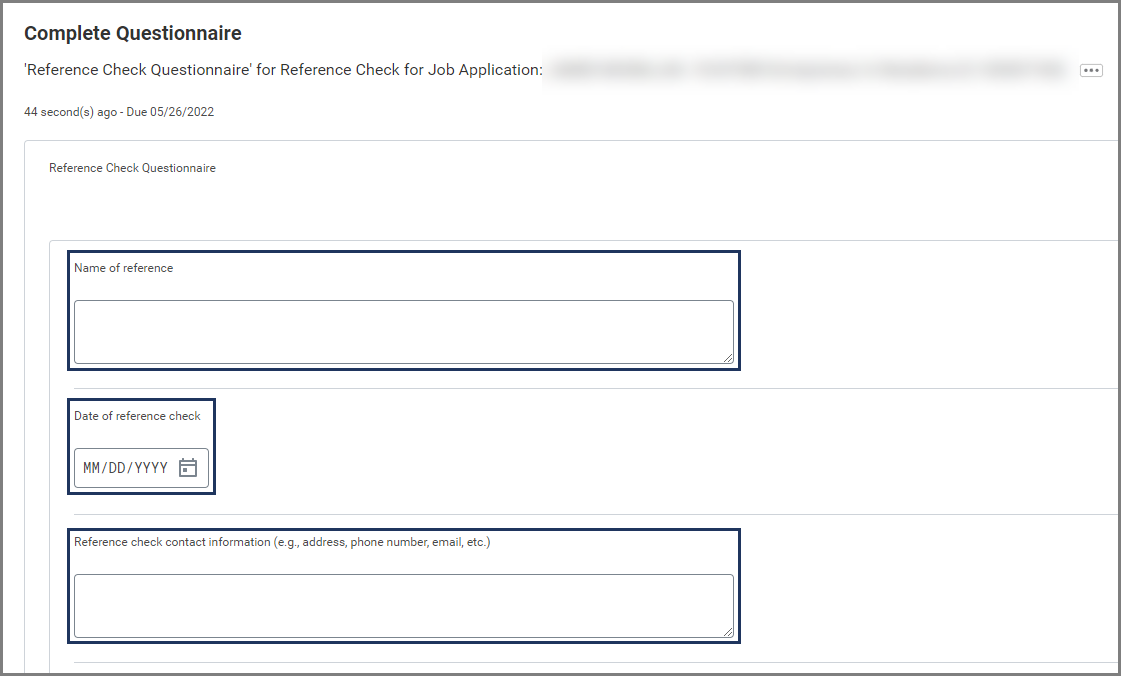
You will receive the inbox task Complete Questionnaire where you can add up to three references.
Note: This task serves as documentation for contact information only used to complete the reference check, not details of information acquired. Reference checks are completed outside of Workday.
- Enter the Name of reference, Date of reference check, and Reference check contact information.

- Select Submit.
Reference Check
If your member has opted to utilize this step, you will receive an inbox task called Complete Questionnaire where you can add up to three references.
Note: This task serves to document contact information only and is used to complete the reference check, not the details of any information acquired. Reference checks are completed outside of Workday.
- Enter the following information for each reference: Name of reference, Date of reference check, or Reference check contact information.
- Select Submit.
Reference Check Decision
Based on the reference check you will decide whether to move the Candidate forward. You will receive an inbox task to make this decision.
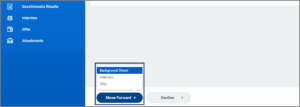
- Select the inbox task Reference Check for Job Application.
- Select Move Forward and select from the dropdown: Background Check, Interview, or Offer. The next section will assume you select Background Check.

Up Next
The remaining tasks are completed by the Recruiting Partner. The Recruiting Partner will complete a Background Check on the Candidate and move them to Ready for Hire.
Background Check (Recruiting Partner)
The Recruiting Partner receives an Inbox item to select the Background Check Package.
Note: The Candidate must move to the Background Check stage for the Inbox item to appear in the Recruiting Partner’s Inbox.
Background Check Package
- Select the Background Check Package you use at your member in the Name field.

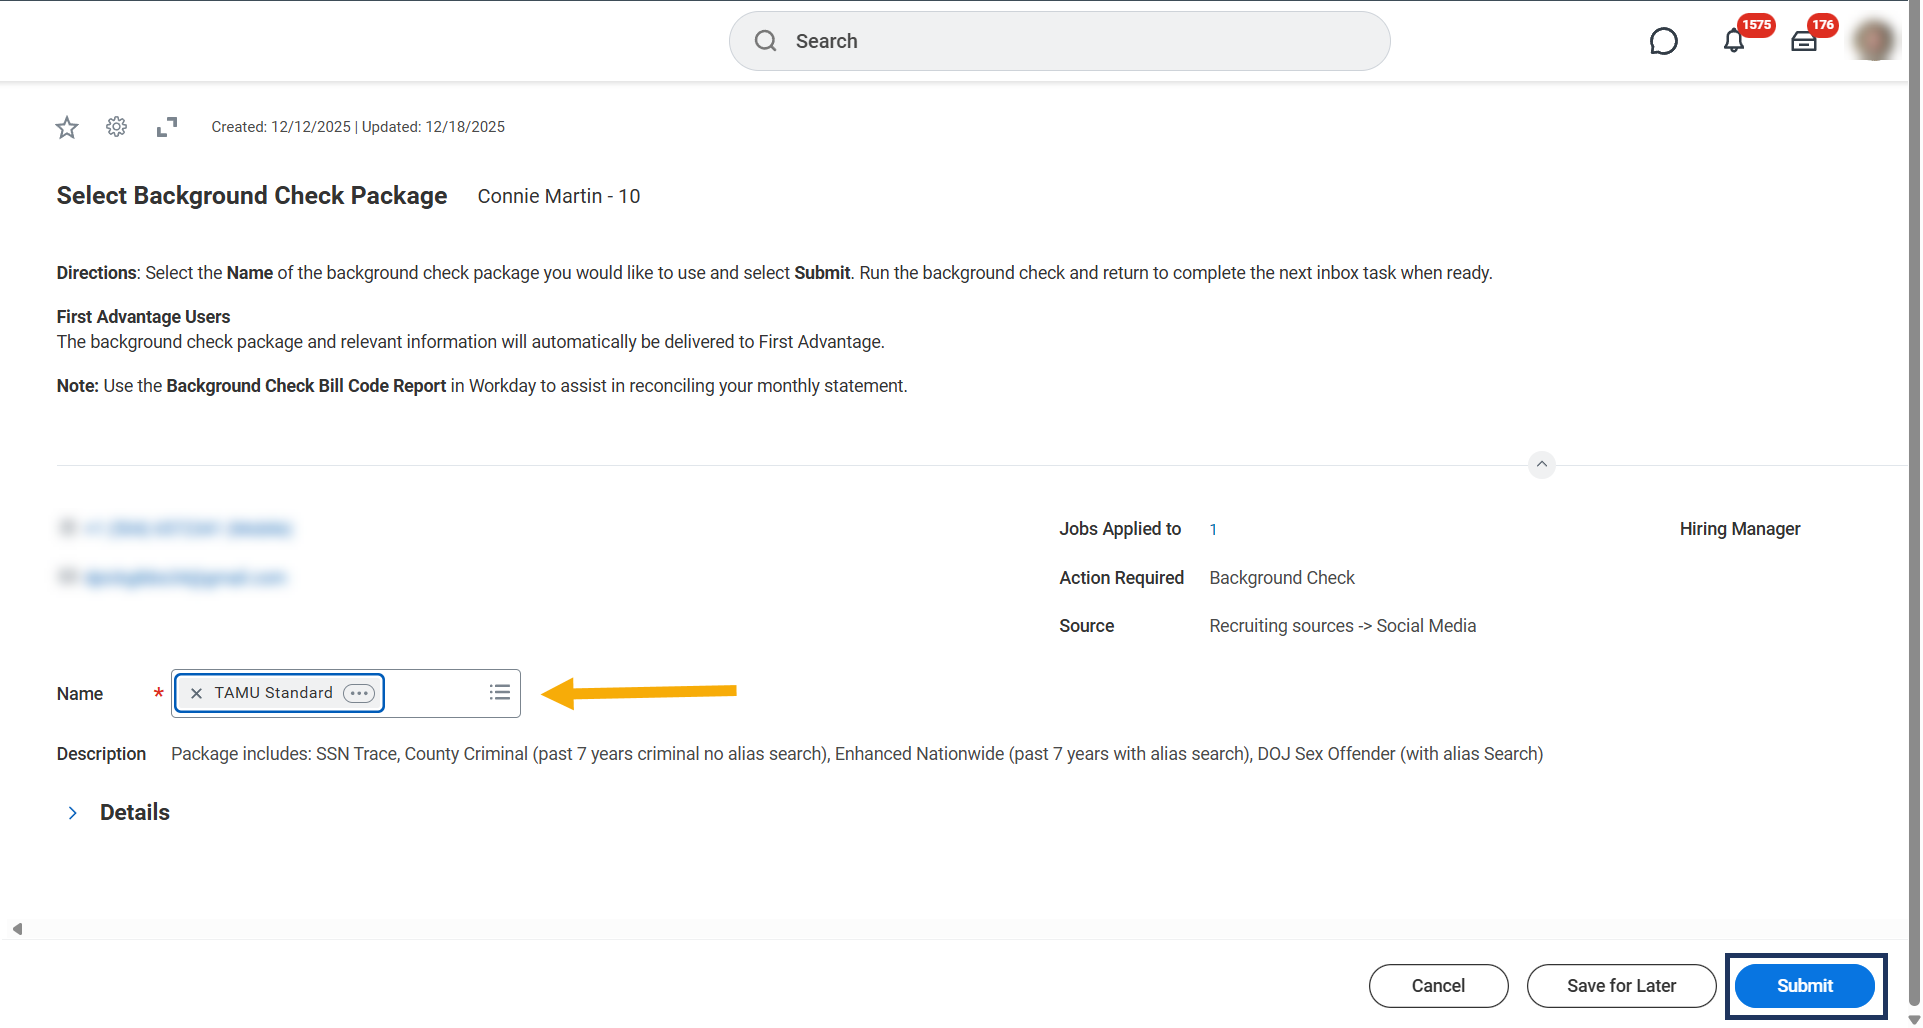
Note: The description will populate after the package is chosen.
- Select Submit.
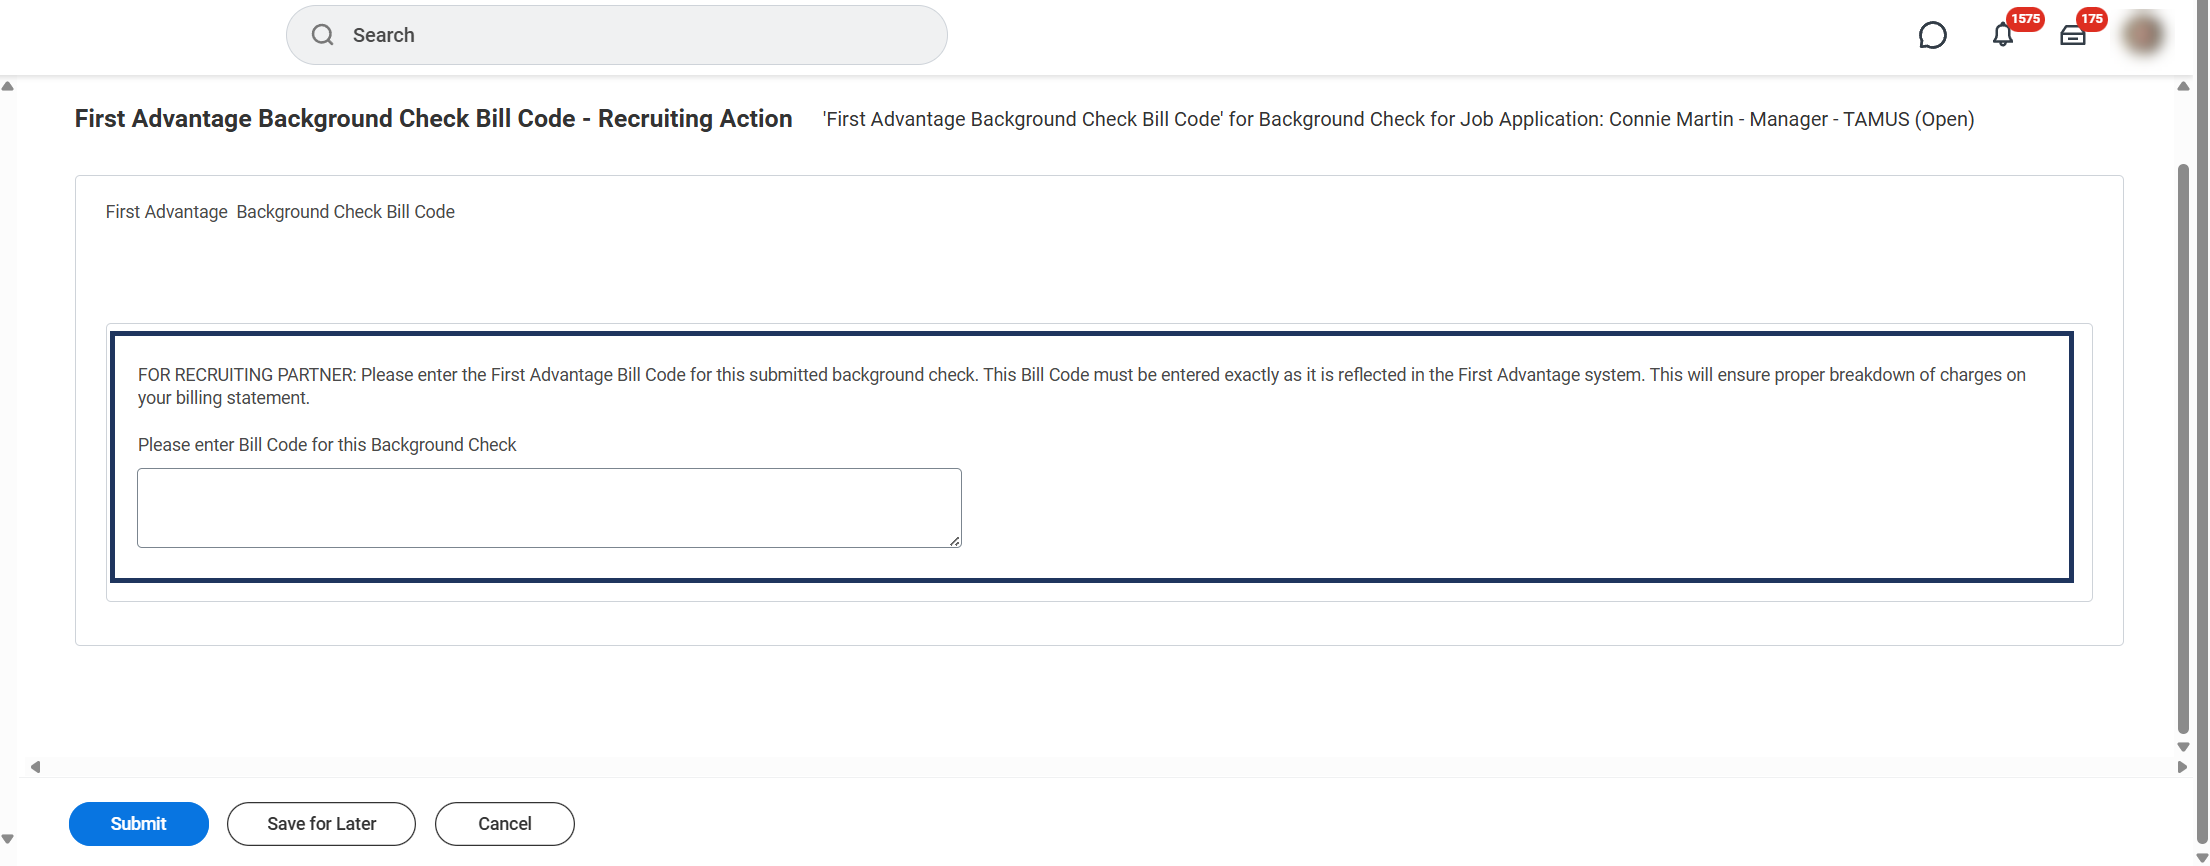
First Advantage Background Check Bill Code (First Advantage Users ONLY)
- Select the inbox task First Advantage Background Check Bill Code.
- Enter the Bill Code in the text box provided.

- Select Submit.
To Do: Update Candidate Address Length (Recruiting Partner)
The Recruiting Partner will ONLY receive the Update Candidate Address Length To Do if the candidate’s address in Primary Address Line 1 or Primary Address Line 2 exceeds 30 characters.
- Navigate to your Inbox.
- Select the To Do Update Candidate Address Length.
- Follow the instructions in the To Do to edit the candidate’s contact information.
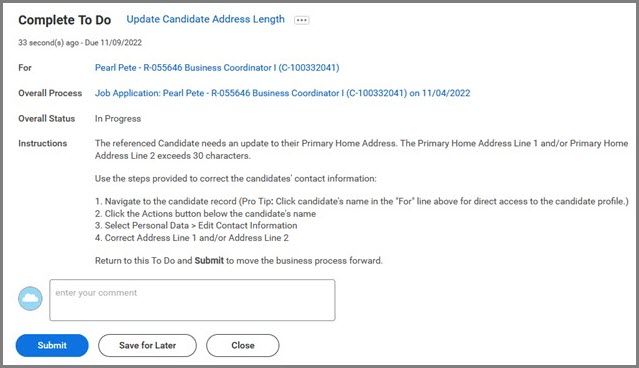
- Return to Inbox item and select Submit.
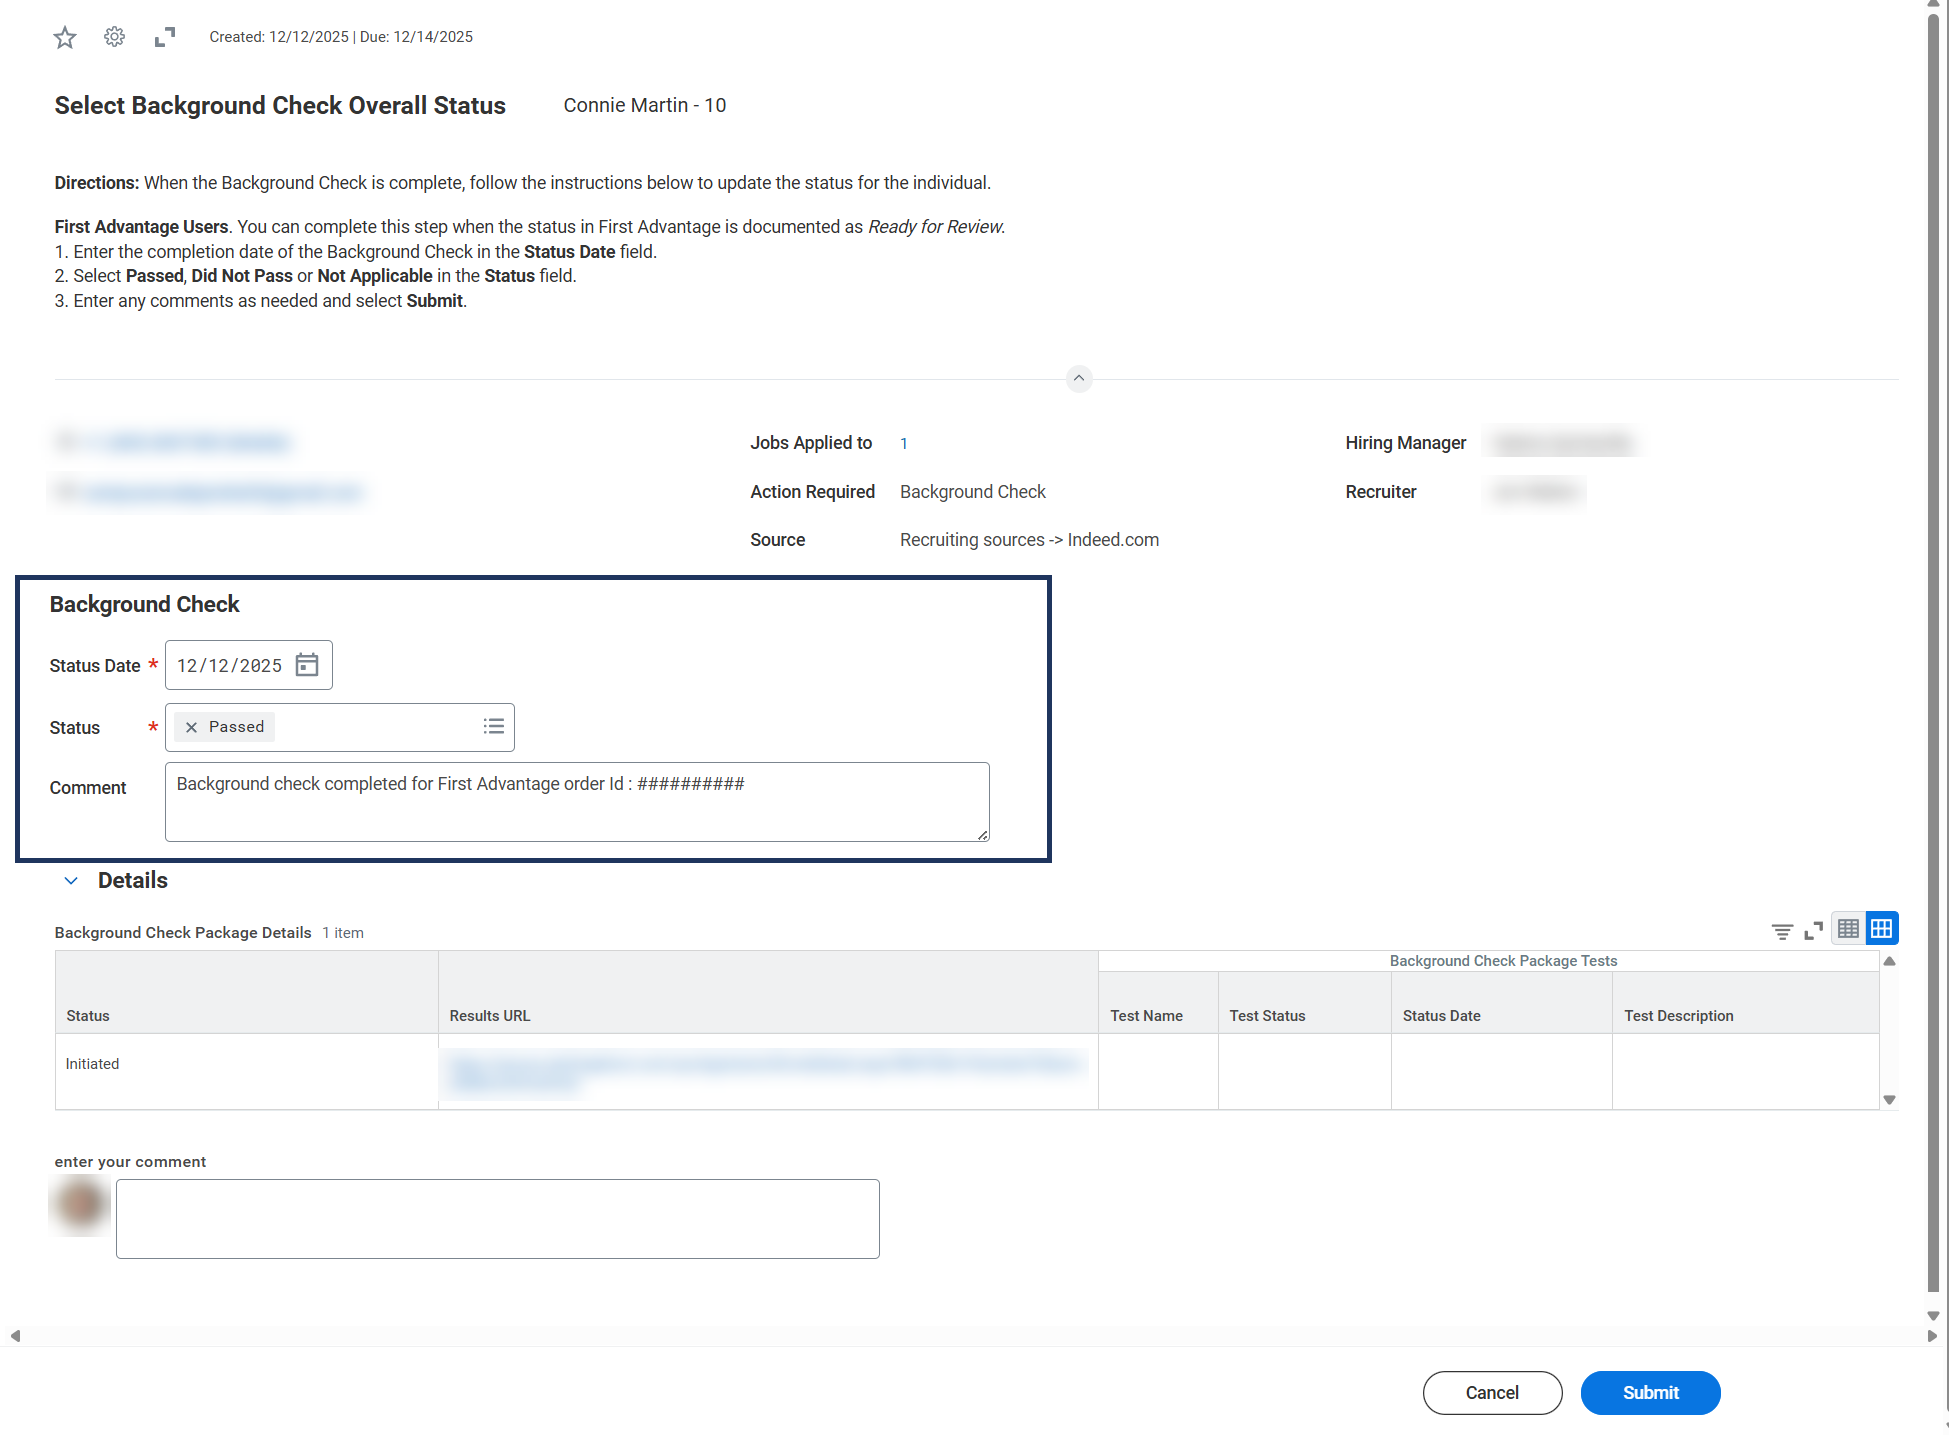
Select Background Check Overall Status
This is the inbox task you will receive to note the results of the background check.
- Enter the following information:
- Status Date. This is the date the results were received.
- Status (e.g., Pass, Did Not Pass)
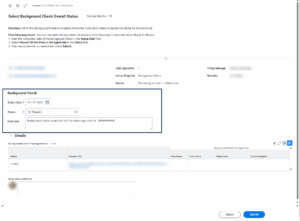
- Enter any comments, as needed.
- Select Submit.
Make Background Check Decision
This task is to move the Candidate forward or decline the Candidate.
- Select task Background Check for Job Application.
- Select Move Forward and select from the dropdown: Another Background Check, Reference Check, Offer, or Ready to Hire. The next section will assume you select Ready to Hire.
Ready for Hire (Recruiting Partner)
This is the last stage of the Job Application process. The Recruiting Partner receives an inbox item to complete the Ready for Hire Compliance Checklist.
REMEMBER: The Candidate must move to the Ready for Hire stage for this item to appear in the Recruiting Partner’s Inbox.
- Select the inbox task Ready for Hire Compliance Checklist and complete the questionnaire.
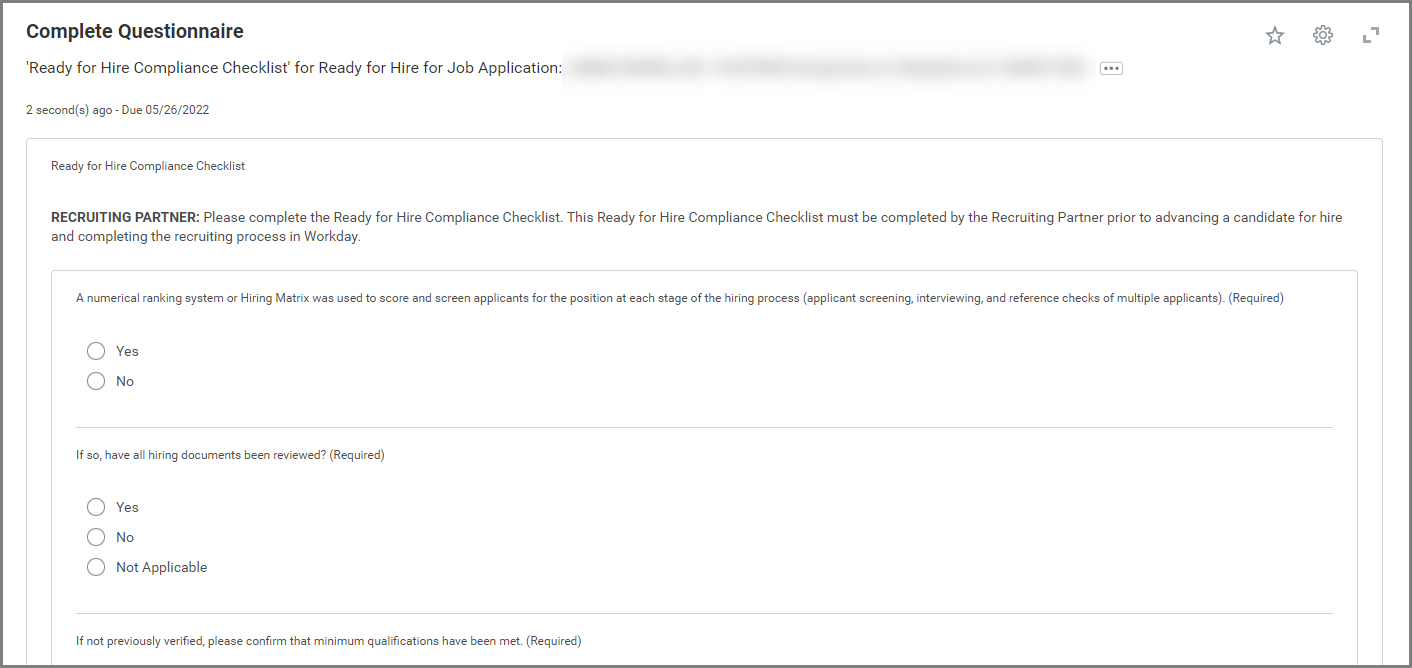
- For the question: Has education and/or certification/licensure been verified? select Yes, No or Not Applicable.
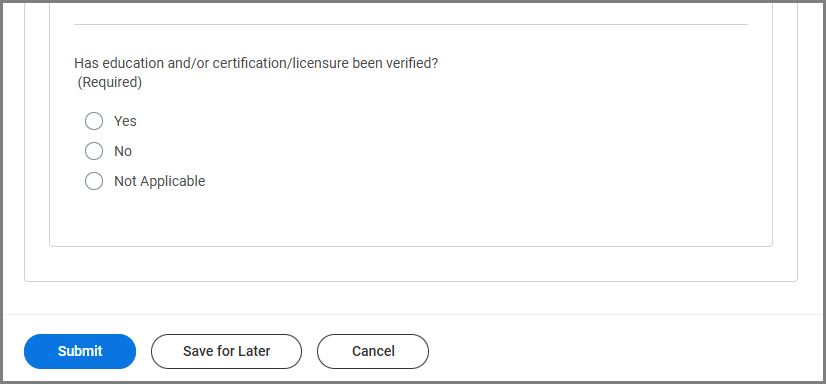
-
- Yes. This option confirms you have completed the verification outside of Workday, the job application process is completed and the Hire (External Candidates) or Change Job (Internal Candidates) business process will be initiated.
- No. This option documents the degree review has not taken place. If your member has opted to use the degree verification form in Workday, the degree verification form will go to the Candidate to complete after the compliance checklist is submitted. You will then receive a Final Education Verification Check questionnaire to complete.
- Not Applicable. This option indicates a degree verification is not required. The Candidate has completed the job application process and the Hire (External Candidates) or Change Job (Internal Candidates) business process will be initiated.
- Select Submit.
Note: Your answer to the degree verification question will determine what happens next.
Up Next
If you selected Yes or Not Applicable, skip to the Staffing Action section of this job aid to continue.
If you selected No, one of the following actions will occur:
-
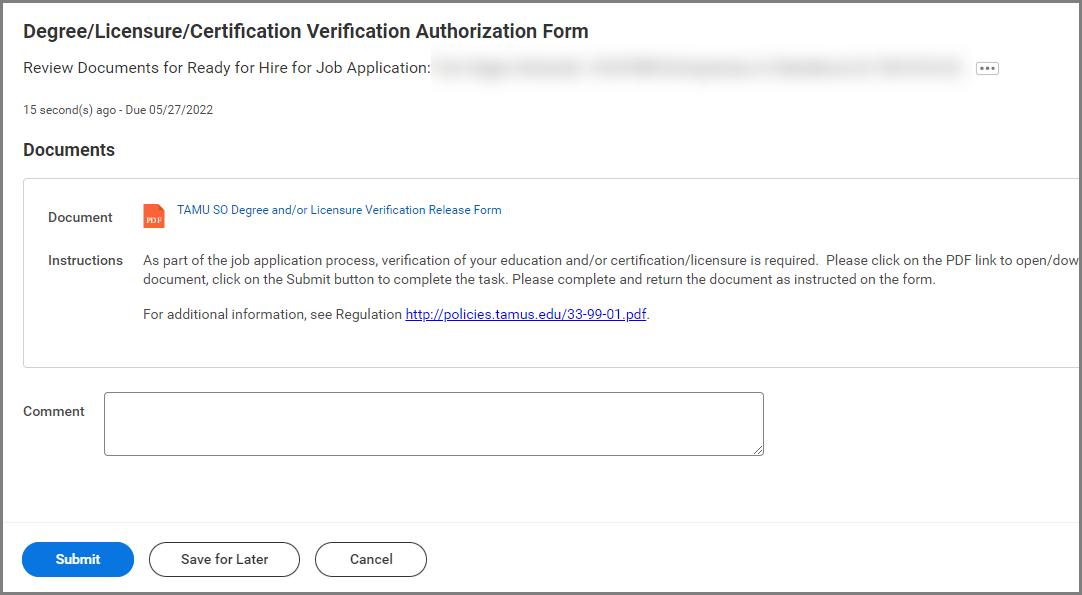
- For members who use the degree verification form in Workday, the Candidate will receive the degree verification form and must submit the degree verification task (shown below) for the business process to continue to the Final Education Check Questionnaire.
-
- For members who do degree verification outside of Workday, the business process will continue immediately after you submit the Ready for Hire Compliance Checklist to the Final Education Check Questionnaire.
Note: A degree verification form in Workday is only applicable to members who provided an authorization form.
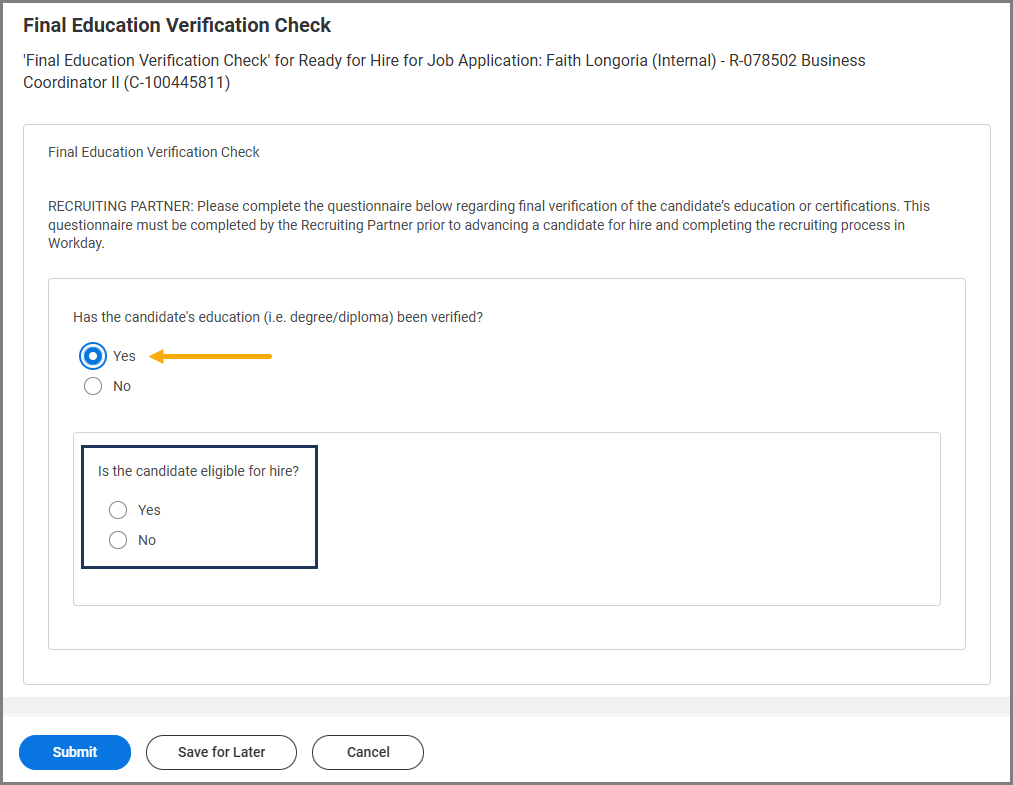
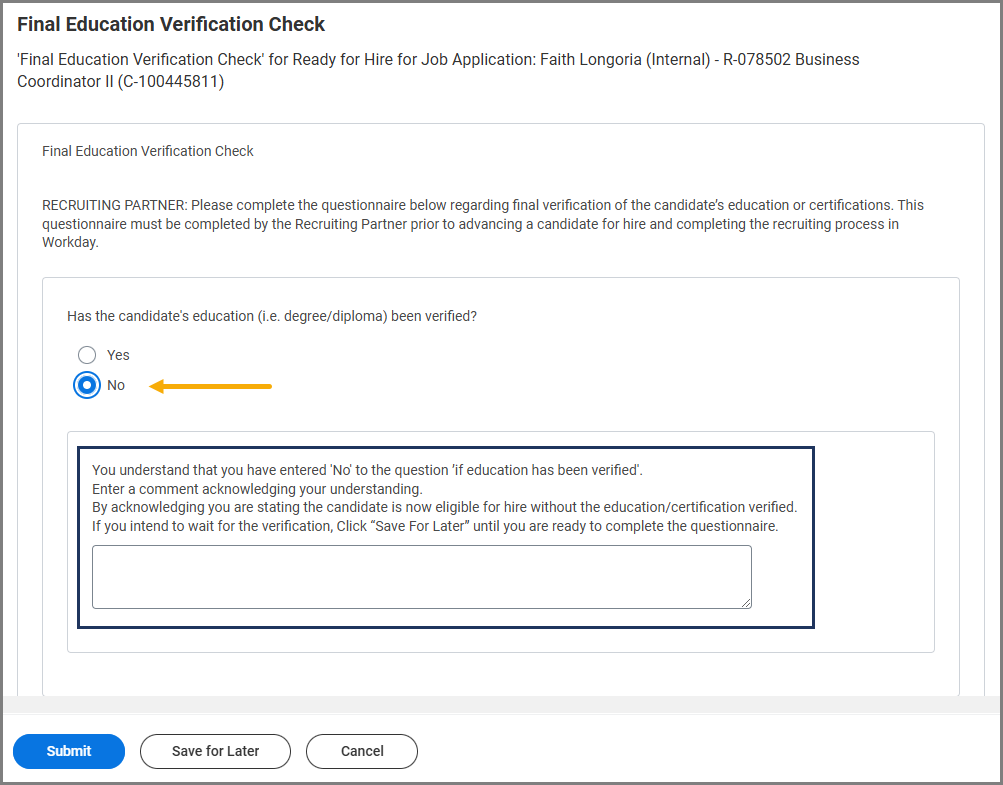
Final Education Verification Check
This is your final verification that the verification has taken place, the Candidate is eligible for hire, and degree verification (if applicable) is complete.
- Select the task Final Education Verification Check in your inbox.

- Select Yes or No.
- Yes. The Recruiting Partner receives an immediate branching question to indicate whether the Candidate is eligible for Hire.
-
- No. Recruiting Partner must acknowledge the Candidate is ready for Hire without a degree verification.
- Select Submit.
The job posting will unpost automatically, if not already done manually prior to completing the Ready for Hire stage.
Staffing Action
Once the Ready for Hire stage is complete, a staffing action will trigger to the HR Partner.
Internal Candidates
For internal Candidates the HR Partner will initiate the appropriate business process.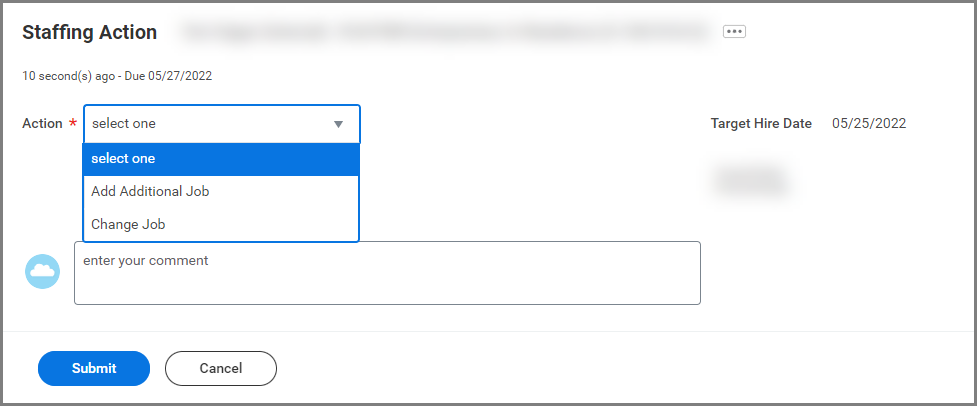
Refer to the Hire job aid on the Workday Help website for how to hire the Candidate in Workday.
External Candidates
For External Candidates the HR Partner will receive the task Revise Employee Hire.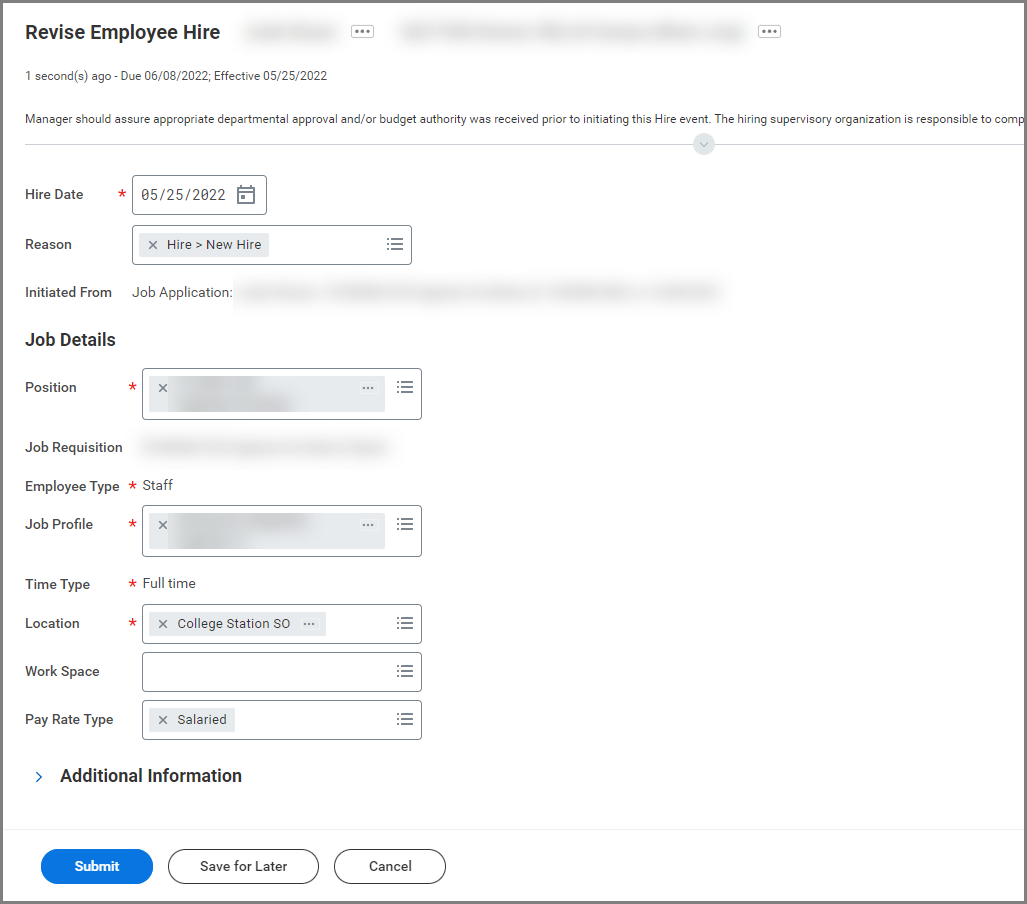
Refer to the Hire job aid on the Workday Help website for how to hire the Candidate in Workday.
This completes the Job Application process.