This job aid outlines the process for a HR Contact, HR Partner, Manager or Management Chain to end an additional job assigned to an Employee.
End Additional Job
Last updated on May 29, 2025
Page Loading...Checking SSO..

Prerequisites
Identify whether the position should be closed. Collect all termination details for the Employee including the reason for termination, eligibility for rehire, termination dates (e.g., effective date of termination, last payment date), and any costing allocation changes to the position restrictions.
Important Information
- Ending an additional job is essentially terminating the Employee from the additional job while leaving the Employee still employed in the primary job.
- You will have the option to select the primary job on the End Job business process when an Employee has a future-dated Switch Primary Job event.
Getting Started
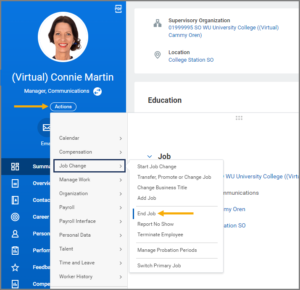
- Navigate to the Employee’s Worker Profile.
- Select Actions > Job Change > End Job.
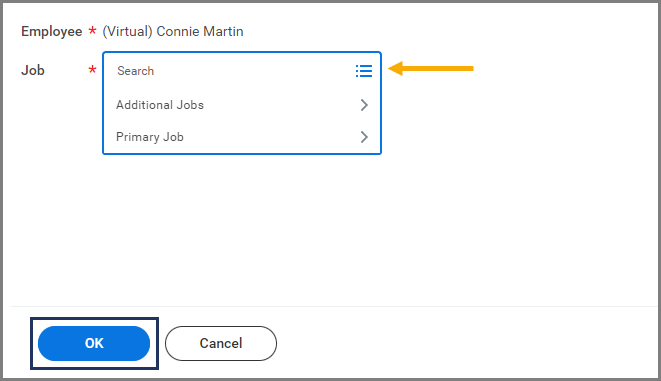
- In the Job field, select the additional job.

- Select OK.
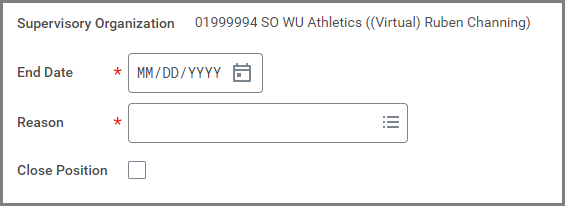
- Add or edit the following information.
- End Date.
- Reason.
- Close Position. If the position should be closed, select this checkbox to close the position from the current Supervisory Organization
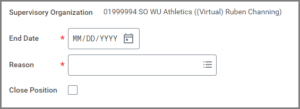

IMPORTANT: The position cannot be reopened after it has been closed. Managers should communicate with their HR Contact if they are unsure of how to mark this field.
- Select the Additional Information drop-down section. Add or edit the information including Last Day of Work and Pay Through Date.

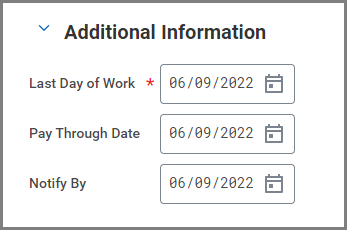
Note: Notify by will not be used.
- Select Submit
Up Next
Routing and Approvals
- The HR Partner or Faculty Partner will receive an inbox task to review the business process.
- The Graduate Studies Partner may receive an inbox task to review the business process.
- The business process may also route to the Department Head for approval, specifically if involuntary.
- If applicable, the HR Contact or HR Partner will receive the inbox task Assign Roles – Change Assignments for Worker to determine if any security roles need to be assigned to another person.
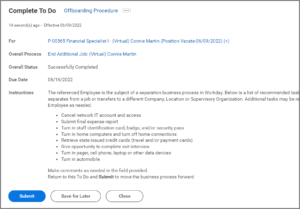
- The HR Contact or HR Partner will receive the To Do Offboarding Procedure to begin the offboarding process for the Worker’s additional job.
- The Security Administrator will receive the To Do Review User-Based Security Group Assignments if the Worker has user-based security group assignments.
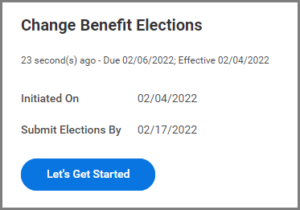
- The Employee may receive an inbox task to Change Benefit Elections if there is an effect on the Employees’ benefits.


Update Position Restrictions Costing Allocation
The Budget Contact will receive the To Do Update Position Restrictions Costing Allocation if the position is left open.
- To view the existing costing allocations on the Position Restrictions, select Assign Costing Allocation.
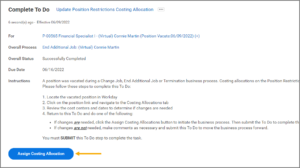
- In the Position Restrictions Costing section, enter the Effective Date and Position Restrictions for which updates may be needed.

- Review the costing allocations. If changes are necessary, close the window and create a new cost set following the guidelines that should always be applied when editing costing allocations. For detailed instructions, see the Assign Costing Allocations job aid and Costing Allocations reference guide available on the Workday Help website.
- Select Submit only if changes are made. Otherwise, select Cancel.


IMPORTANT: Once you have opened the Assign Costing Allocation window to view existing costing allocations, do NOT select Submit unless changes are made. If no changes are needed, select Cancel. (Selecting Submit without making changes will route the business process to Workday Services, delaying the business process.)
- Submit the To Do to complete the business process.
This completes the End Job business process.