This job aid outlines the process for a Recruiting Partner to create questionnaire in Workday which will be used for Recruiting.
Create Questionnaire for Job Requisition
Last updated on June 10, 2024
Page Loading...
Checking SSO...
Important Information
- Primary and Secondary Questionnaires are used to ask Candidates questions during the job application process to meet legislative requirements and collect additional information from the Candidate in regards to qualifications for the job.
- Primary Questionnaires must be attached to all requisitions and contain required questions that are standard for all System members.
- Secondary Questionnaires can be customized to a specific position or job and are not reusable. Only the Recruiting Partner can create and attach them to requisitions.
- On the Job page of Create Job Requisition business process, there is a section titled Questionnaire. In this section, you can link up to 2 questionnaires to the requisition (one primary and one secondary for both the internal and external career site).
- Negative Scoring on Secondary Questionnaire – We recommend members use standardized negative scoring to help facilitate screening of candidates. Recommend using a value of -1,000 for each question response that is deemed a disqualifying response. Candidates with a secondary questionnaire score of less than zero, when negative scoring is used, will be automatically disqualified.
Getting Started
This process involves a series of tasks. The first step is to create the questionnaire. Then you will configure it for your requisition, and then add questions specific to the job listing.
Create and Configure a Questionnaire
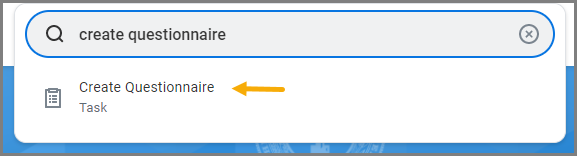
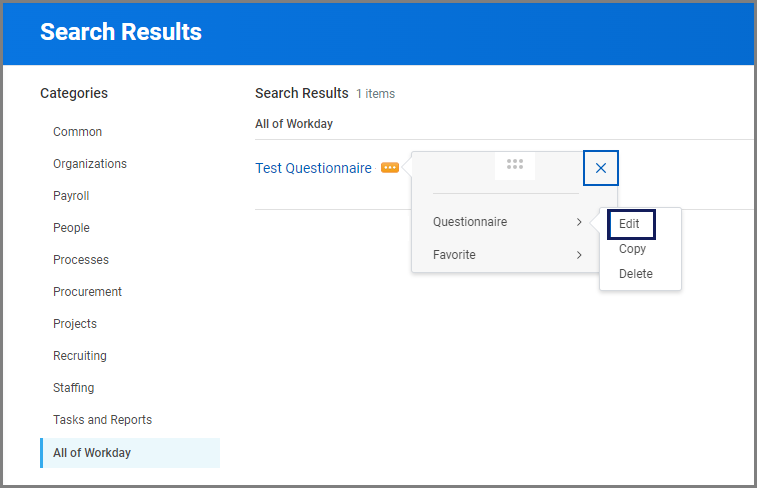
- Search for and select the Create Questionnaire task.

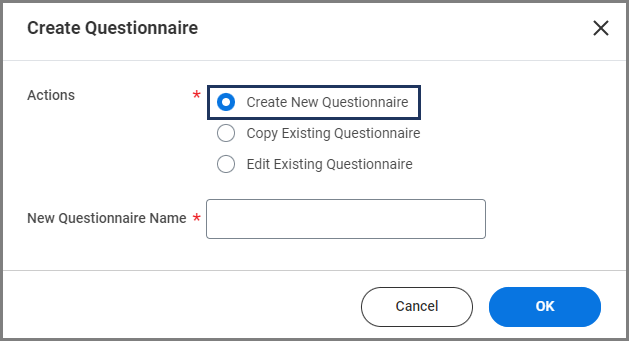
- In the Actions field, select the one of the following:
- Use Create New Questionnaire to create a new questionnaire from scratch. In the New Questionnaire Name field, use the recommended naming convention: MEMBER ABBREVIATION_job code_job profile name (e.g., TAMU_U1234_veteran affairs).

- Use the Copy Existing Questionnaire to make a copy of an existing Questionnaire to which you can then make changes. Then in the New Questionnaire Name field, use the recommended naming convention: MEMBER ABBREVIATION_job code_job profile name (e.g., TAMU_U1234_veteran affairs).
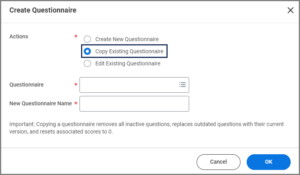
- Use Edit Existing Questionnaire to select an existing Questionnaire to edit without making a copy of it.

- Use Create New Questionnaire to create a new questionnaire from scratch. In the New Questionnaire Name field, use the recommended naming convention: MEMBER ABBREVIATION_job code_job profile name (e.g., TAMU_U1234_veteran affairs).

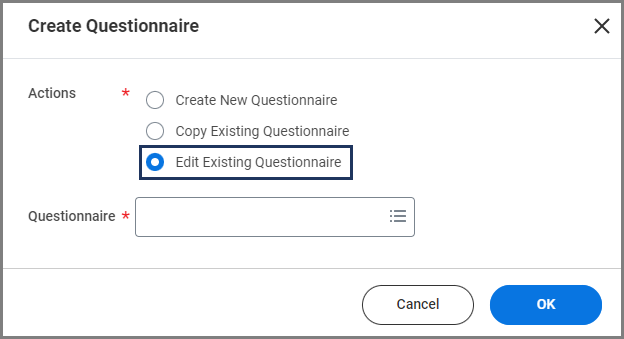
Note: You can only edit a questionnaire if it has not been associated with a job requisition.
- Select OK.
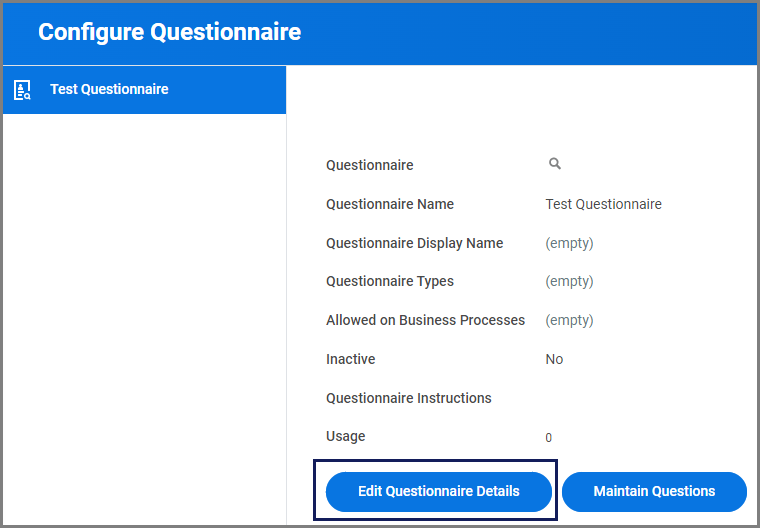
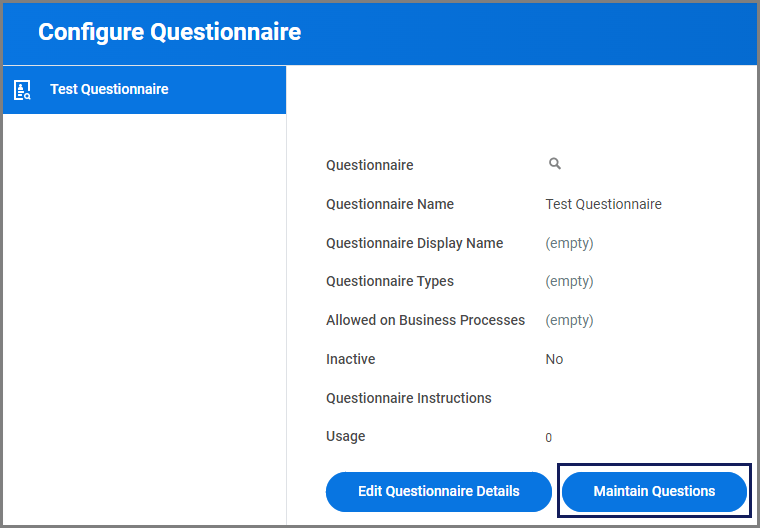
- Select Edit Questionnaire Details.

- Enter information as needed for the questionnaire.
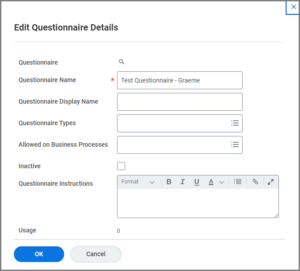

Note: You must select Recruiting for the Questionnaire Types field to see the questionnaire as an option when adding it to your job requisition. Additionally, you can select more than one business process in the Allowed Business Process field.
- Select OK.
Add and Maintain Questions
Once a questionnaire has been created or selected for editing, the next step in the process involves setting up individual questions for the questionnaire. Questions can be created from scratch or pulled from the existing list of questions. Before adding a new question, it is considered best practice to search and make sure the question does not already exist.
Search for Existing Questions
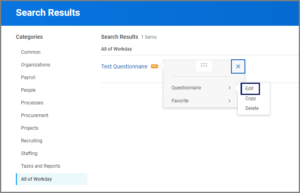
- Access your questionnaire by searching for it and selecting Actions > Questionnaire > Edit.
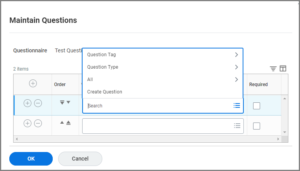
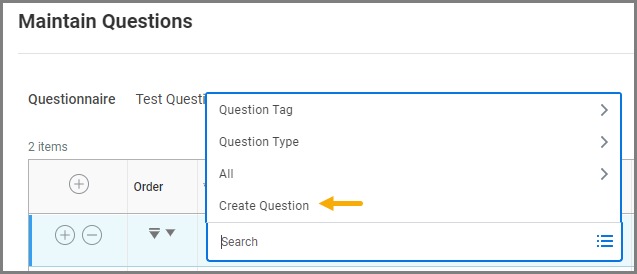
- Select Maintain Questions.

- Select the plus (+) icon to add a row for each question.
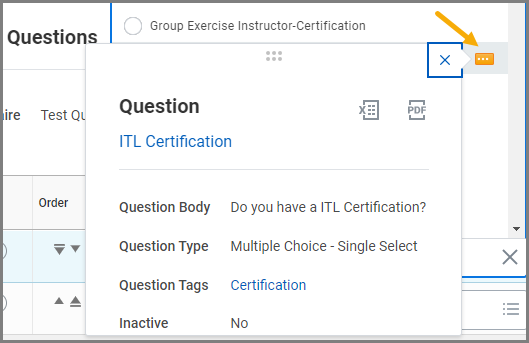
- Select the Prompt icon and enter key terms to search for a question or use the Question Types category to search.
- Select the Related Actions icon to view details about the question.

- Select the question.
- Select the Required check box if the question is required for applicants.

Create Questions
- Select the plus (+) icon to add a row.
- Select the Prompt icon and select Create Question.

- Enter information as needed in the following fields:
- Question Name. Enter a name for the question.Note: Use the recommended naming convention (MEMBER ABBREVIATION_purpose_other info). Example = TAMU_Military Rank
- Question Body. Enter the actual question the Candidate will need to answer.
- Question Type. Select one from the list

- Possible Answer. Select the plus (+) icon to add rows and enter expected answers.
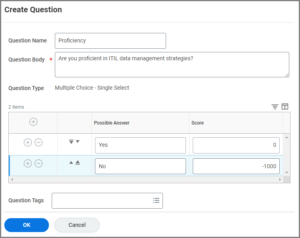
- Question Tags. Select any or leave blank.Note: For Multiple Choice Type questions you can assign scores to help screen Candidates during the recruiting process. Use Multiple Choice Single Select to allow the Candidate to choose only one answer or use Multiple Choice Multi Select to allow more than one answer for the question.
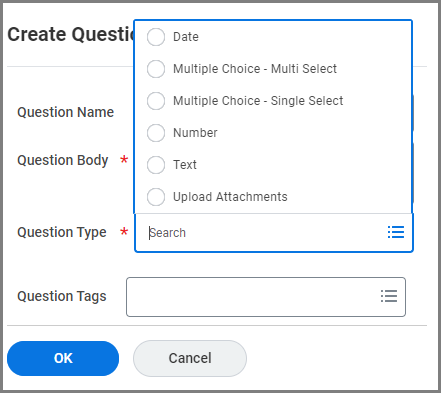

- Select OK.
- Select the Required check box if the question is required for applicants.
- Select OK once all the questions are added and scores are assigned.
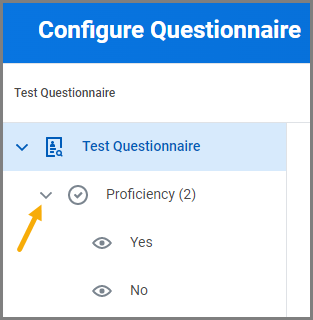
Branch or Nested Questions
Once a question has been added, you can add additional follow up questions based on the user’s answer. These follow up questions are known as branch or nested questions. You may add up to 6 branch questions for each answer.
- Select the arrow next to the questionnaire name.
- Select the arrow next to the question that will have a branch question.
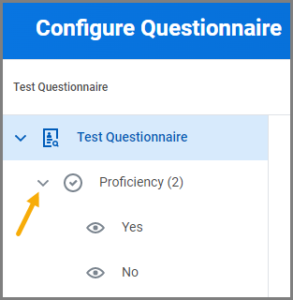
- Select the answer to add a branch question.
- Select Maintain Question Branch.
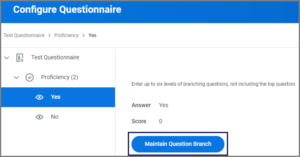
- Follow the same process to add a branch question.
- Select OK.
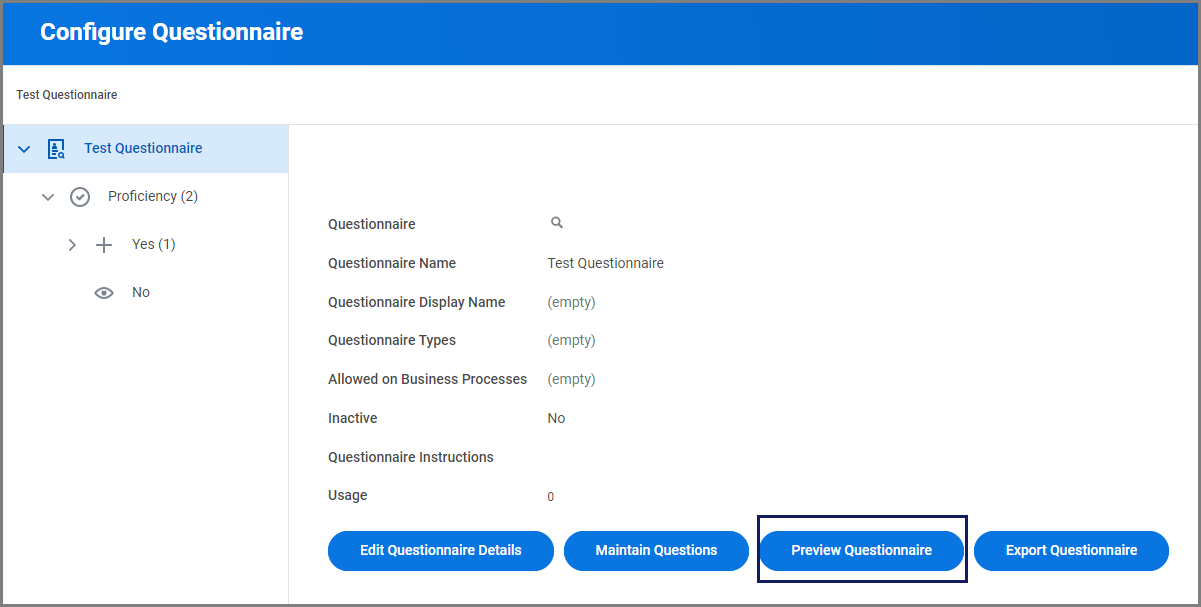
- Select the questionnaire name to return to the Configure Questionnaire screen.
- Select Preview Questionnaire to review and test branch questions.


The Recruiting Partner should then add the Questionnaire to the job requisition.
This completes the Create Questionnaire task.