This job aid outlines the process for an I-9 Partner to complete an Employee’s Form I-9 Section 3.
Complete Form I-9 Section 3 in Workday
Last updated on January 13, 2023
Page Loading...Checking SSO..

Prerequisites
The Employee’s Form I-9 was initiated in Workday during the time period December 6, 2017 through July 31, 2018.
Important Information
- Forms I-9 previously completed in Workday remain in Workday.
- If an Employee is a rehire, the Hire process will have a To Do Complete Form I-9 Section 3 step.
- If an Employee’s date of birth, citizenship, or visa status is changed, the I-9 Partner will receive the To Do: Complete Form I-9 Section 3. This will require the I-9 Partner to verify the location of the Employee’s Form I-9 to determine whether action should be taken in Guardian or in Workday
- To view an Employee’s Form I-9 in Workday, navigate to the Worker Profile and select Actions > Personal Data > View Form I-9. The View Form I-9 link will only be available for Employee’s whose Form I-9 is housed is Workday.
- Users should always follow applicable federal regulations concerning Form I-9 and E-Verify. All A&M System Members are E-Verify Employers.
Getting Started
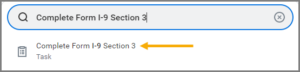
- Search for Complete Form I-9 Section 3 in the Search Bar and select it.
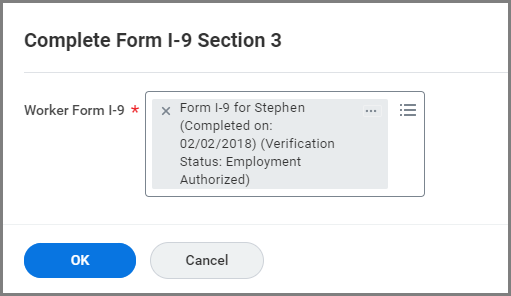
- Select the Worker Form I-9 whose Form I-9 Section 3 you want to complete.

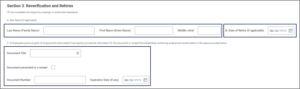
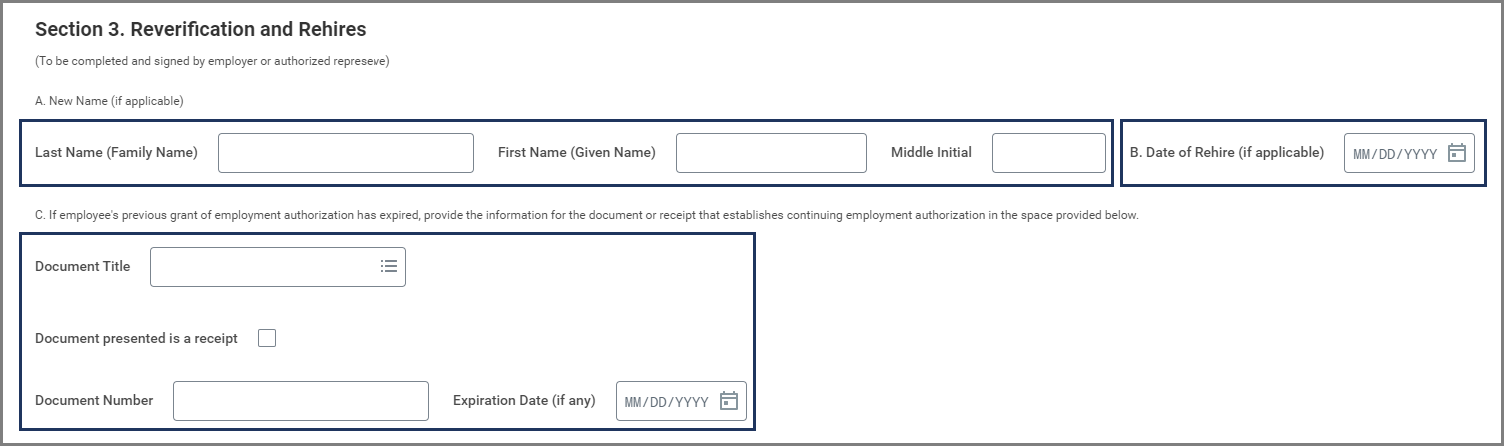
- Under section A, complete the following fields, if applicable: Last Name (Family Name), First Name (Given Name) and Middle Initial.
- Under section B, enter the Date of Rehire, if applicable.
- Under section C, complete the following fields, if applicable: Document Title, Document Number, and Expiration Date. Select the Document presented is a receipt checkbox, if applicable.
- Select the I Agree checkbox and enter your name in the Name of Employer or Authorized Representative field.

- Enter any comments, as needed.
- Select Submit.

This completes the Complete Form I-9 Section 3 business process.