This job aid describes how to Add Retiree Status to an Employee after the Termination business process has been initiated and how to initiate a Change Benefits Event when the termination reason is Retirement.
Add Retiree Status (Termination)
Last updated on December 12, 2024
Page Loading...
Checking SSO...
Prerequisites
- The Termination business process has been initiated with a Primary Reason of Voluntary > Retirement.
- The Employee should have met with their member’s human resources office to confirm TAMUS retirement eligibility.
Important Information
- The Effective Date of Retirement should be the day immediately following the Termination date in order for benefits to be available the following month.
- Add Retiree Status can be a stand-alone business process from a terminated Worker’s related actions initiated by the HR Partner or Benefits Partner.
- The Organization for Billing Other ID maintains the identification of the Supervisory Organization from which the employee retired in a format that will drive reporting requirements to legacy systems to assist in determining the organization that will pay the SGIP.
- TAMUS continues to pay a portion of a former-employee’s State Group Insurance Program (SGIP) insurance premium after retirement. The Retiree Percent Local Other ID will maintain a percentage amount representing what portion of the SGIP is paid from local funds versus state funds and will drive reporting requirements to legacy systems.
- The Retiree Retirement Program Other ID maintains the type of retirement (TRS, ORP, or ERS) and is used for billing insurance premiums.
Getting Started
Once other security roles have completed actions during Termination, the Benefits Partner will receive the Inbox Action Add Retiree Status.
- Open the Action Add Retiree Status for the Employee in your inbox.
- Enter the following information:
- Effective Date. Enter the effective date of retirement as the day immediately following the Termination date.
- Reason. Select one of the following:
- Involuntary > Disability Retirement – limited
- Involuntary > Disability Retirement – unlimited
- Voluntary > Elected to retire
- Retiree Organization. Select the Employee’s primary company.
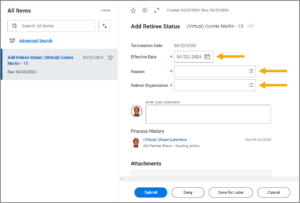

- Enter any comments, if needed.
- Select Submit.
Navigate to the Up Next tab for the next steps in the process.
Up Next
To Do: Update Retirement Other IDs
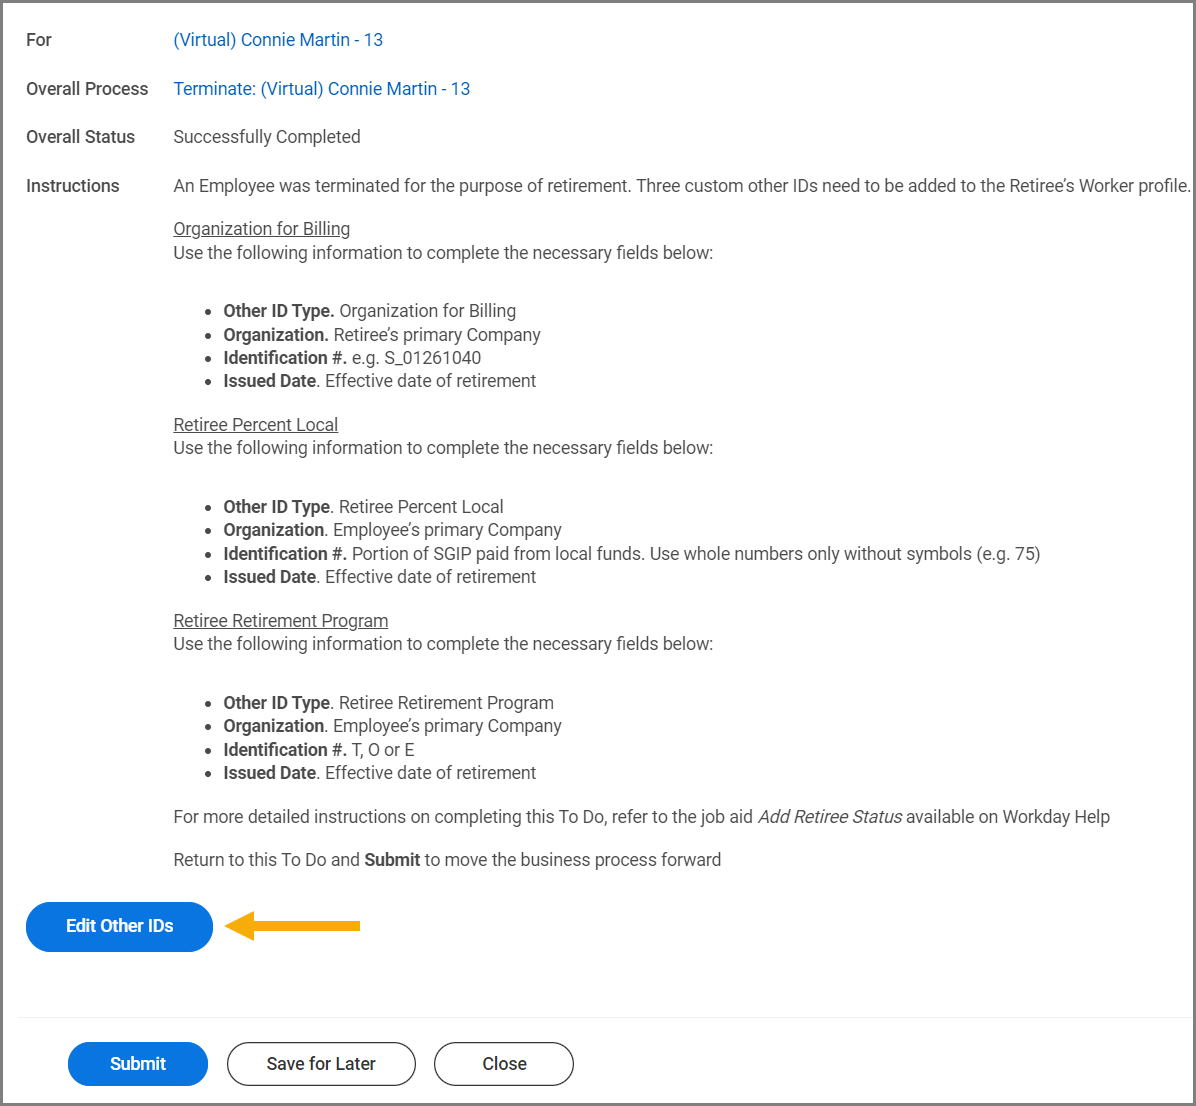
The Benefits Partner will receive a To Do to add three Other IDs for the Retiree using the Edit Other IDs business process.
Note: See the Important Information tab for information about the three Other IDs that will be added.
- From your Inbox, open the To Do Update Retirement Other IDs.
- Select the Edit Other IDs button.

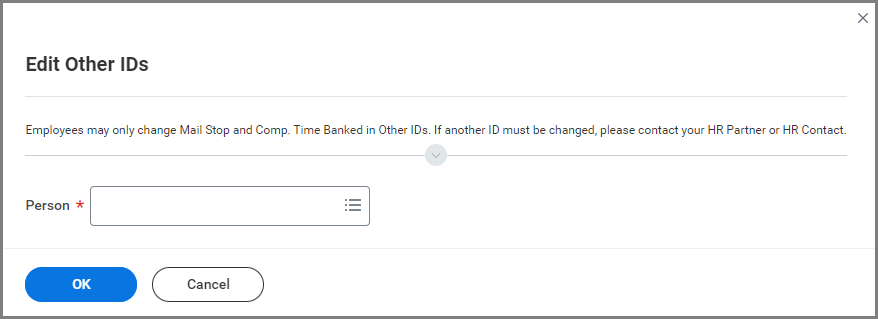
Note: Alternatively, you can do this by navigating to the Worker’s Profile and selecting Actions > Personal Data > Edit Other IDs.
- Enter the Employee’s UIN or name in the Person field and select OK.

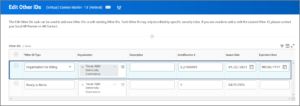
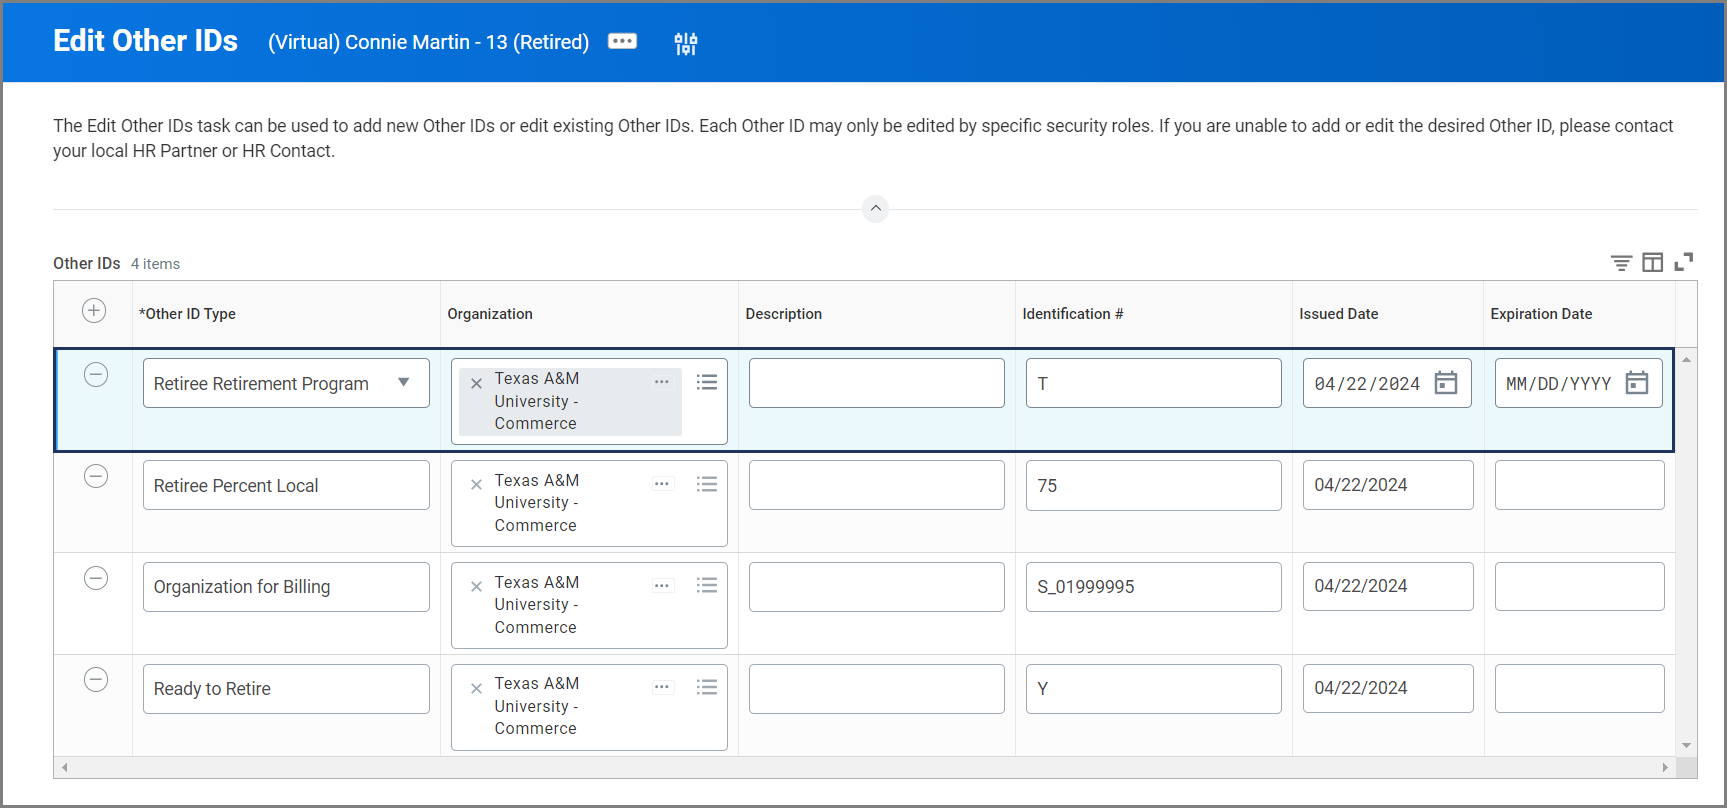
On the Edit Other IDs page, you will enter three additional Other IDs: Organization for Billing, Retiree Percent Local, and Retiree Retirement Program. Follow the directions below for each Other ID.
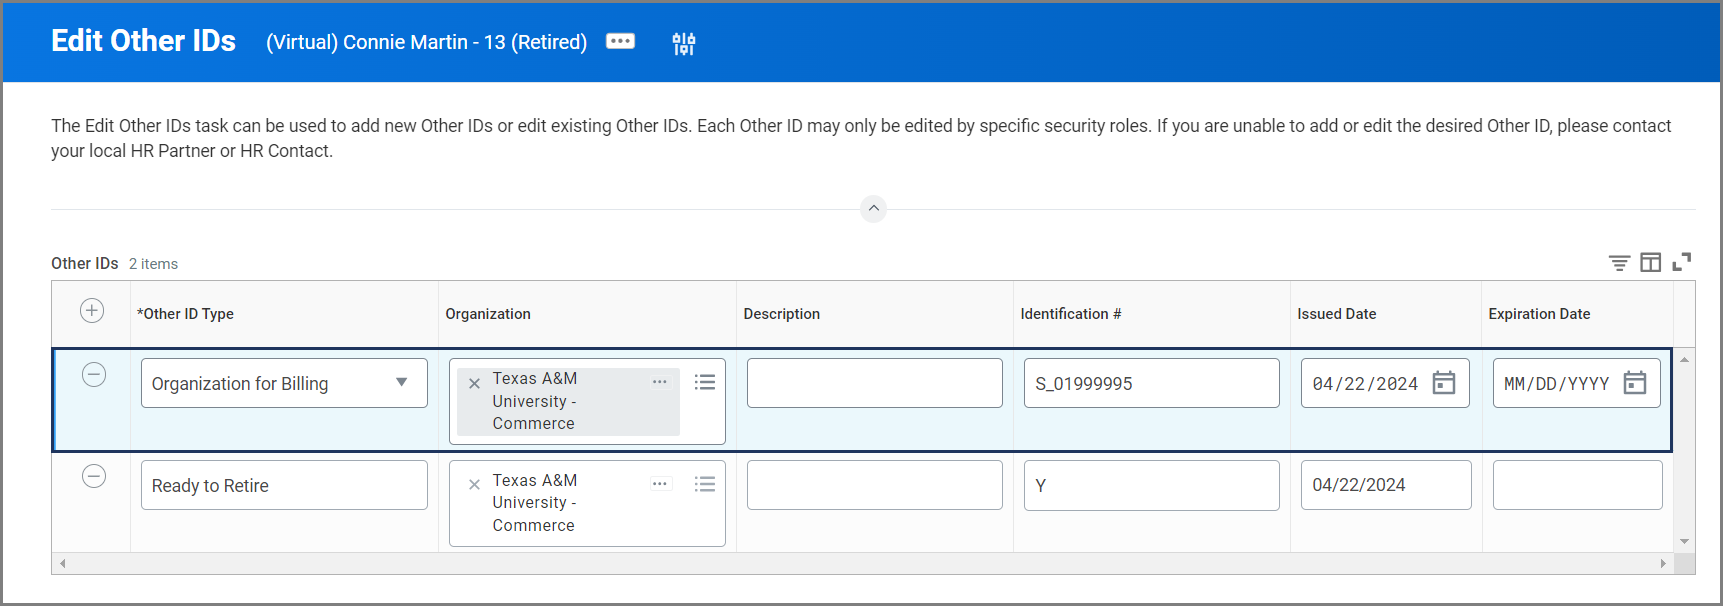
Organization for Billing
- On the Edit Other IDs page, select the Plus Sign (+) icon to add a new row and enter the following information.
- Other ID Type. Select Organization for Billing from the drop-down menu.
- Organization. Select the Employee’s primary Company.
- Description. Enter if needed.
- Identification #. This should be in the following format: M_YYZZZZZZ . Use these guidelines:
- M= Work Station
- YY = Adloc
- ZZZZZZ = Department number
- Issued Date. Enter the retirement date.
- Expiration Date. Leave blank.
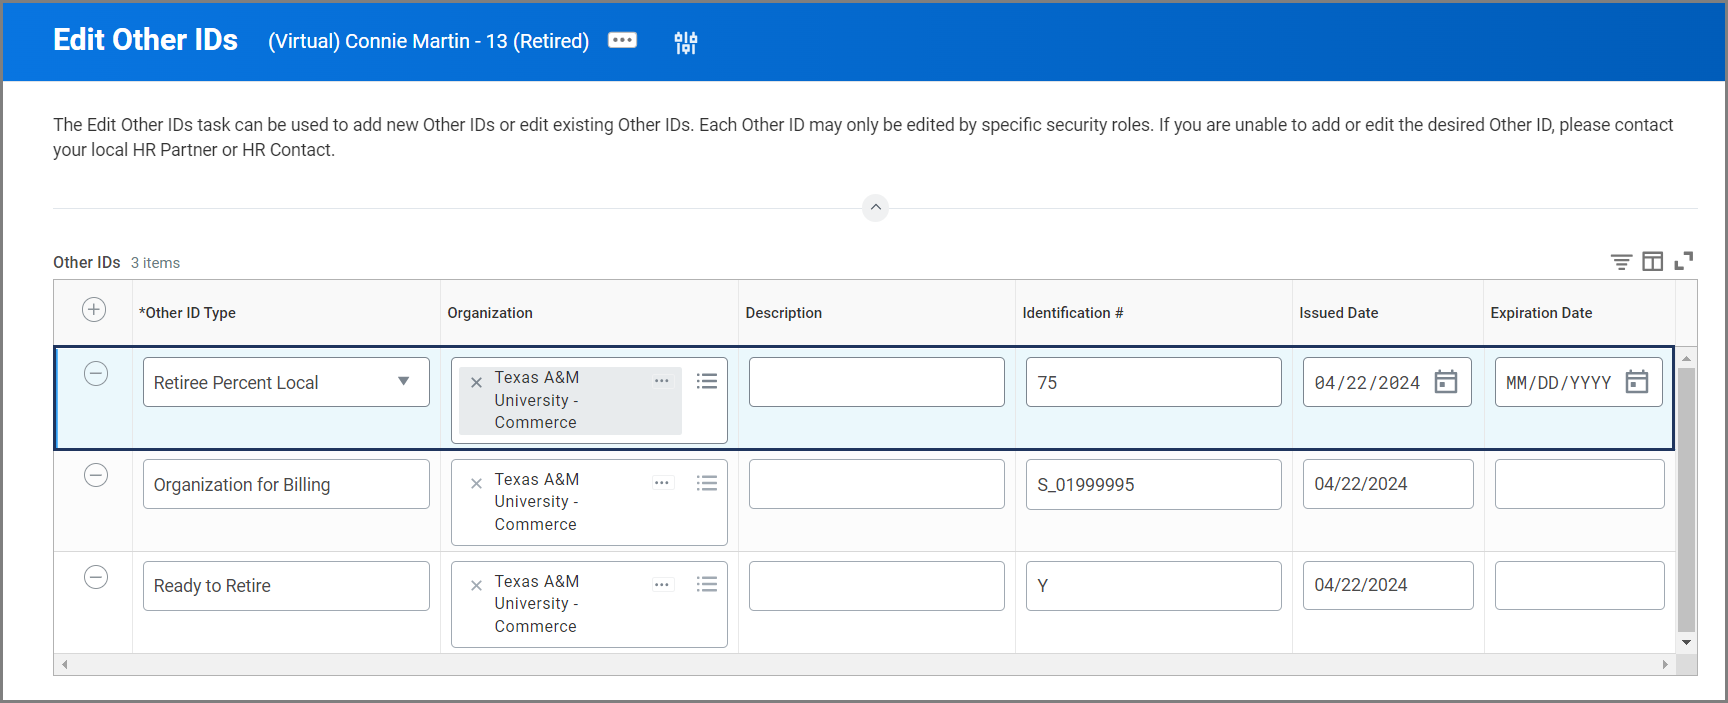
Retiree Percent Local
- On the Edit Other IDs page, select the Plus Sign (+) icon to add a new row and enter the following information.
- Other ID Type. Select Retiree Percent Local from the drop-down menu.
- Organization. Select the Employee’s primary Company.
- Description. Enter if needed.
- Identification #. Enter the amount that represents the portion of the SGIP paid from local funds versus state funds. Use whole numbers without a “%” sign (e.g., 75% would be entered as “75”).
- Issued Date. Enter the Retirement Date.
- Expiration Date. Leave blank.
Retiree Retirement Program
- On the Edit Other IDs page, select the Plus Sign (+) icon to add a new row and enter the following information.
- Other ID Type. Select Retiree Retirement Program from the drop-down menu
- Organization. Select the Employee’s primary Company.
- Description. Enter if needed.
- Identification #. Enter T, O or E, using the following guidelines:
- T = TRS
- O = ORP
- E = ERS
- Issued Date. Enter the Retirement Date.
- Expiration Date. Leave blank.
- Enter any comments, if needed.
- Select Submit at the bottom of the page.
- Return to the To Do Update Retirement Other IDs in your Inbox and select Submit.
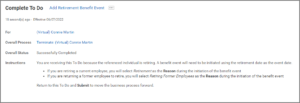
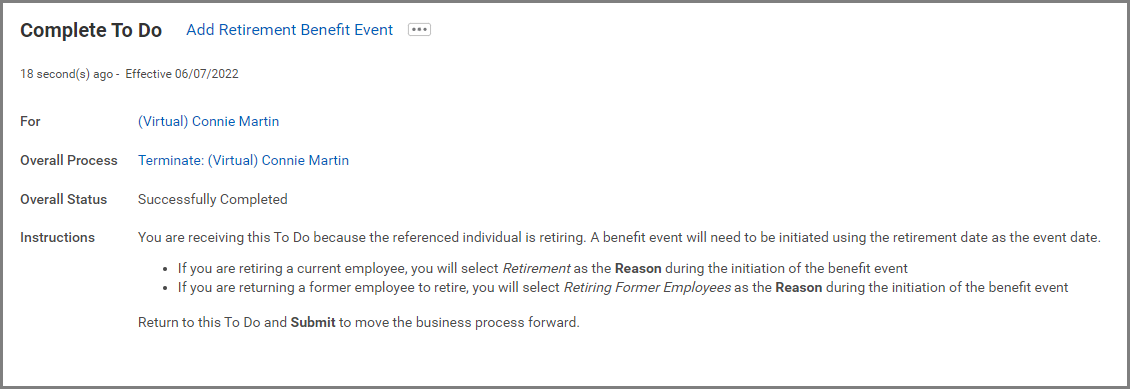
To Do: Add Retirement Benefit Event
The Benefits Partner will receive a To Do step to create a Retirement Benefit Event, using the retirement date as the event date.
Note: The Retirement Benefit Event may have already been completed during the Ready to Retire process. Confirm that the benefit event has not been completed before continuing.
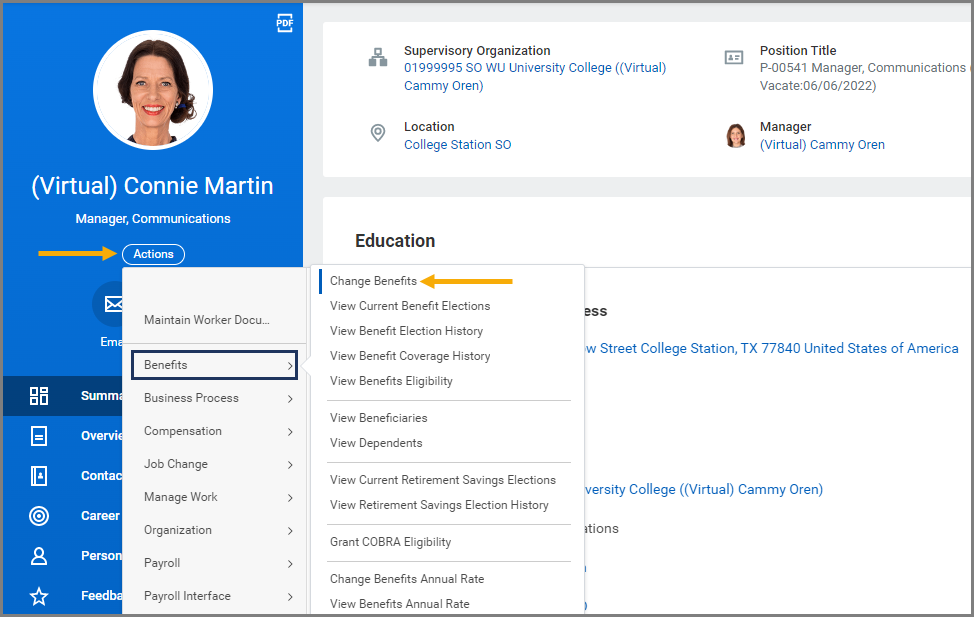
- From your inbox, select the To Do Add Retirement Benefit Event.
- Navigate to the Retiree’s Worker Profile. Select Actions > Benefits > Change Benefits.

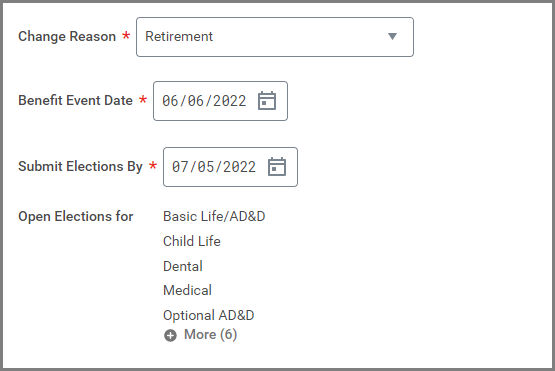
- Fill in the following information:
- Change Reason. Select Retirement.
- Benefit Event Date. Enter the Retirement Date.
- Submit Elections By. This field will be automatically populated.
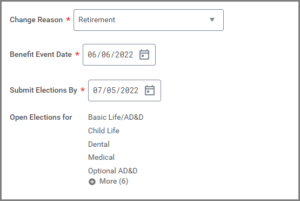
- Select Submit.
- Return to the To Do Add Retirement Benefit Event in your inbox and select Submit.
Up Next
The business process will then route to the Retiree to change their benefits elections. The Retiree will also receive a notification to elect how they would prefer to receive retirement and insurance information from the A&M System via email. The Benefits Partner can make this election on behalf of the Retiree by referring to the job aid Update Retiree Electronic Communication.
This completes the Add Retiree Status subprocess of Termination.