This job aid outlines the activities for a Benefits Partner to prepare an Employee’s record in Workday in preparation for their upcoming retirement.
Ready to Retire
Last updated on June 6, 2024
Page Loading...Checking SSO..

Prerequisites
Be sure to meet with your Employee to ensure eligibility prior to initiating this process.
Important Information
- The Ready to Retire Other ID should NOT be entered for employees completing the Return to Retire business process.
- The Retirement Date should be the first of the month and the first day the Retiree benefits will begin.
WARNING: There may be timing issues with Medicare Part B enrollment to begin immediately upon retirement. If this is the case, during the Benefit Event, the Employee should stay in A&M Care for the Retirement Event. You will then help the Retiree initiate a Medical Change Only benefit event to switch to the 65+ plan when they are eligible
Getting Started
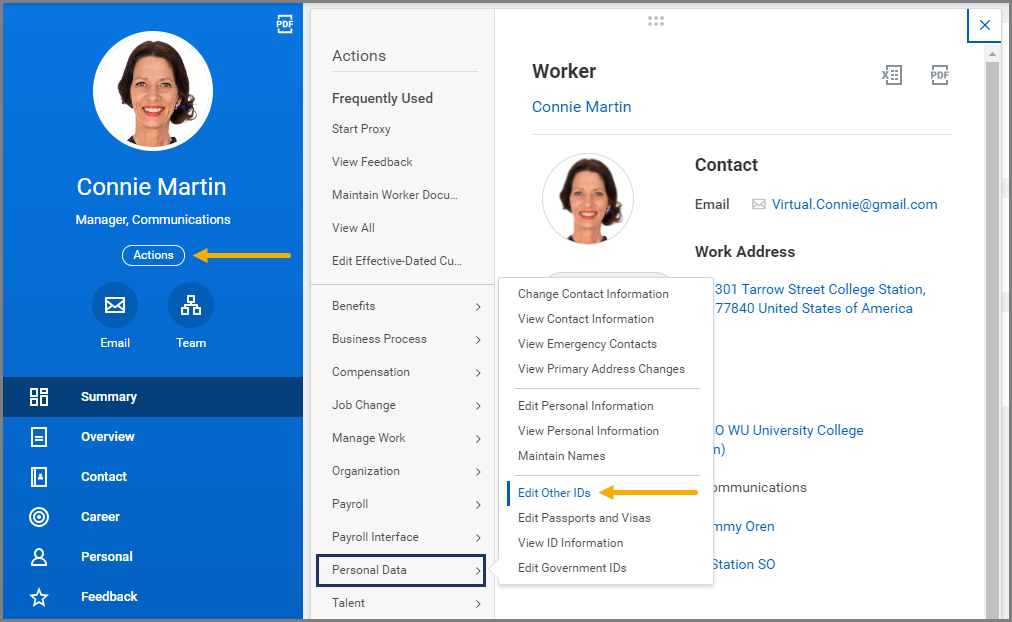
Add the Ready to Retire Other ID
- Navigate to the Employee’s Worker Profile and select the Actions button.
- From the Employee’s related actions, select Personal Data > Edit Other IDs.

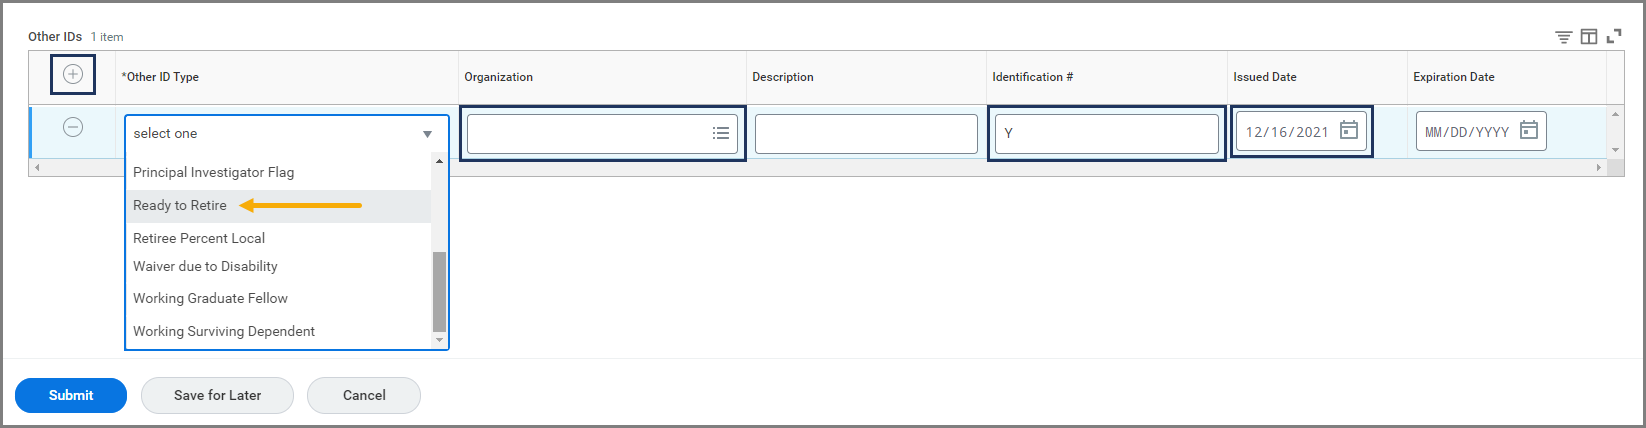
- Select the Plus Sign (+) icon to add a row for the ID.
- In the new row, enter the following information.
- Other ID Type: Select Ready to Retire from the drop-down menu.
- Organization: Select the Employee’s primary Company.
- Description: Enter if needed.
- Identification #. Enter the letter Y.
- Issued Date: Enter the date the Employee plans (and is eligible) to retire.
- Expiration Date: Leave blank.
- Select Submit.
Additional Other IDs
While editing Other IDs, you may also add the three additional IDs that are associated with retirement: Organization for Billing, Retiree Percent Local and Retiree Retirement Program.

Note: These three Other IDs must be entered at the time that the record goes for billing so that the necessary information is included. You can add these now or after the Termination business process completes. Refer to the job aid Add Retiree Status.
IMPORTANT: If you edit these Other IDs now, you will still receive To Dos with instructions to edit them after the Termination business process is completed in the future. Simply submit the To Dos, and the business process moves forward.
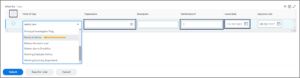
Create the Benefit Event
You now need to initiate the benefit event for the Employee.
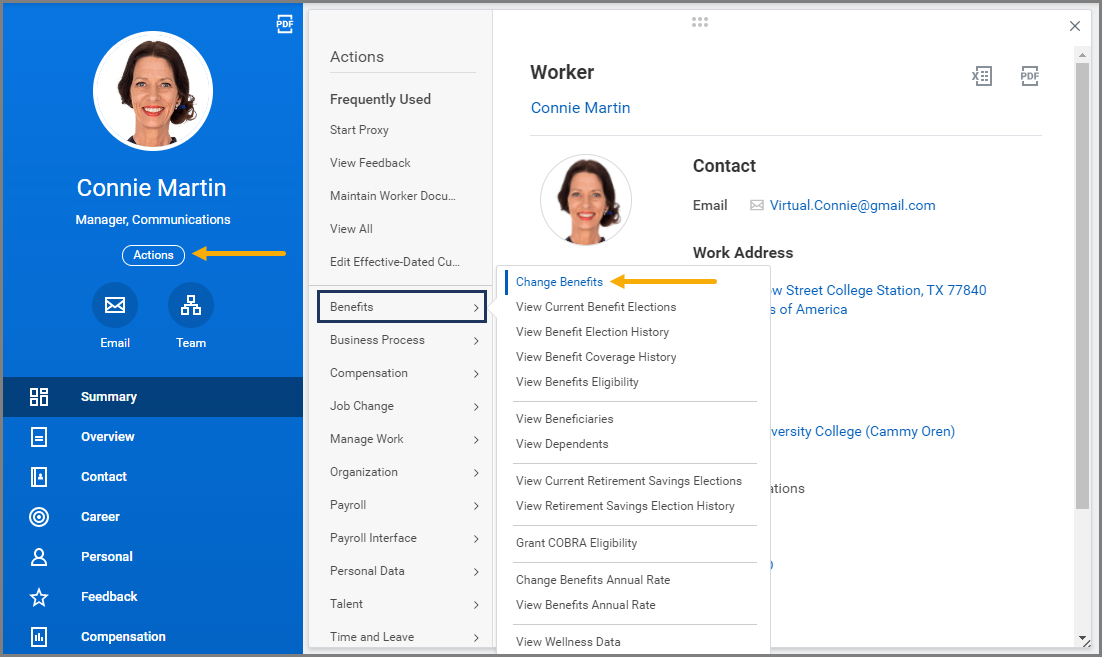
- From the Employee’s Actions menu select Benefits > Change Benefits.
- On the Change Benefits page, read the Instructions on the right-hand side of the page. On the left-hand side of the page, fill-in the following.
- Change Reason: Select Retirement.
- Benefit Event Date: Enter the Retirement Date.
- Submit Elections By: This will default to one month after the Benefit Event Date. Leave as is.
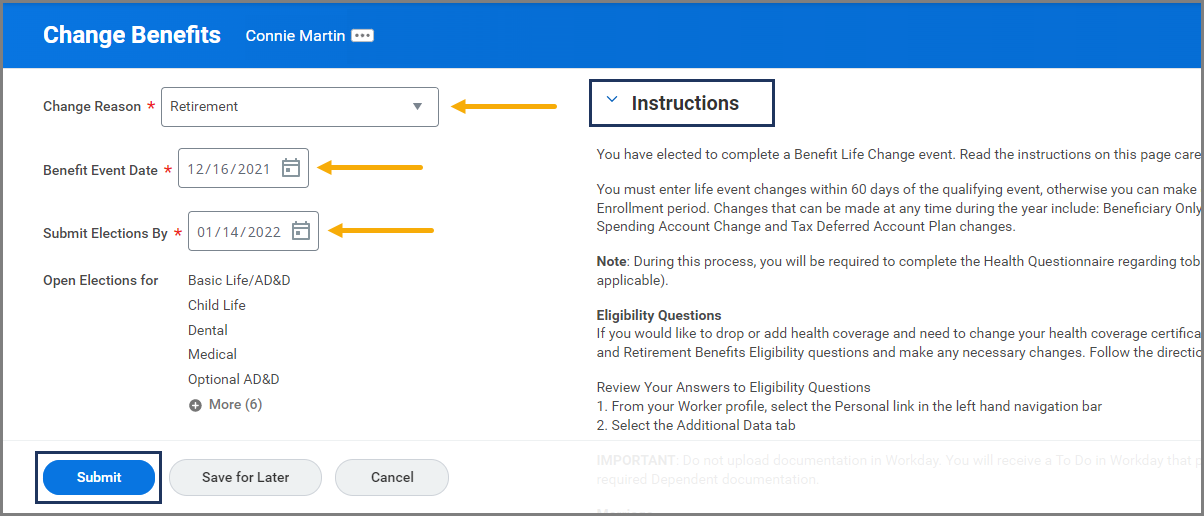
IMPORTANT: Benefit Event Date is the same as the Issued Date you entered for the Other ID Ready to Retire (see above) and the Add Retiree Status date.
- Select Submit.
Up Next
The benefit event routes to the Employee to complete. Once submitted, it will be processed automatically for billing. If manual work is needed, you should receive a To Do step.
The Employee receives the To Do Update Electronic Communication Flag to select the Retiree’s preferred method to receive information from the A&M System about retirement and insurance benefits. The Benefits Partner can make this election on behalf of the Employee by referring to the job aid Update Retiree Electronic Communication (Benefits Partner).
This completes the Ready to Retire process.