This job aid outlines the process for Absence Partners and Managers to place an Employee on a leave of absence.
Place Worker on Leave
Page Loading...Checking SSO..

Important Information
- A leave of absence should be used when the absence is full-time, continuous, unpaid and for a duration of 30 days or more. This is an unpaid, job-protected leave status.
- If an Employee has any eligible paid time off, a leave of absence should not be processed. Please submit a time off request instead.
- If the Estimated Last Day of Absence arrives and the Request Return from Leave business process has not been initiated, the Employee’s primary manager will receive the To Do: Return Employee from Leave of Absence. If the Employee has not returned to work, the Manager should wait until the Employee returns to initiate the Return Worker from Leave business process and then submit the To Do.
WARNING: If an Employee will not return to work, you should complete the Return Worker from Leave business process before Termination is initiated to avoid downstream corrections that require administrative support and additional work. See the Return Worker from Leave job aid for instructions.
Getting Started
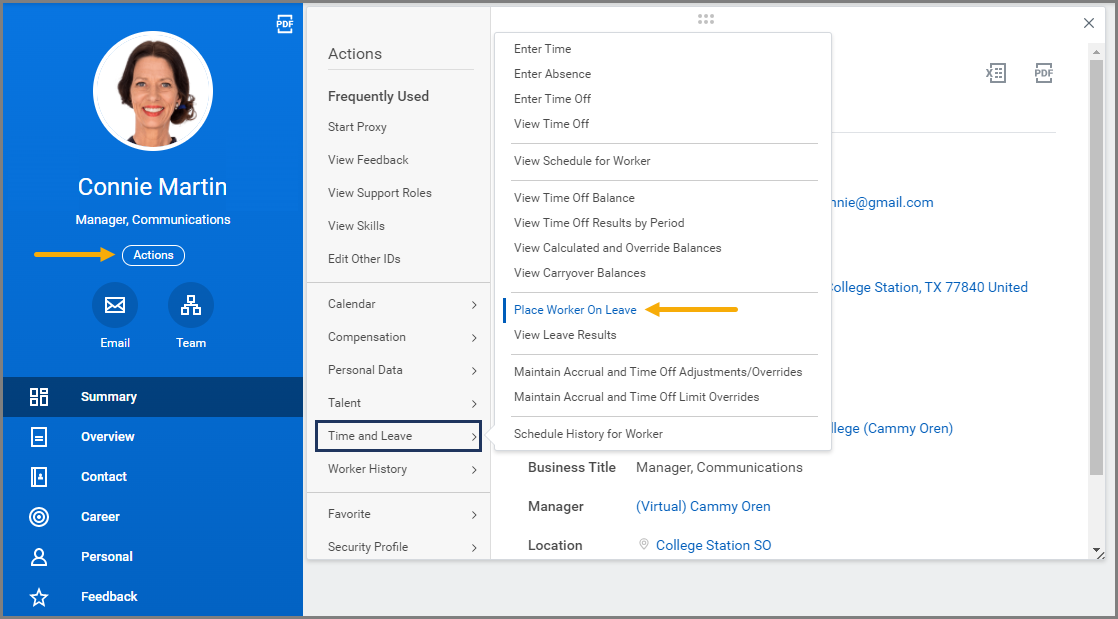
- Navigate to the Employee’s Worker Profile and select Actions > Time and Leave > Place Worker on Leave.
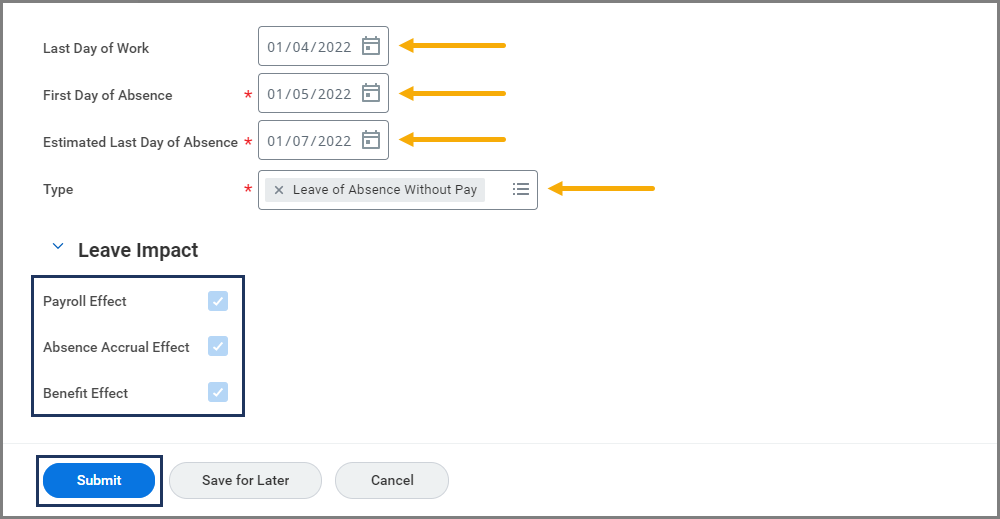
- On the Place Worker on Leave page, fill in the following fields:
- Last Day of Work. This field should be auto-populated based on the First Day of Absence. If applicable, select a different date.
- First Day of Absence
- Estimated Last Day of Absence. This is only an estimate. When this day arrives, the manager will receive a To Do to acknowledge if the Employee has returned to work.
- Type
- Based on the Type selected, Additional Fields may appear. Fill in these fields listed as needed.
- Review the Leave Impacts which will appear based on the Type selected. These are effects that will impact various areas and cannot be edited.
Note: Do not upload files under Support Documents at this time. Medical documentation and other sensitive information must be kept separate from the Employee’s Workday profile.
- Select Submit.
The business process will route to either the Manager or Absence partner for approval, depending on who initiated the business process.
Navigate to the Up Next tab for the next steps in the process.
Up Next
Change Benefit Elections (Employee)
The Employee will receive the Action item: Change Benefit Elections, if applicable. Select Let’s Get Started and update the information presented to you.
Note: This event will default coverages to waive. The Employee must complete this event to continue coverages at full cost to the Employee.
To Do: Billing Review Required (Benefits Partner)
The Benefits Partner will receive the To Do: Billing Review Required.
Manage Business Processes for Worker (Business Process Administrator)
The Business Process Administrator will receive the Action: Manage Business Processes for Worker to address any business processes that are not yet complete and are awaiting action by the Employee on leave.
Assign Roles to Worker (HR Partner)
The HR Partner will receive the Action: Assign Roles to Worker to add security roles to individuals who may need to do the work of the Employee who is on leave.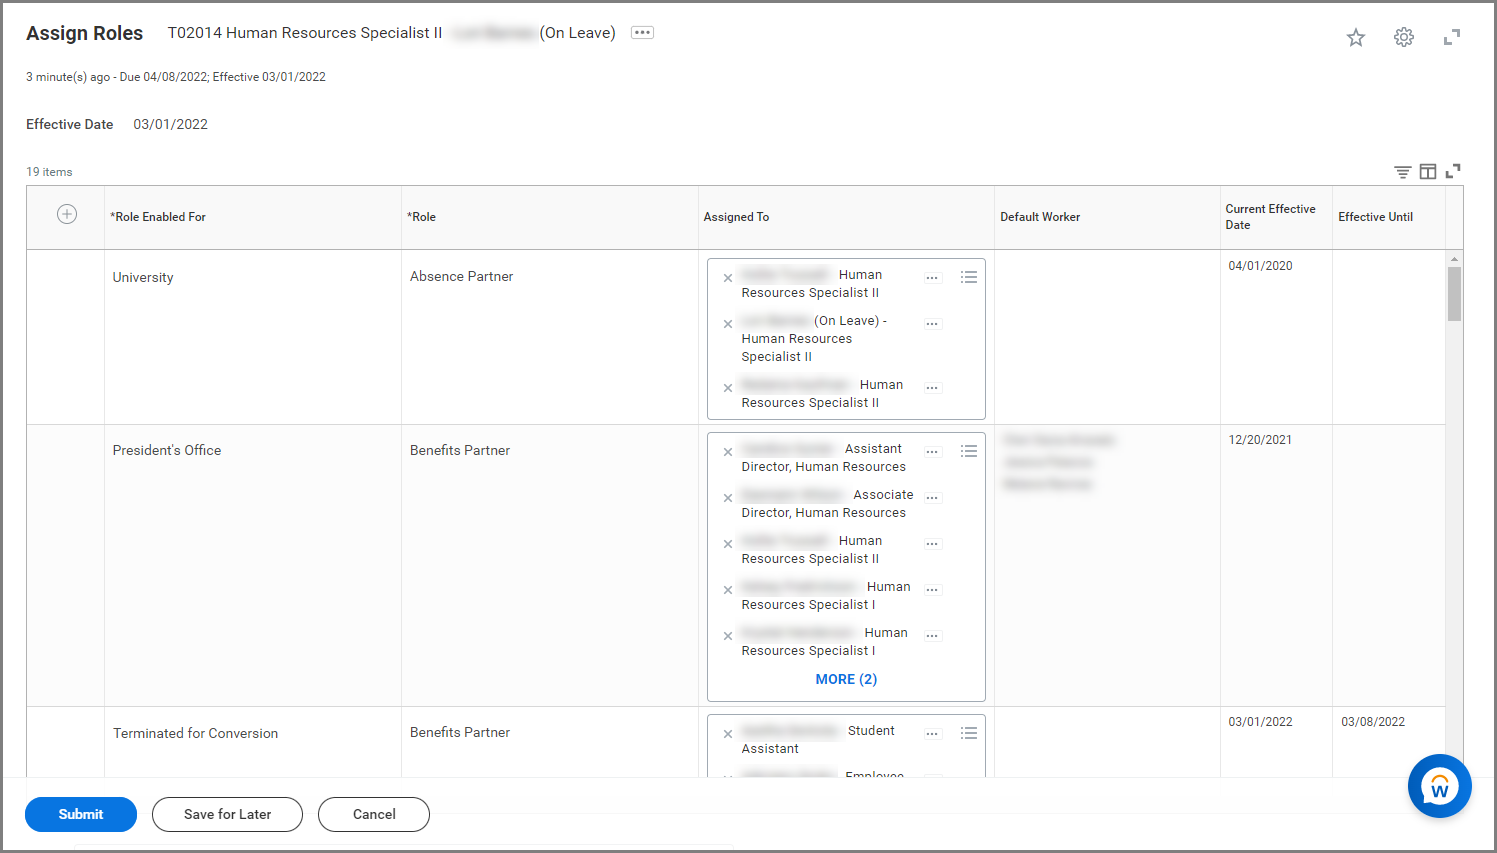
Employee Tasks
The Employee who has security roles other than Employee as Self will receive the Action: Request Delegation Change to manage delegations for business processes while on leave.
- To add a delegation, select the Plus Sign (+) icon under New Delegation.
- Complete the following fields:
- Begin Date. This is the date that the delegation will begin.
- End Date. This is the date the delegation will end. If you do not know the End Date, you can leave this blank. However, delegations can only last up to twelve months.
- Delegate. This is the individual to which you want to delegate the business process to as of the Begin Date.
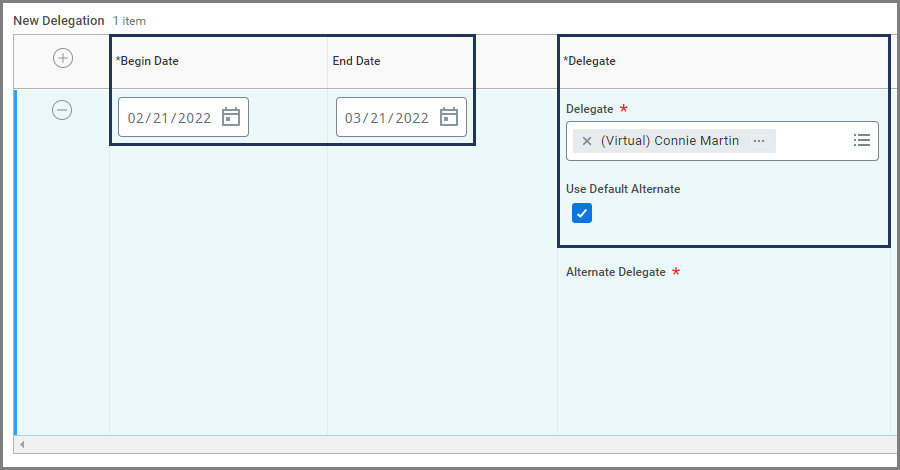
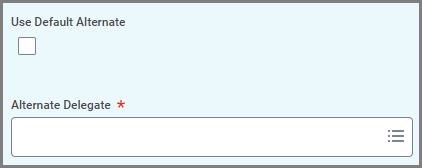
Note: When the Delegate is excluded from the task, Workday will route the delegated task to your Default Alternate (your Primary Manager). You can choose your own Alternate Delegate by unchecking the Use Default Alternate box and selecting an Alternate Delegate.
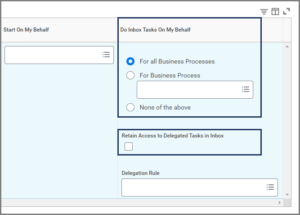
- Under the Do Inbox Tasks On My Behalf section, select one of the following options:
- For all Business Processes. All business processes with steps that would route to you will route to your Delegate.
- For Business Process. Only steps in the specific business process you select will route to your Delegate.
- None of the Above. Nothing will route to the Delegate.
- Check the Retain Access to Delegated Tasks in Inbox checkbox if you want to continue to have the steps routed to you as well as your Delegate. Otherwise, leave this unchecked.

- Leave the Delegation Rule field blank.
- Enter any comments, as needed.
- Upload supporting documentation, as needed.
- Select Submit.
This completes the Place Worker on Leave business process.