This job aid outlines the the process for an Employee to verify their U.S. Social Security Number (SSN) and edit Government IDs in Workday. Government IDs include National IDs, U.S. Social Security Numbers or Qatar ID Card numbers, and additional Government IDs such as Resident Citizen of the United States ID cards (I-179) and Driver’s License.
Manage Your SSN and Other Government IDs
Page Loading...Checking SSO..

Important Information
- Employees should be prepared to provide documented proof of changes for verification purposes.
- If you continually receive an error when trying to verify your social security number, contact your local HR Office.
- Employees who do not already have a social security number entered in Workday receive a task during onboarding to enter this number during the onboarding process.
Getting Started
Verifying Your Social Security Number
The Verify National ID business process allows you to make sure that the social security number entered in Workday is correct.
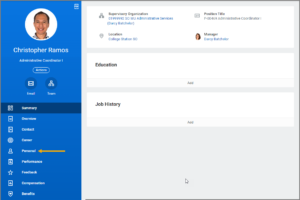
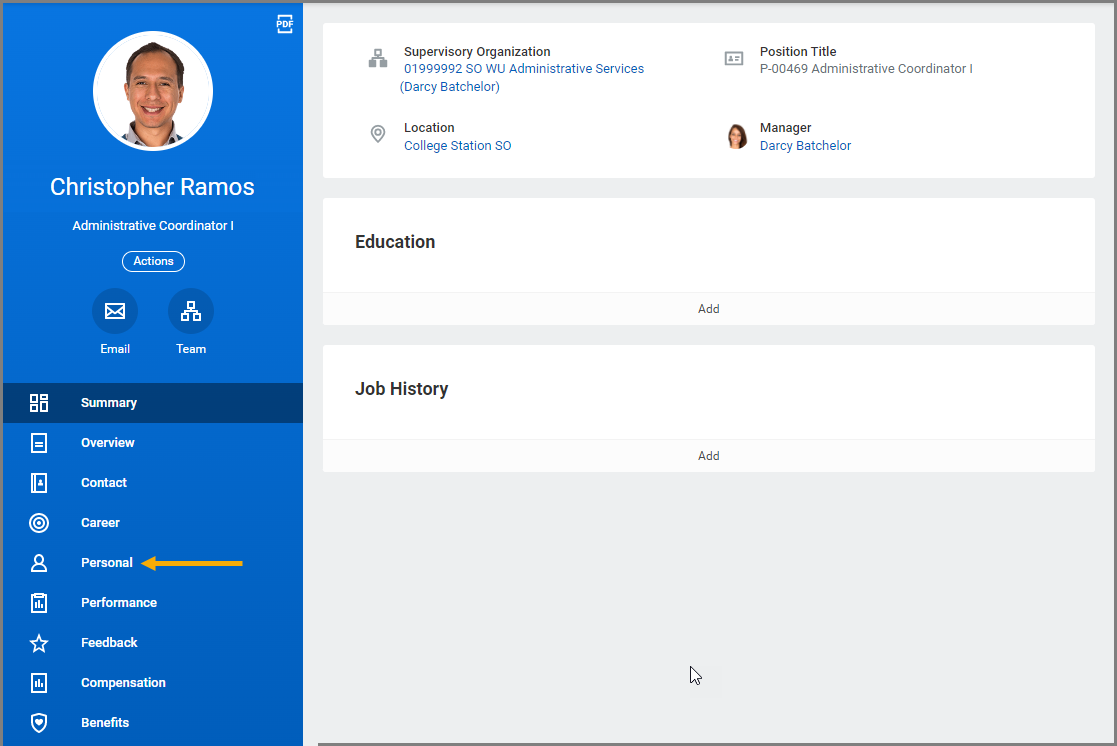
- Navigate to your Worker Profile and select Personal on the left-hand menu.
- Under the IDs tab, select the Verify National ID button.
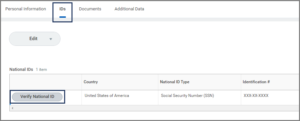
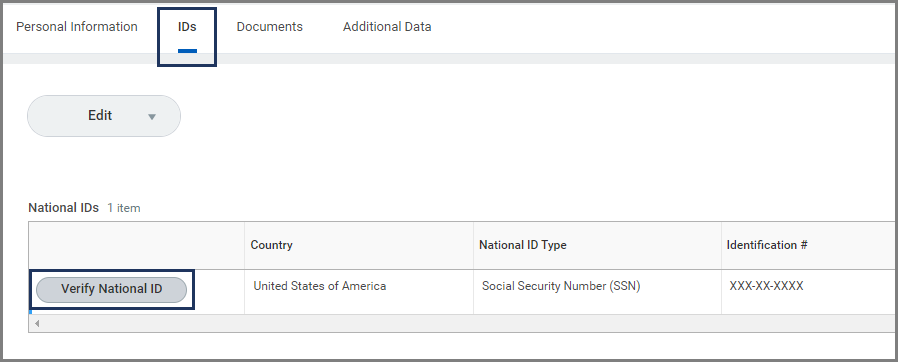
Note: All social security numbers are masked for security purposes. Only individuals with appropriate security access to your account can view the number.
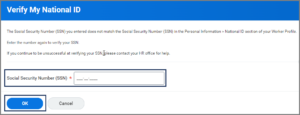
- Enter your social security number in the field provided and select OK.
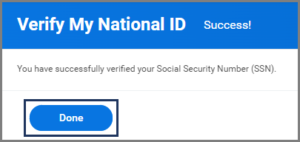
- If the number you entered matches what is currently in Workday, you will receive a confirmation message. Select Done.
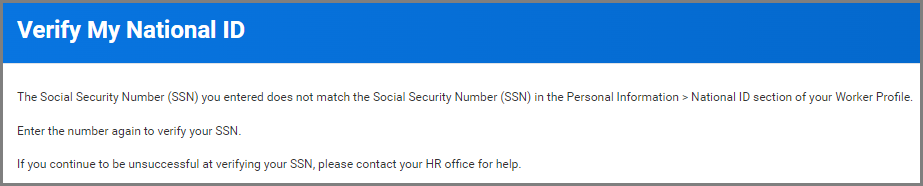
- If you enter an SSN that does not match the information in Workday, you will instead receive an error message. Try to enter the SSN again. If you still receive an error message, it is possible the number on file is incorrect. Check with your local HR department for assistance (you may need to edit your social security number in Workday).

- If the number you entered matches what is currently in Workday, you will receive a confirmation message. Select Done.
- Back on the IDs tab, scroll to the right and you will see your name and the date you verified your SSN.


Making Changes to IDs
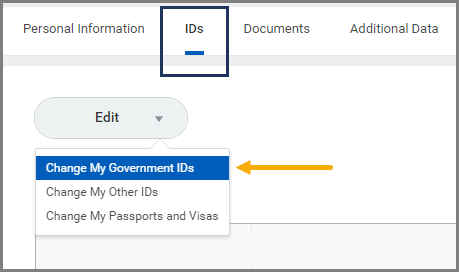
Changes can be made to your Government IDs from your Worker profile using the Change My Government IDs task.
- Navigate to your Worker Profile and select Personal on the left-hand menu.
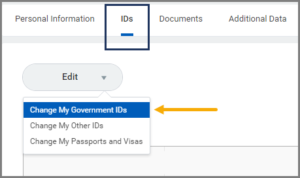
- Under the IDs section, select Edit.
- In the drop-down that appears, select Change My Government IDs.
Adding IDs
- In the National IDs and/or Government IDs section, add information by selecting the Plus Sign (+) icon.
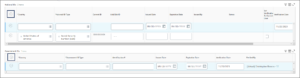

Important: The social security number or Qatar ID number should only be entered into the National ID section. No other data should be included in the National ID section.
- Depending on whether the ID is a National or Government ID, fill in the following fields:
- Country
- National ID Type or Government ID Type
- Add/Edit ID (for National IDs) or Identification # (for Government IDs)
- Issued Date (only required for Government IDs)
- Expiration Date
- Leave Verification Date blank as this will be updated by your HR Partner.
- Enter any comments, as needed.
- Select Submit.
- Move to the Up Next section of this job aid to continue.
Editing IDs
- In the National IDs section, use the Add/Edit ID column to update the existing SSN.
- Add or update the Issued Date as needed (not required).

Important: You cannot delete your SSN record. Contact your HR Partner for assistance.
- In the Additional Government IDs section, edit the field in the Identification # column. The Issued Date and Expiration Date fields may be provided but are not required.

- Enter any comments, as needed.
- Select Submit.
Warning: Do not upload a copy of any government documents in the Attachment section unless instructed. Please contact your HR Partner with questions.
Up Next
- You will be prompted to show documented proof of the ID to your HR Contact or HR Partner.
- The request will be routed to other individuals for additional steps. You may be required to provide documented proof to these other individuals prior to the process being able to move forward.
This completes the Manage Your SSN and other Government IDs process.