This job aid outlines the process for an Employee to request a leave of absence.
Request Leave of Absence
Page Loading...Checking SSO..

Important Information
- Before initiating a leave of absence, Employees should talk to their Absence and Benefits Partners. There may be benefits changes depending on the type of leave selected.
- A leave of absence should be used when the absence is full-time, continuous, unpaid and for a duration of 30 days or more. This is an unpaid, job-protected leave status.
- If you have any eligible paid time off, a leave of absence should not be processed. Please submit a time off request instead.
- If you decide to leave your position before returning to work, you should contact your HR Office.
- If the Estimated Last Day of Absence arrives and the Request Return from Leave business process has not been initiated, the Employee’s primary manager will receive the To Do: Return Employee from Leave of Absence. If the Employee has not returned to work, the Manager should wait until the Employee returns to initiate the Return Worker from Leave business process and then submit the To Do.
Getting Started
- From the Workday Home Page, select the Time Off application.
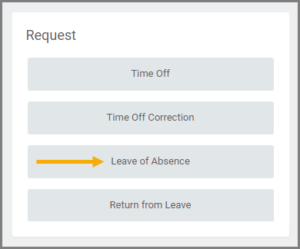
- Under the Request section, select Leave of Absence.
- On the Request Leave of Absence page, complete the following fields:
- Last Day of Work. This is the last date you will be working before your absence begins.
- First Day of Absence. This is the first date you would have been working if not absent.
- Estimated Last Day of Absence: This is only an estimate.
- Type: Select the appropriate type of leave.

- Based on the Type selected, Additional Fields may appear. If applicable, complete these fields.

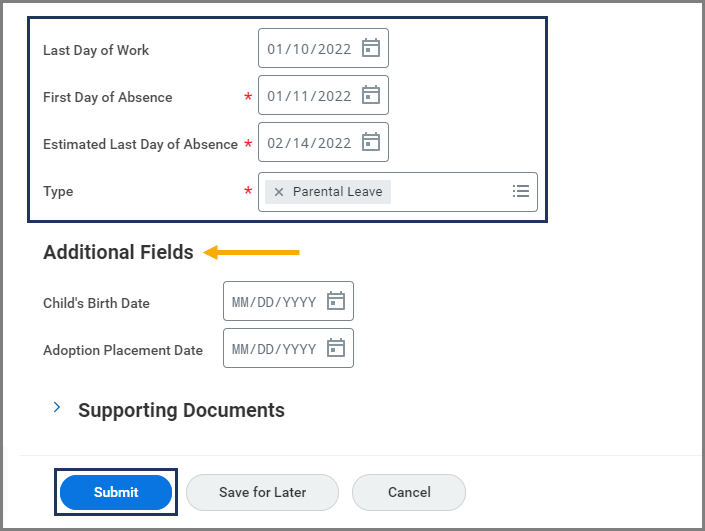
Note: Do not upload documents during this event. Medical documentation and other sensitive information are kept separate from the Employee’s Workday profile.
- Enter any comments as needed.
- Select Submit.
The request will be routed to your Absence Partner and Manager for approval.
Important: Check Workday for notifications regarding your leave of absence request and potential changes to your benefits.
Navigate to the Up Next tab for the next steps in the process.
Up Next
Request Delegation Change
If you have any security roles other than Employee as Self (e.g., Manager, Timekeeper), you will receive the action item Request Delegation Change in your inbox. You can complete this to delegate any business processes that would typically route to you while you are on leave.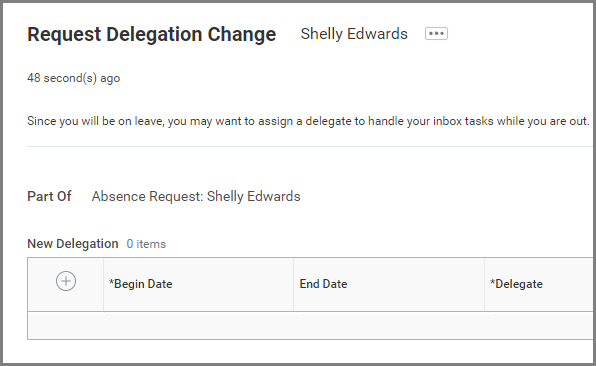
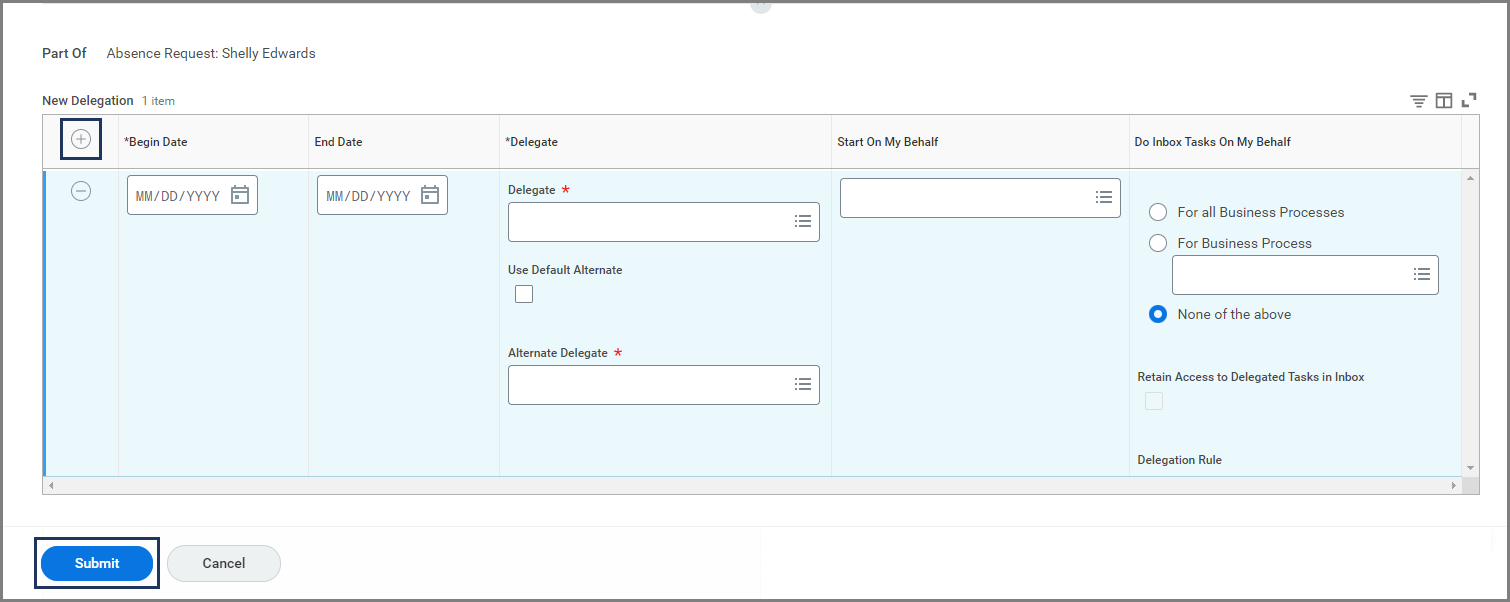
To Add a Delegation
- If you wish to add a delegation, select the Plus Sign (+) icon.
- Fill in the presented fields as necessary, except Start on My Behalf (which means you cannot delegate any initiation steps for a business process). For further details, see the job aid Manage Delegations on Workday Help.

- Select Submit.
Important: You will need to communicate with any persons to whom you have delegated business processes as they will not receive a notification that you have added them as a delegate until a task arrives in their inbox.
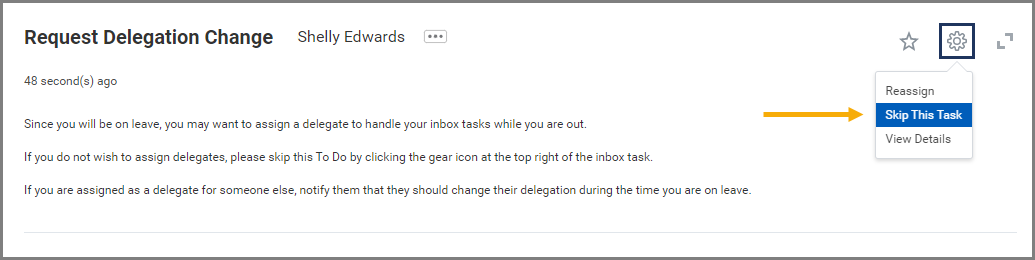
No Delegations Needed (Skip This Task)
- If you do not wish to add a delegation, select the gear icon in the top right hand corner and select Skip This Task.
 On the Skip This Task page, enter a reason you are skipping the task in the Skip Reason field (e.g., “no delegations needed”).
- Select OK.

Change Benefit Elections
If you have benefits, you will receive the action item Benefit Change – Leave of Absence in your inbox after your Manager and Absence Partner have approved your leave. Select Let’s Get Started and update the information presented to you.
Important: If you do not complete this process and submit your choices within 14 days, your benefits elections will automatically be waived/dropped and you will not have the option to enroll again until you return to a benefits-eligible position.
This completes the Request Leave of Absence business process.