This job aid describes the steps for a Timekeeper, Payroll Partner or Manager to Enter Time for an Employee. Employees can also enter their own time through self-service.
Enter Time for Your Employee
Page Loading...Checking SSO..

Important Information
- Time can be entered for hourly employees and salaried employees tracking time on projects. Hours entered for salaried employees are for record keeping only and do not feed to payroll.
- Time entry policies vary by member. Please note that some members will Enter Time with the number of hours worked and others will Enter Time with the exact times worked.
Getting Started
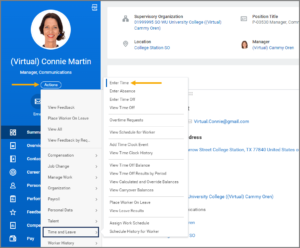
- Navigate to the Employee’s Worker Profile.
- Select Actions > Time and Leave > Enter Time.
- In the Enter Time for Worker window, verify the correct Employee is selected in the Worker field and select the Date for which you need to enter time for your Employee.


Note: The Date field will default to today’s date. You can later select a different date.
- The Employee’s Time Calendar will display. To enter time, select the blank space beneath the date.

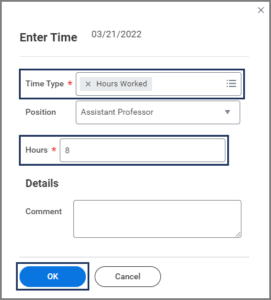
- In the Enter Time window, complete the following fields.
- Time Type. Select the appropriate time entry code or project. (If your Employee does not enter time on projects, you will not see Projects as an option.)
- Enter the number of Hours worked that day.
Note: Some members will enter exact times rather than the number of hours for each day.
- Select OK. You will see that the time has been added to the calendar.

Note: Select Actions at the top of the page to view a drop-down list of various options pertaining to time entry.
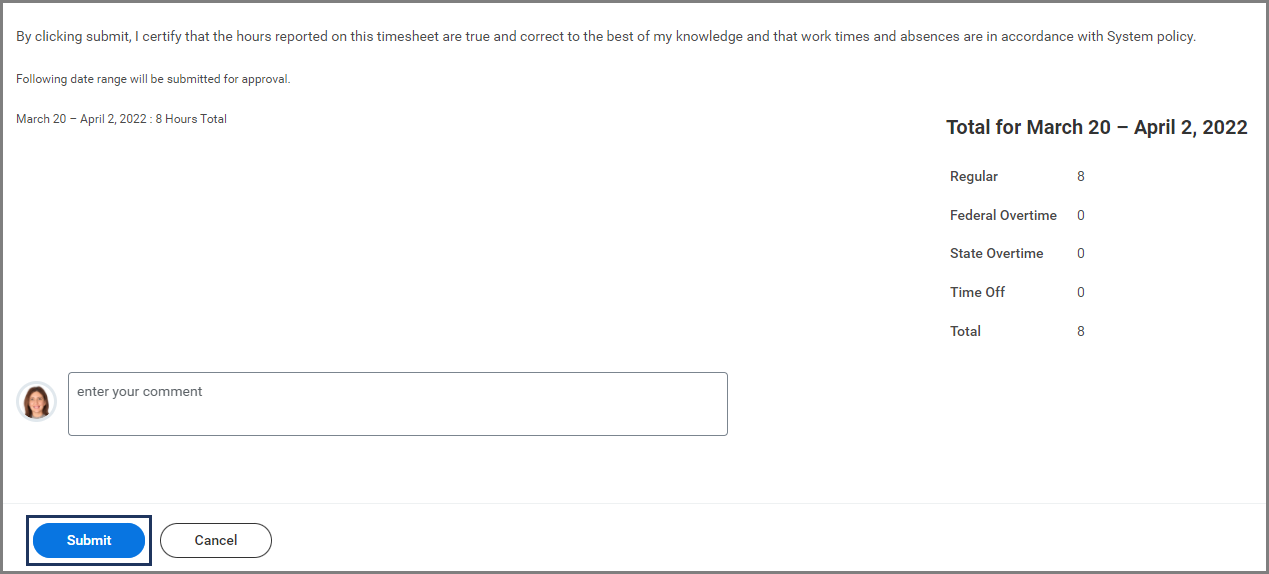
- Select Review at the bottom-right corner of the page.
- The Submit Time summary page will display. Review the time entered and enter any comments, as needed.

- Select Submit.
This completes the Enter Time for Your Employee process.