This job aid outlines the process for a Project Manager to create a new project in Workday.
Create Project
Page Loading...Checking SSO..

Prerequisites
The project hierarchy has been created.
Getting Started
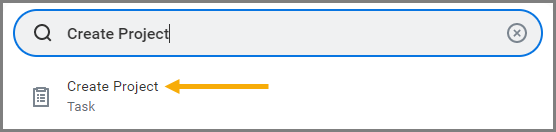
- Search for the Create Project task in the Search Bar and select it.

- In the Create Project window, select a Project Hierarchy to add to the project.
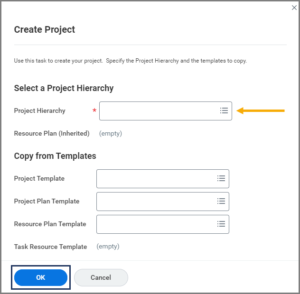
- Select OK.
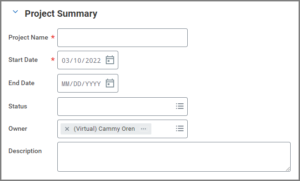
- Under Project Summary, complete the following fields:
- Project Name. This is what employees will see when entering time on their timesheets.
- Start Date. This will default to today’s date. Employees will not be allowed to allocate time to the project prior to the start date. You can update the start date as needed.
- End Date. After the end date, employees should not allocate time toward the project. Enter if known. Otherwise, leave it blank.
- Status (Active, Inactive or Frozen). This status does not control whether employees can enter time against the project. Rather the status can be used for reporting purposes.
- Owner. This will default to the Project Manager that is creating the project. Update the Owner, if needed.
- Description. Add a project description, if desired.


Note: Time can be entered against a project for any work day prior to the end date. Time cannot be entered on a timesheet for a work day that is after the project end date.
- Under Reference Information, you can enter a Project ID or one will be auto-assigned by Workday. For conversion purposes, most Project IDs were set.
- If bi-weekly hours for the project should be paid from a specific account, enter an External Project Reference. This account Information will be passed to FAMIS through the payroll integration.
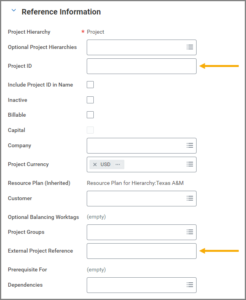
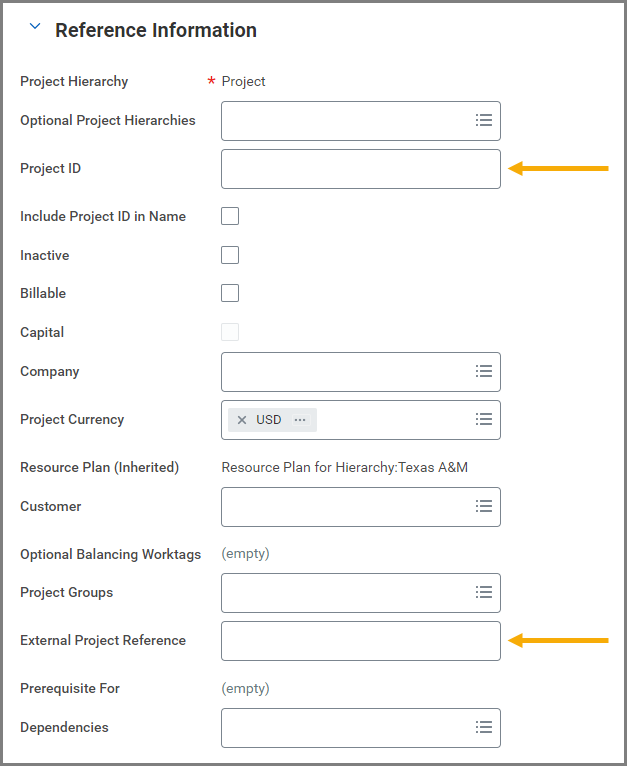
Notes: For most system members, the format of the External Project Reference will be Member-SLAccount- SAAccount. TTI’s format will be Member-1st 7 digits of ProjectCode (includes a dash) + “00” + last 3 digits of ProjectCode. TEEX’s format will be Member-SLAccount – ProjectCode.
- Select Submit.
This completes the Create Project process.