This job aid outlines the process for an Employee to add or edit a Beneficiary and make changes to coverage eligible for change outside of a qualifying life event or Open Enrollment.
Change Benefits (Beneficiary Change Only)
Page Loading...Checking SSO..

Prerequisites
The Beneficiary must be added as a beneficiary in Workday before they can be attached to a plan using the Beneficiary Change Only event type in the Change Benefits process.
Important Information
Changes to medical benefits can only be made during open enrollment or if there has been a qualifying life event.
Getting Started
Add or Edit Beneficiaries
You will first add or edit your Beneficiary and then initiate a Change Benefits business process to make the necessary changes.
- From your Worker Profile, select Actions > Benefits >View My Beneficiaries.

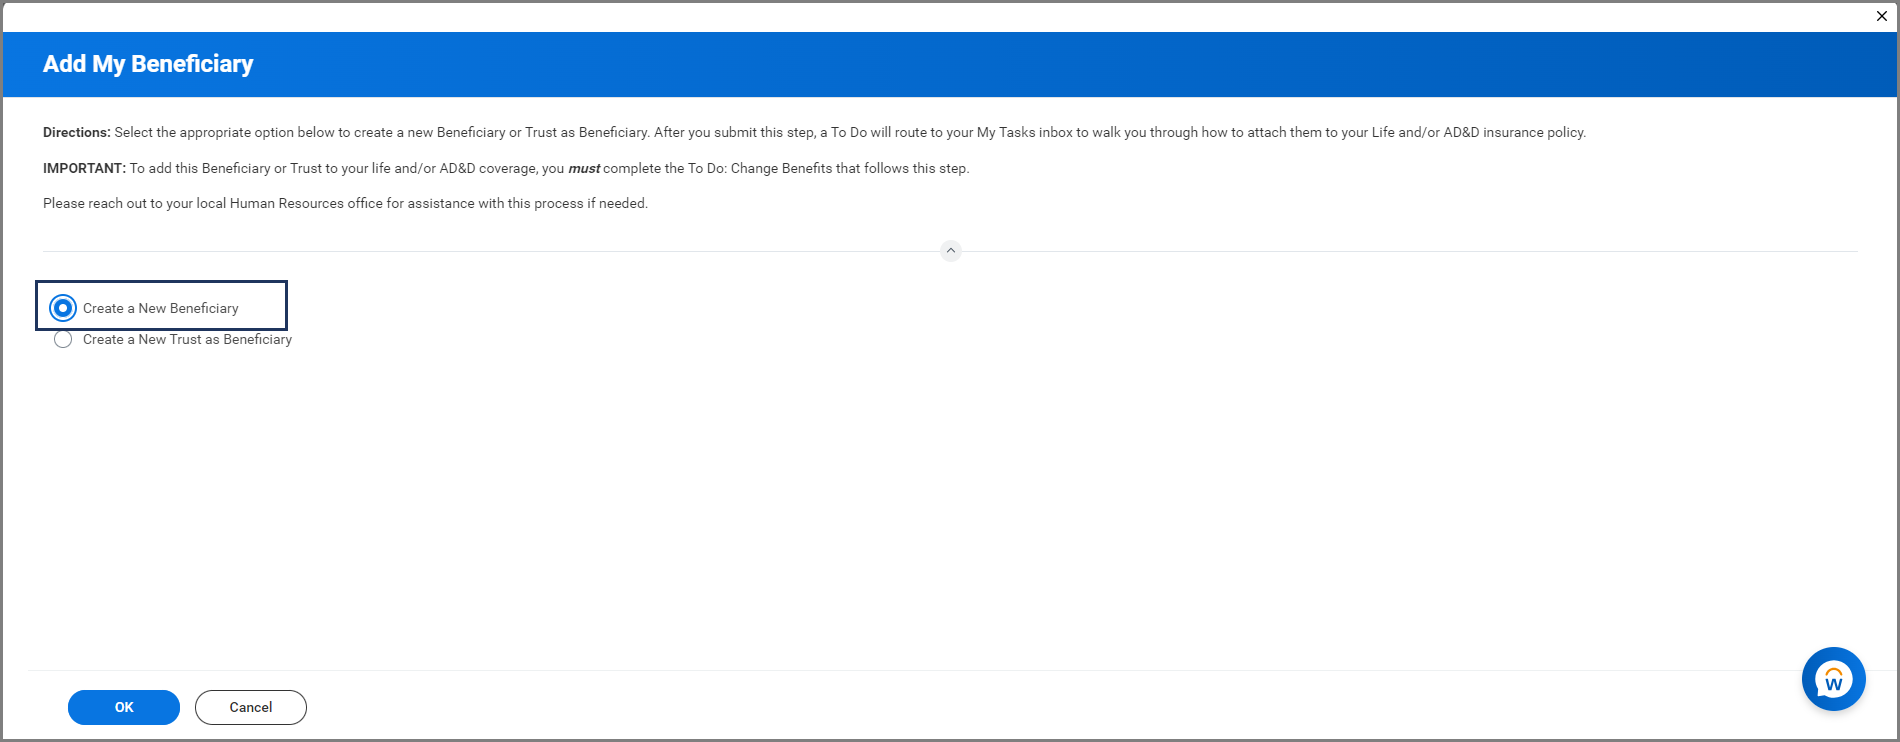
- On the Beneficiary page, perform one of the following actions:
- Select Add to add a new Beneficiary or New Trust as a Beneficiary
- Select Edit to update an existing Beneficiary
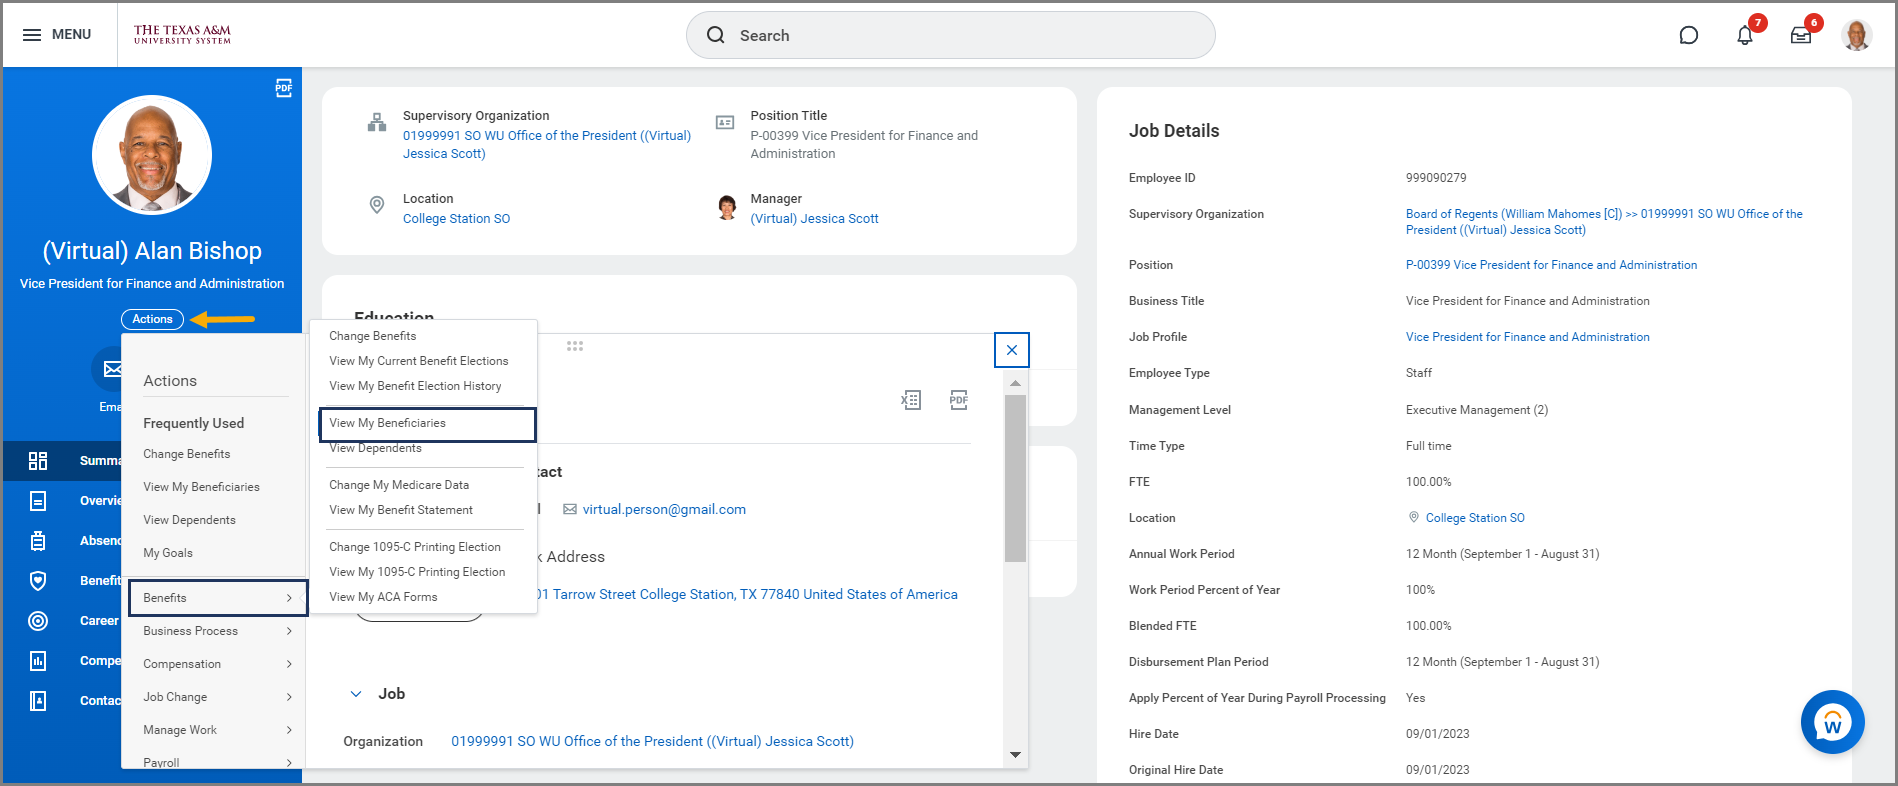
IMPORTANT: You must first add an individual in Workday as a Beneficiary prior to adding them to any benefits so that they become an option in the drop down menu when you go to change benefits.
Note: You can also edit information on a currently listed beneficiary on this page.
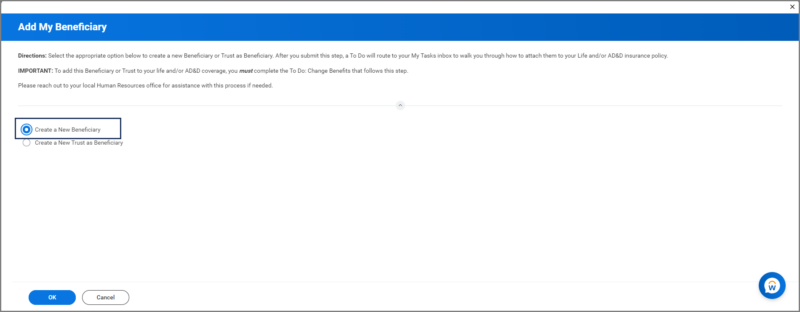
- Select OK.
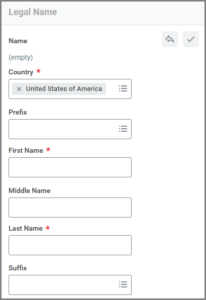
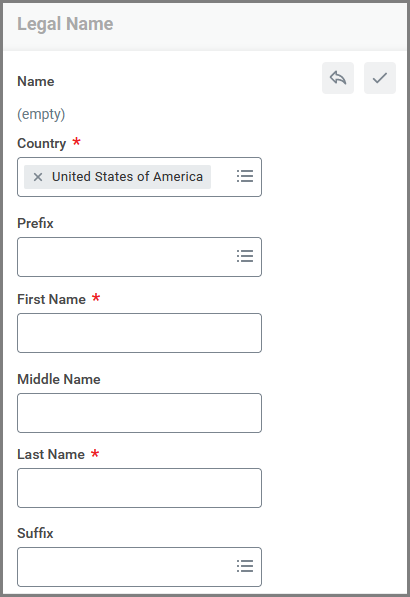
- Complete or edit the following required fields under Legal Name:
- Country
- First Name
- Last Name
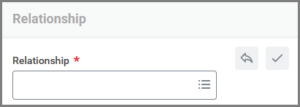
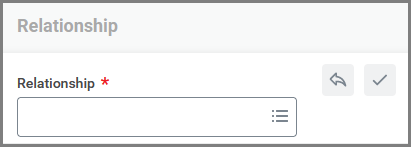
- Select the appropriate Relationship to the Employee (Child, Spouse, Parent, Sibling, etc.).
- In the Contact Information section, select Add to enter any Primary or Additional Address, Phone Numbers or Emails for the beneficiary.

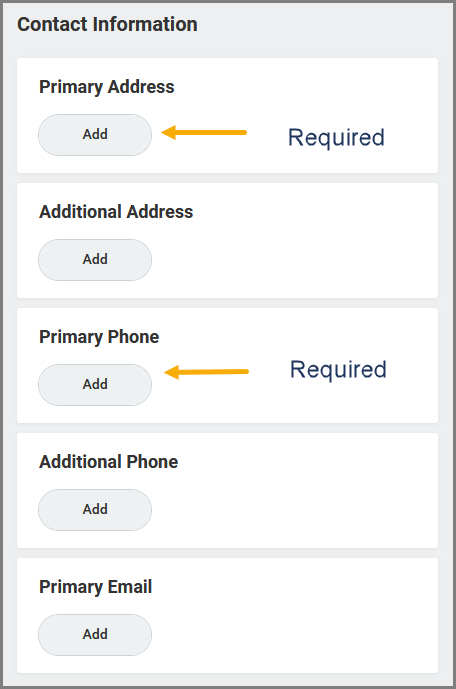
Note: Primary Address and Primary Phone Number are required fields.
- Select Submit.
Note: You will receive a To Do providing instructions on how to add this Beneficiary to your Benefits. - Select Submit.
- Select Done.
If you need to add this beneficiary to coverage, the next step is to attach the beneficiary to your life and/or AD&D coverage through the Change Benefits process. This is critical to the completion of the Change Beneficiary process.
Initiate Benefit Event in Workday
This section guides you through the process of changing benefits from the Workday Home page when there has been a beneficiary change.
- From your Worker Profile, select Actions > Benefits >Change Benefits.
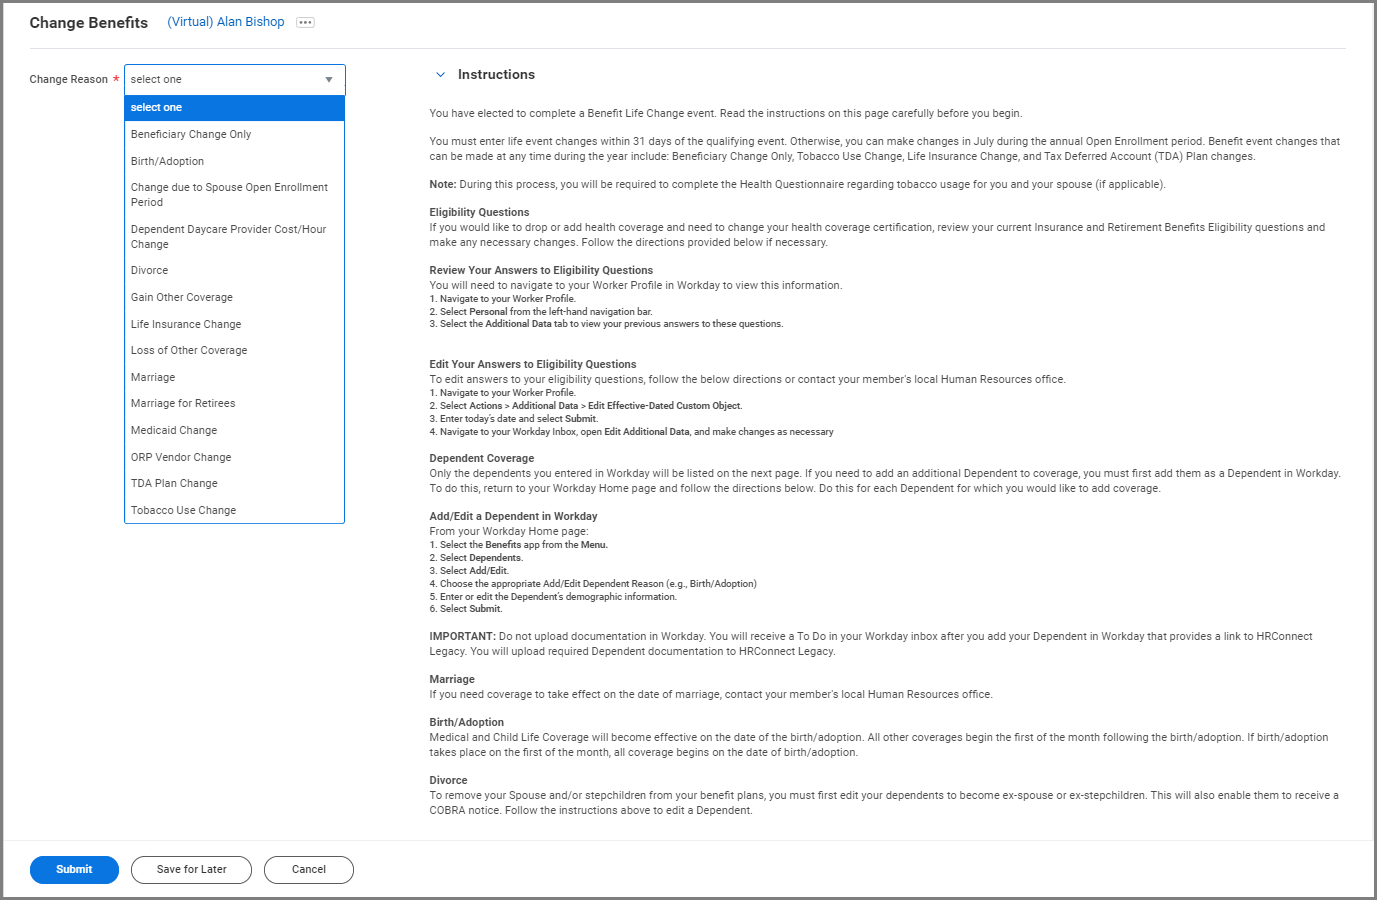
- On the Change Benefits page, read all of the instructions on the Change Benefits page before making a benefits change.

- In the Change Reason field, select Beneficiary Change Only.
- Enter the date specified on the screen.
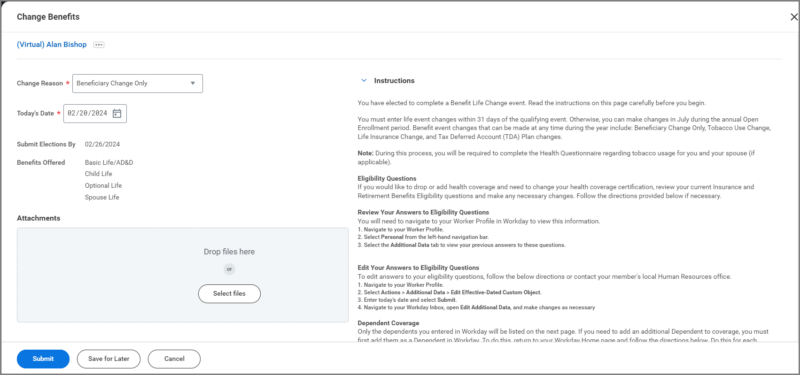
Note: The Submit Elections By and Benefits Offered fields will auto-populate based on what is selected previously.

Important: Do not upload documents during this event. Medical documentation and other sensitive information are kept separate from your Workday profile.
- Select Submit.
- Navigate to your Workday Inbox and select the Benefit Change To Do.
- Select Let’s Get Started.
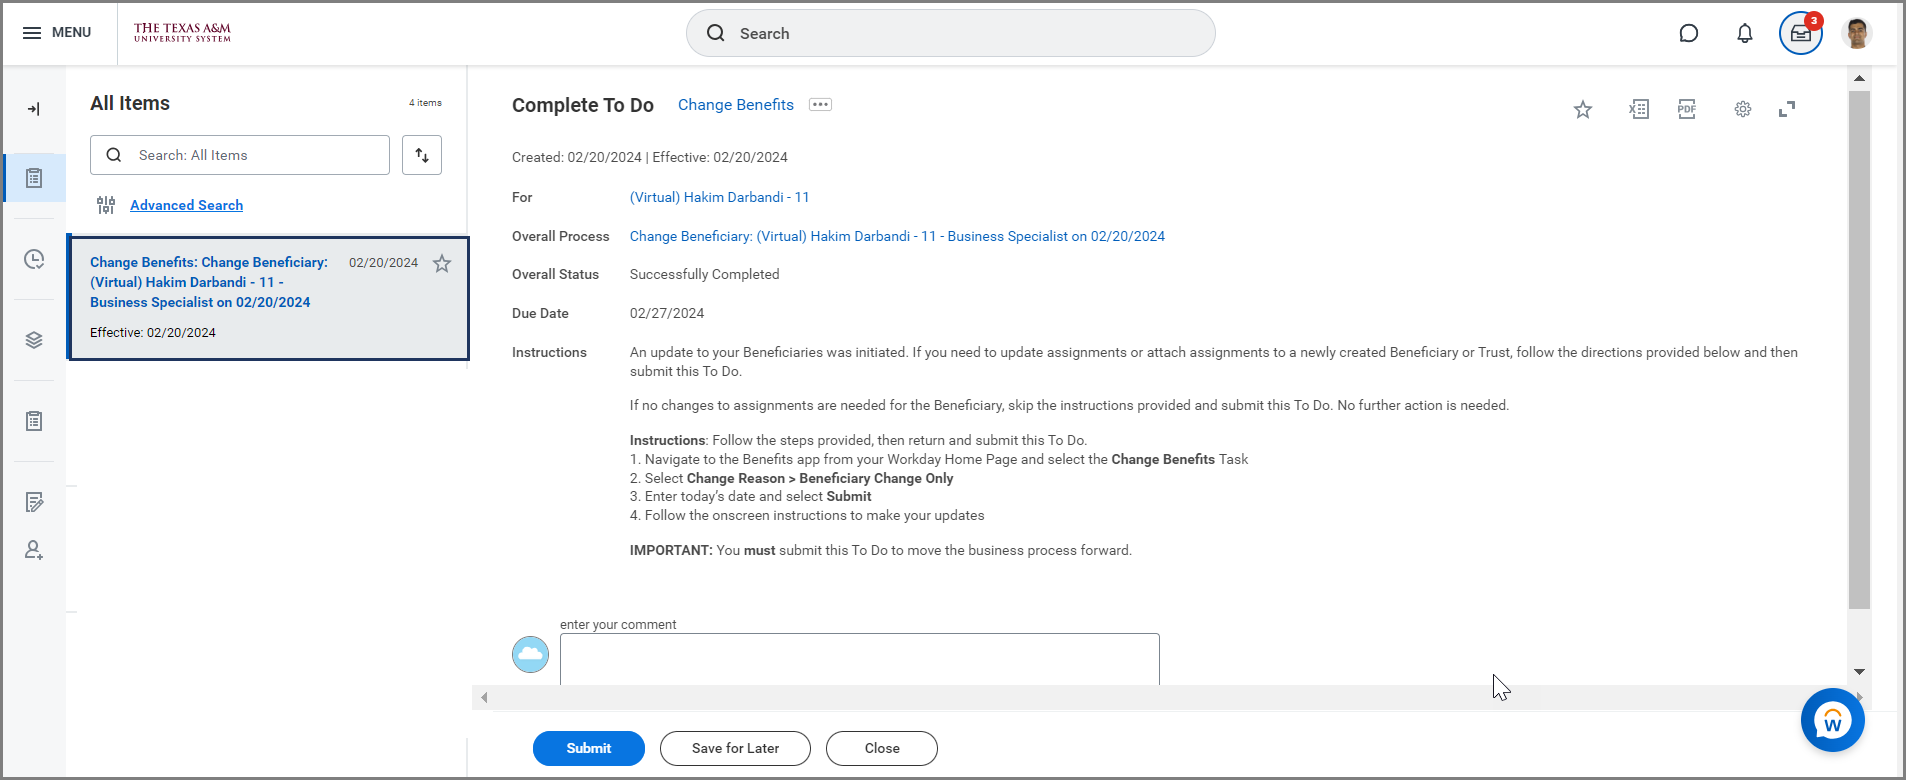
Navigate to the Up Next tab for the next steps in the process.
Up Next
Health Information
- You will now have an opportunity to make updates to Tobacco Use for you and your spouse.
- Select Continue twice to move forward to the Beneficiary Change Only page.
Beneficiary Change Only
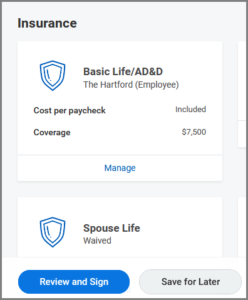
In this section you can add or remove beneficiaries to your coverages that are eligible for change outside of a life event or open enrollment.
Note: You will only see plans that allow beneficiaries on this page.
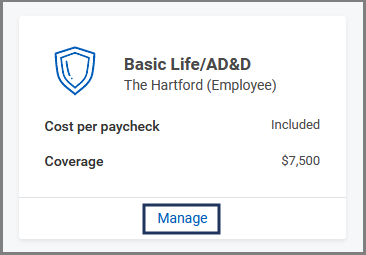
- Locate the plan you want to change and select Manage

- Select Confirm and Continue.
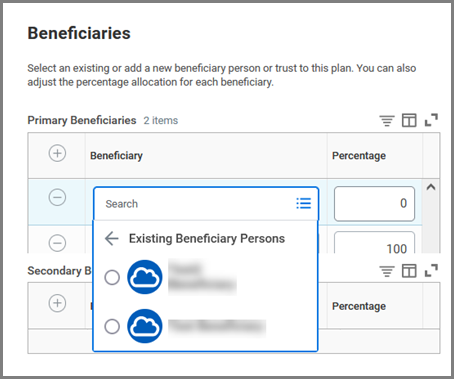
- Under the Beneficiary column you will Add, Delete, or Edit a primary or secondary beneficiary.

Note: Make sure your designated percentages add up to 100%. - Select Save.
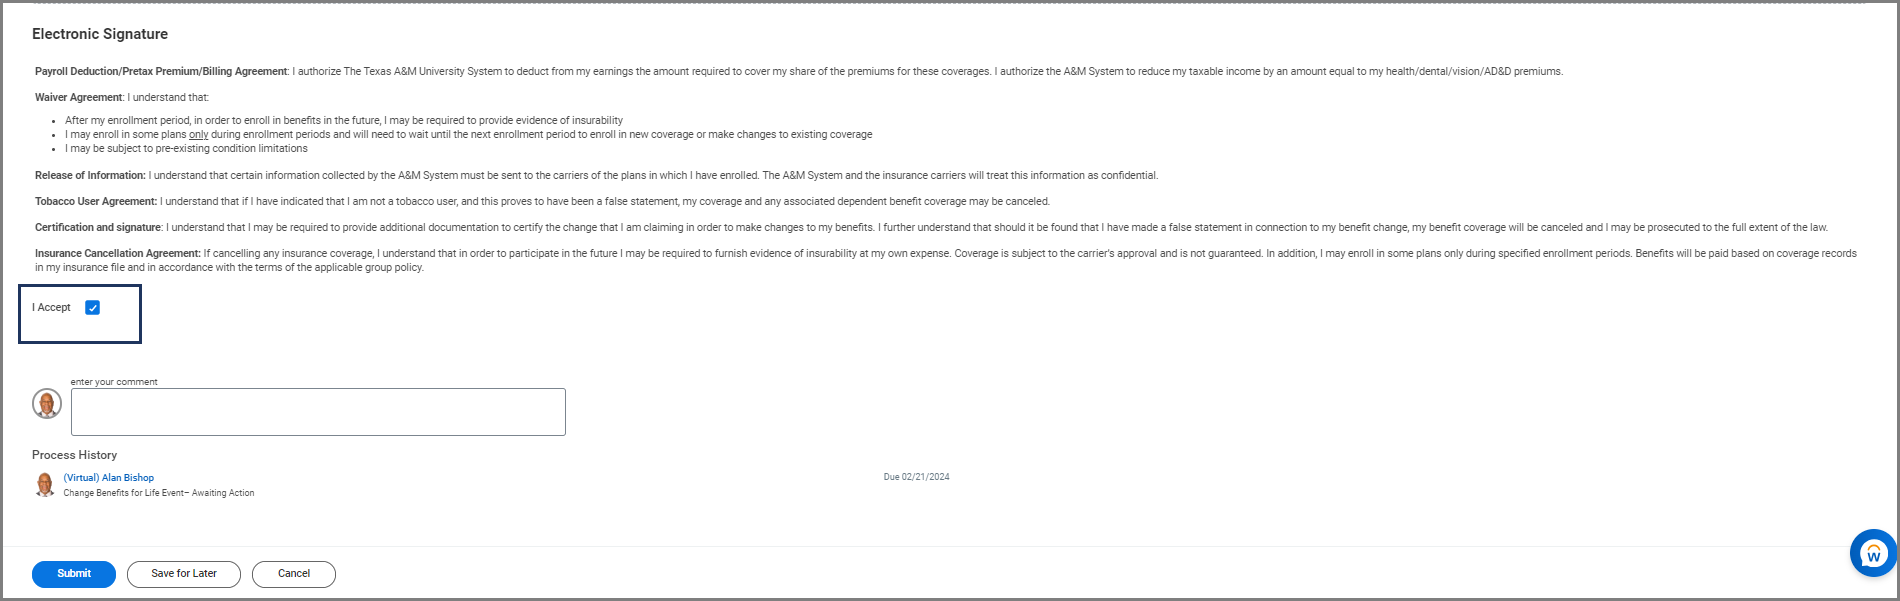
- Update another plan, or Select Review and Sign once you are ready to submit your changes.
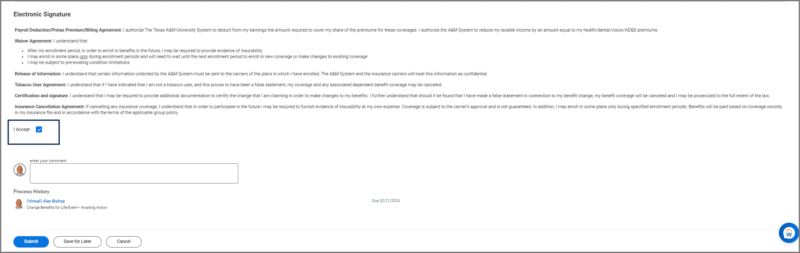
- Select the I Agree checkbox after reviewing your elections.
- Select Submit and Done.

This completes the Change Benefits (Beneficiary Change Only) process.