This job aid outlines the process for a Payroll Partner, HR Contact, HR Partner, Budget Contact, or Manager to add or edit existing costing allocations for a position and/or Worker as a stand-alone process.
Member version: TAMUAssign Costing Allocations
Last updated on October 7, 2025
Page Loading...Checking SSO..

Important Information
- The Assign Costing Allocations business process affects costing on positions and/or workers for future payrolls. For changes to settled payroll, use the Payroll Cost Transfer (PCT) process available in Canopy.
- Refer to the reference guide Costing Allocations for an overview of Costing Allocations as a sub-process of Hire, Change Job and other business processes, as well as impacts to other systems when an incorrect action occurs.
- Cost Center Approvers listed as an approver for multiple accounts used in costing allocations will receive a separate inbox task for each account listed in the costing allocation. Once one costing allocation task is approved, the remaining tasks will automatically be approved.
Getting Started
- Navigate to the Employee’s Worker Profile and select Actions > Payroll > Assign Costing Allocation.

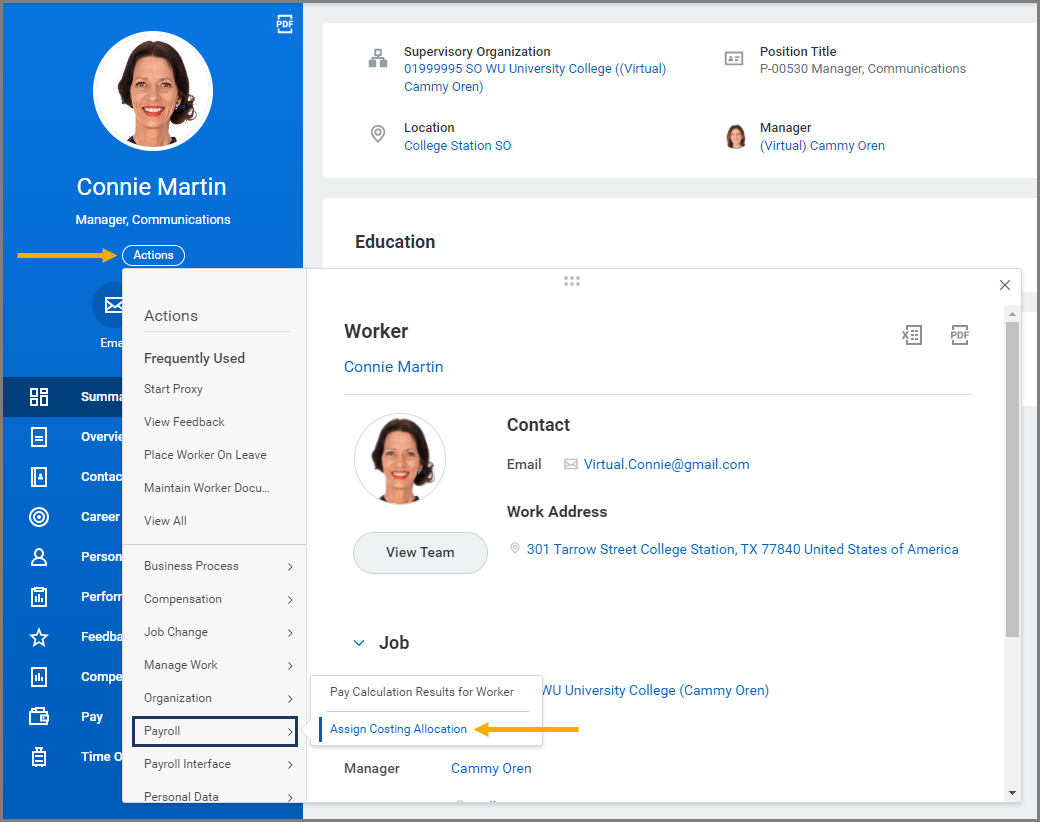
Note: Options displayed within Payroll will vary depending on the security role of the Individual initiating this action.
- Review the displayed information.
- The From date will default to today. If it is not changed, the most recent costing allocation information for the Worker will display. Entering an earlier From date will allow you to view all previous costing allocations for the Worker.
- The Worker field should auto-populate.
- Select the appropriate Position if the Employee has multiple positions.
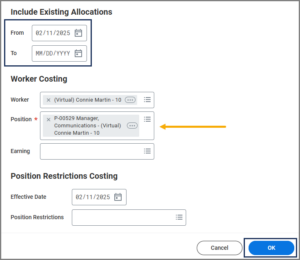

Note: The Effective Date field under Position Restrictions Costing should not be modified unless your intent is to change costing allocations to the position and not the worker.
- Select OK.
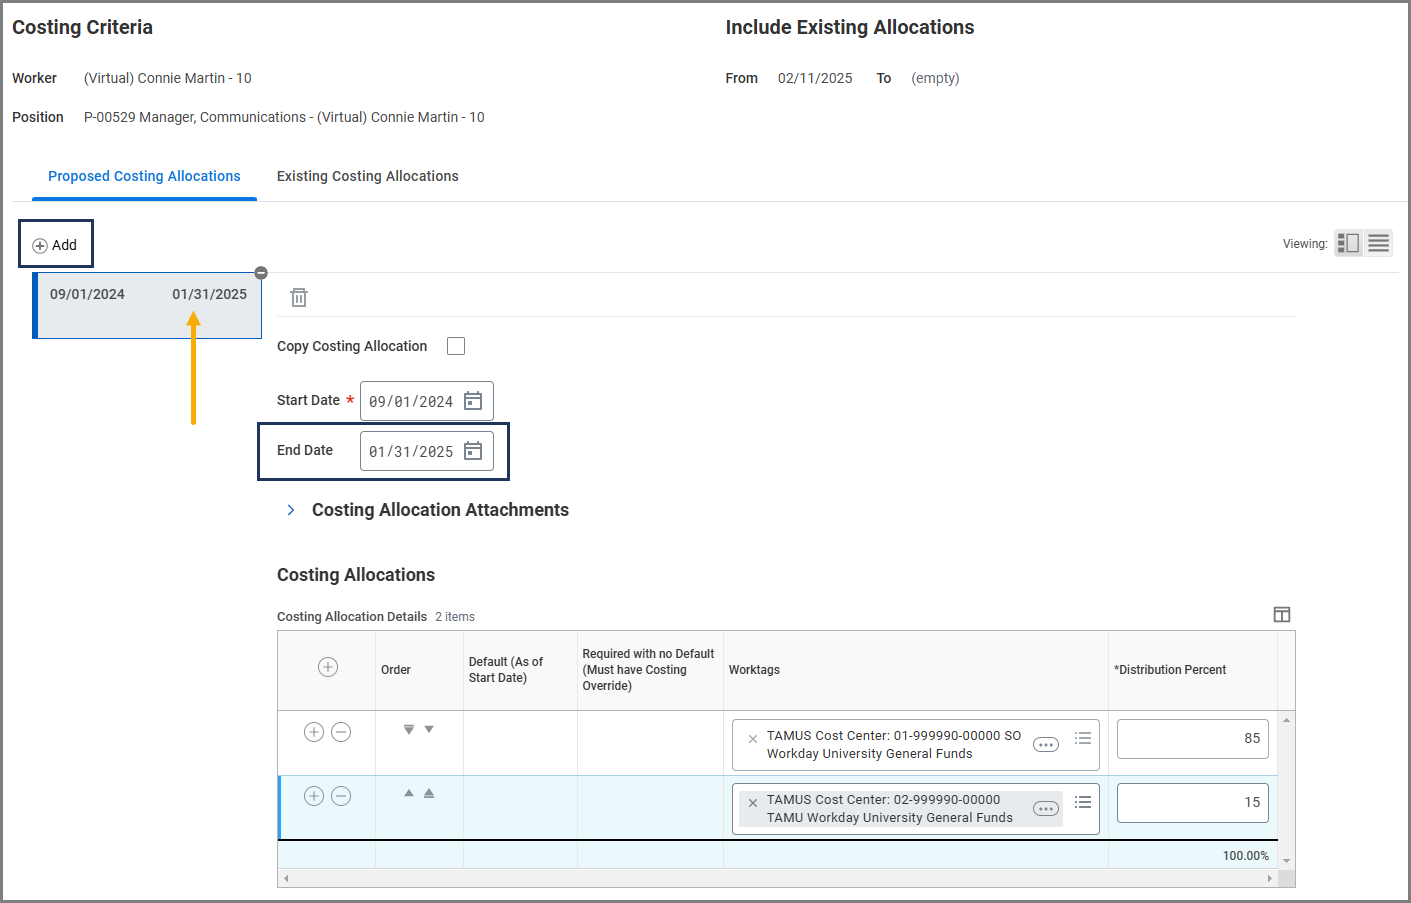
- Complete the following fields.
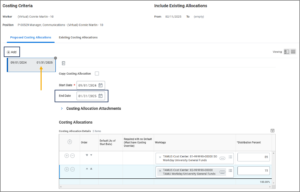
- The Copy Costing Allocation box, if checked, will copy current costing information and make changes. This is useful if a new cost center will be added in addition to the current cost center.
- The Start Date is the date you need the costing allocations to be effective.
- The End Date indicates the last date that the salary/wages will be charged to the designated cost center. It is best to leave this field blank until you need to make a change.

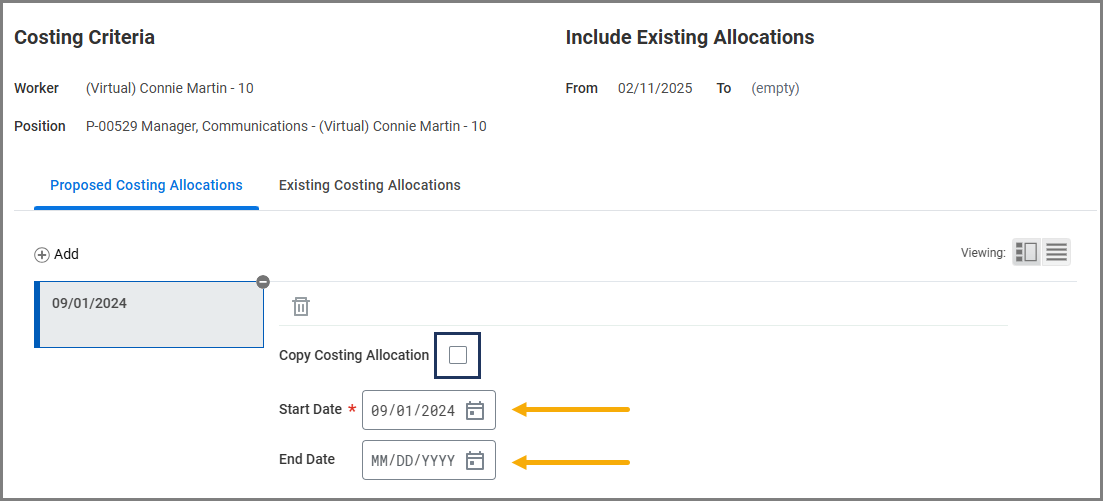
Note: Your costing allocations should always include the current pay period and any subsequent future pay periods. To help determine the appropriate dates, you can check to see if the employee is salaried or hourly by selecting the graph icon in the top right corner. For details on pay period dates, visit the Payroll Schedules page.
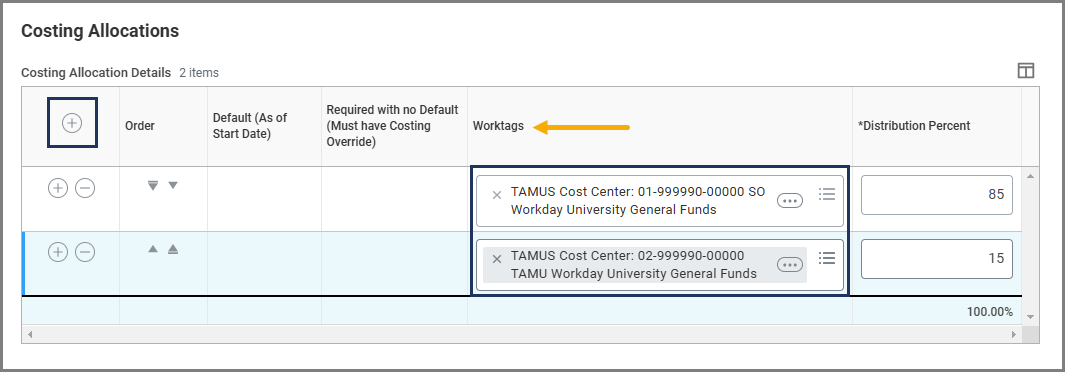
- Under the Worktags column in the table, select the TAMUS cost center from which this position will be paid. This is a required field. It cannot be left blank. If no costing allocations are listed, select the Plus Sign (+) icon to create a new row.

- If the position will be paid out of one cost center, the cost center’s Distribution Percent will default to 100. If the position will be paid out of multiple cost centers, designate the appropriate percentage for each cost center under the Distribution Percent column. Ensure that the Distribution Percent from all cost centers adds up to 100%.
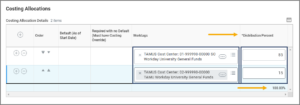
- In the event you need multiple cost sets for different time periods, you will need to enter an End Date for the previous cost set(s) so the dates do not overlap with the new cost set. Then select the Add button above the table. For the new cost set, repeat the steps above.

Note: Remember that each Cost table needs to add up to 100%.
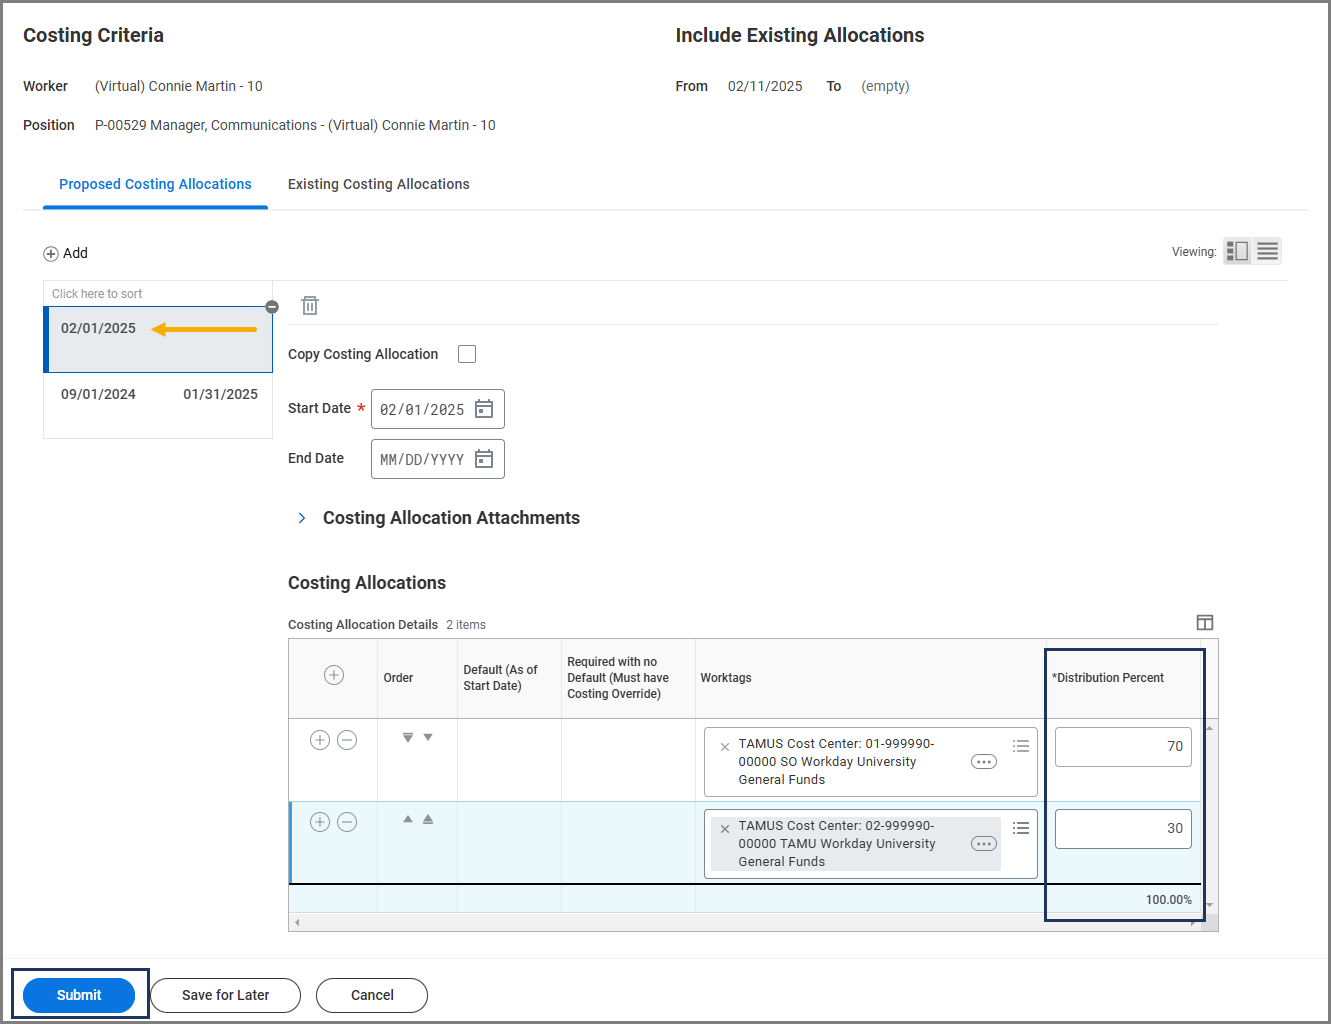
- Select Submit.
The Assign Costing Allocation business process will route to the Cost Center Approver for approval.
Note: Some members have chosen additional approval steps that may route to the Sponsored Research Services, Budget Partner and/or Payroll Partner.
This completes the Assign Costing Allocation business process when used as a stand-alone process.