After an employee group has been created, you can add/edit members to the group from the Group Details page for the group.
To get to the Group Details page:
- Select the Groups tab and click on Employee Groups.

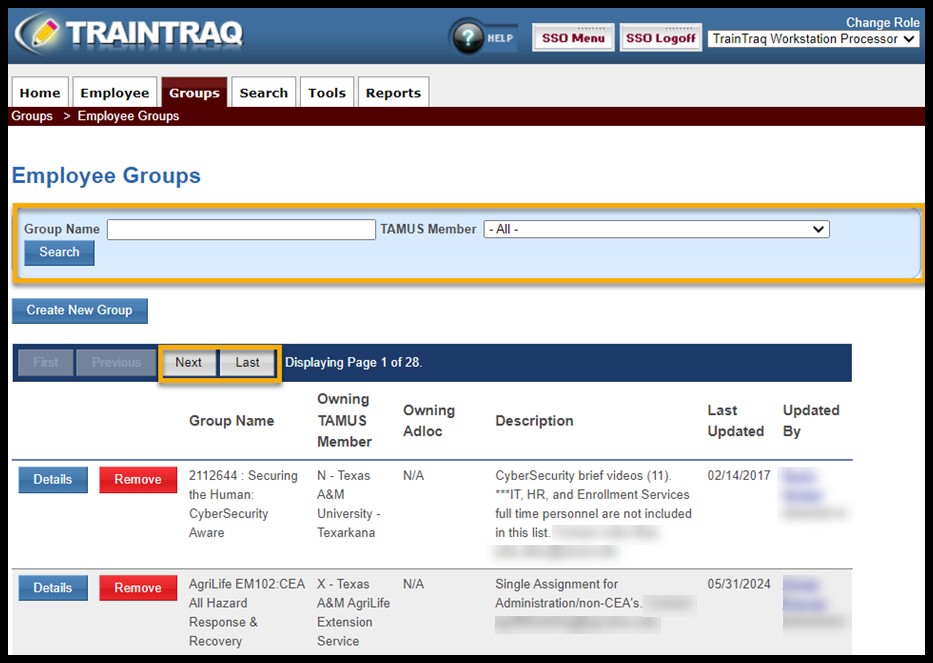
- Locate the desired employee group on the Employee Groups page either by entering the Group Name and TAMUS Member (Workstation) and clicking the Search button or by scrolling through the list using the Next and Last buttons.
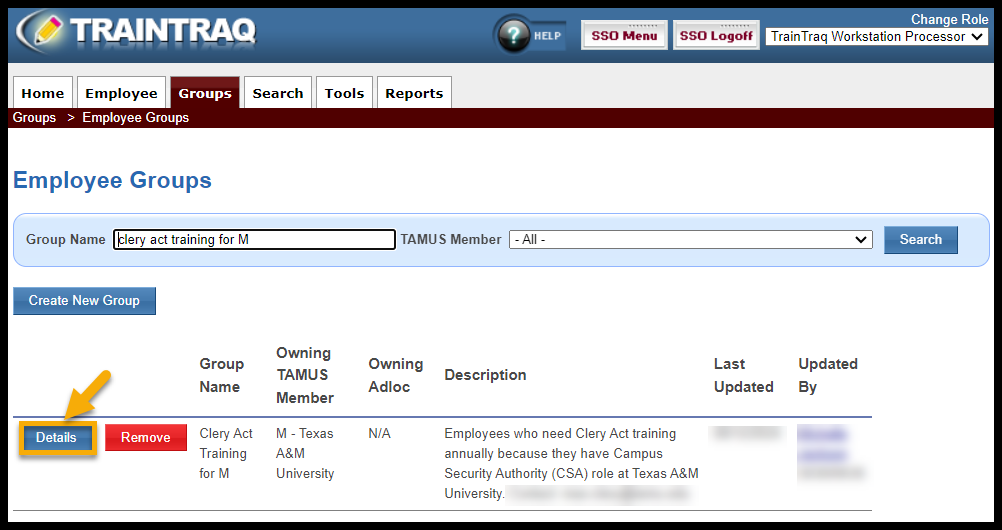
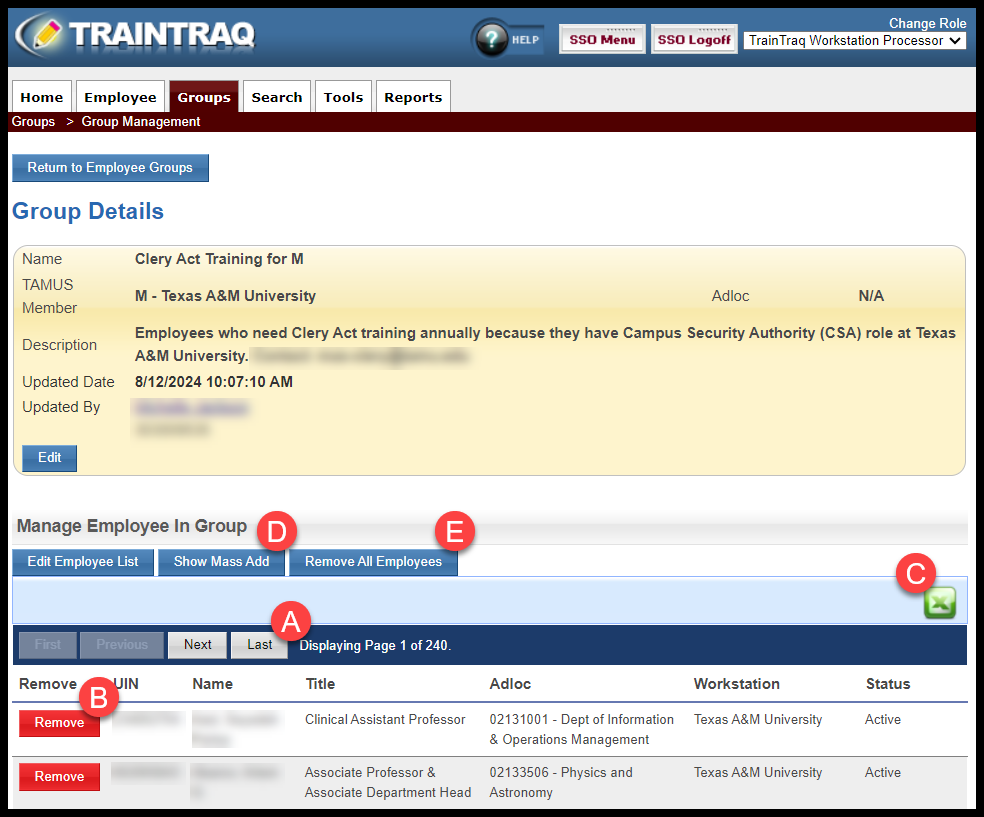
- Select the Details button. This opens the Group Management page, which has two sections: Group Details and Manage Employee in Group.
Group Details
The Group Details section includes the following:
- Group Name,
- Owning TAMUS Member (workstation),
- Owning ADLOC (also known as department),
- Description,
- Updated Date (the last time the group was edited),
- Updated By (the name and UIN of the employee who last edited the group)
You can use the Edit button to make changes to the Group Details if needed.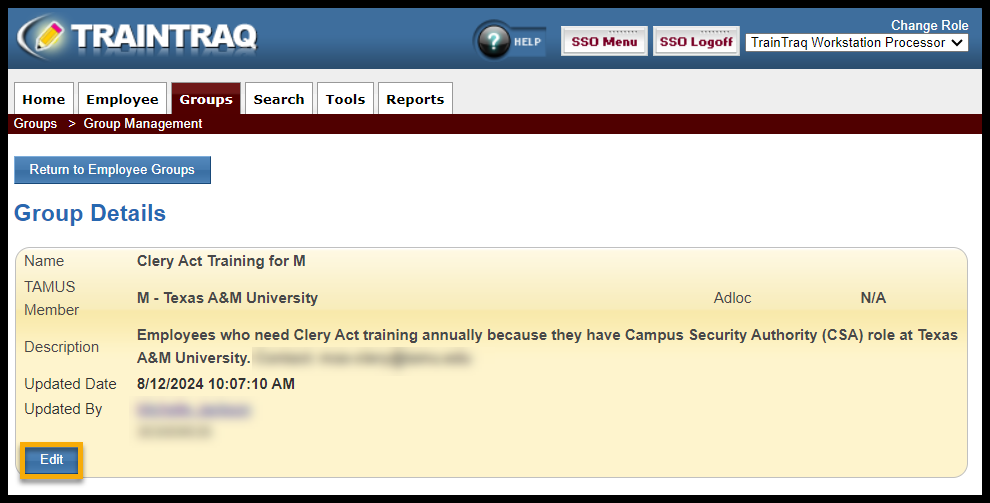
Manage Employee In Group
The Manage Employee In Group section lists all the employees currently in the group (which will be none if the group is newly created).
The Edit Employee List button allows you to add or remove employees using the Employee Search window. This button is the most frequently used and is explained in more detail in the Edit Employee List section below.
Other buttons on this page:
- If the group has a large number of employees, you can use the gray First, Previous, Next, and Last buttons to scroll through the list. NOTE: The First and Previous buttons will become clickable after you scroll to the second page.
- You can also use the red Remove button to remove employees from the list. However, in most cases, it will be easier to use the blue Edit Employee List button, which allows you to find employees using the Employee Search window.
- The Excel button allows you to download a list of group members in Excel format, providing a convenient way to review your list and identify employees who should no longer be in the group.
- The Show Mass Add button allows you to add up to 500 employees at a time. This feature is useful when you have a long list of UINs and you are certain all the UINs on your list are valid. However, it’s important to note that there is no error checking when you use Mass Add. Using the Edit Employee List feature is a safer option.
- The Remove All Employees button will remove all employees from the group.
Pro tip:
The Excel, Remove All Employees, and Show Mass Add buttons can be used together to efficiently remove employees who no longer need to be in a group. First, use the Excel button to download the group list. Then delete the rows corresponding to the employees who are no longer in the group. Next, use the Remove All Employees button to remove everyone in the group. Finally, select the UINs of the remaining employees in the cleaned-up Excel file and use the Show Mass Add button to add the good UINs back to the group.
Edit Employee List
Edit Employee List is used to add and remove employees from the group via Employee Search.
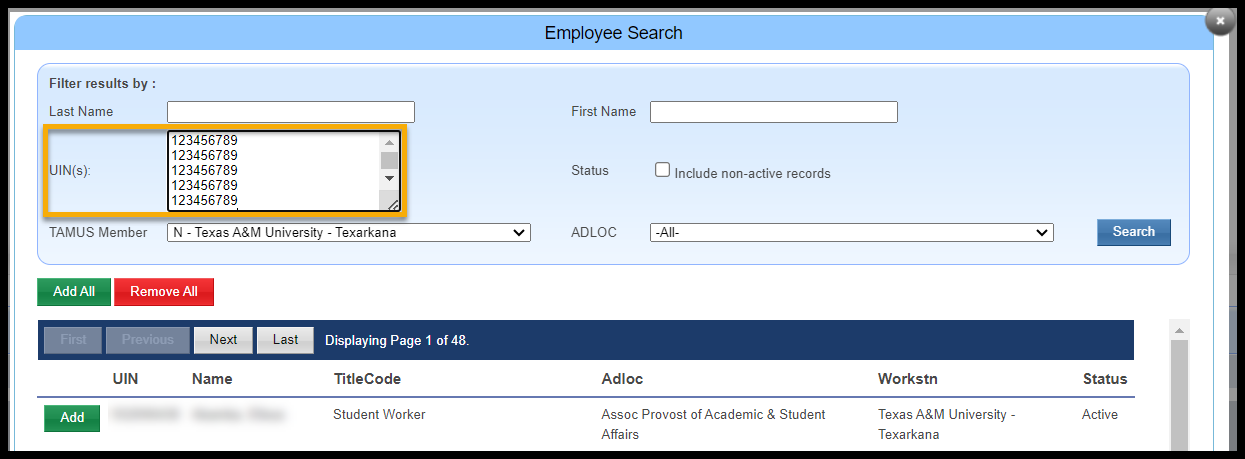
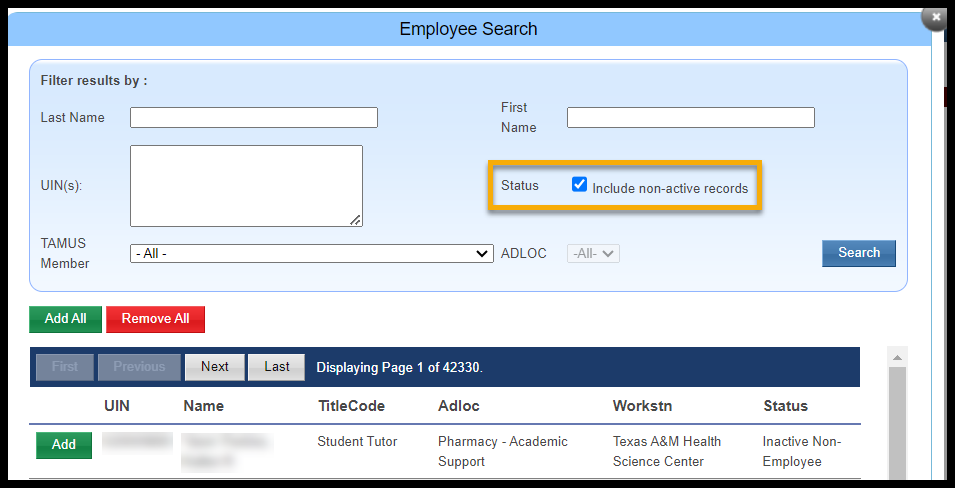
- Click the Edit Employee List button. The Employee Search pop-up window displays. The list of employees displayed in this window are automatically filtered based on the owning TAMUS member (Workstation).
You can filter results further by:
- The results list a maximum of 10 employees per page, even if searching by multiple UINs. Select Add next to an individual employee or Add All to add all 10 employees in the list at once. Select Next to review and add additional employees as applicable.
- NOTE: Clicking the Add button changes the button to Rmv. If you add an employee to the group in error, click the Rmv button to remove them from the group. Additionally, if you need to remove all selected employees from the group, click the Remove All button located just above the employee list. NOTE: The Remove All button will only remove the 10 employees currently displayed on the page. For instance, if you’re on page 2 of 20, clicking the Remove All button will remove the 10 employees listed on page 2.
- Once you have added the required employees to the group, click the Close (X) button located in the upper right corner of the pop-up window. The Group Details displays the selected employees in the Manage Employees In Group Section.
Sometimes you may not be able to find an employee you wish to add or remove. Possible reasons for this include:
-
- The person you wish to add was an employee but is no longer in an active status. Check the “Include non-active employees” checkbox to broaden your search to include inactive employees. However, if an employee is inactive, they should not be added to the group.
- The person you wish to add has never been an employee. For example, students who have never worked for the A&M System are not in TrainTraq.
- The person you wish to add is employed by a workstation (System member) to which you don’t have access. If this happens, reach out to TrainTraqHelp@tamus.edu for assistance.
- The person you wish to add is employed by a workstation to which you have access, but you are searching in the wrong workstation. Often the workstation filter will default to one specific workstation. If you have access to multiple workstations, make sure to set the Workstation filter to “All”.
- The name you are searching for does not match the employee’s name in TrainTraq. This could happen due to misspelling or the use of a nickname/preferred name instead of the employee’s legal name.
- The person you wish to add was an employee but is no longer in an active status. Check the “Include non-active employees” checkbox to broaden your search to include inactive employees. However, if an employee is inactive, they should not be added to the group.

