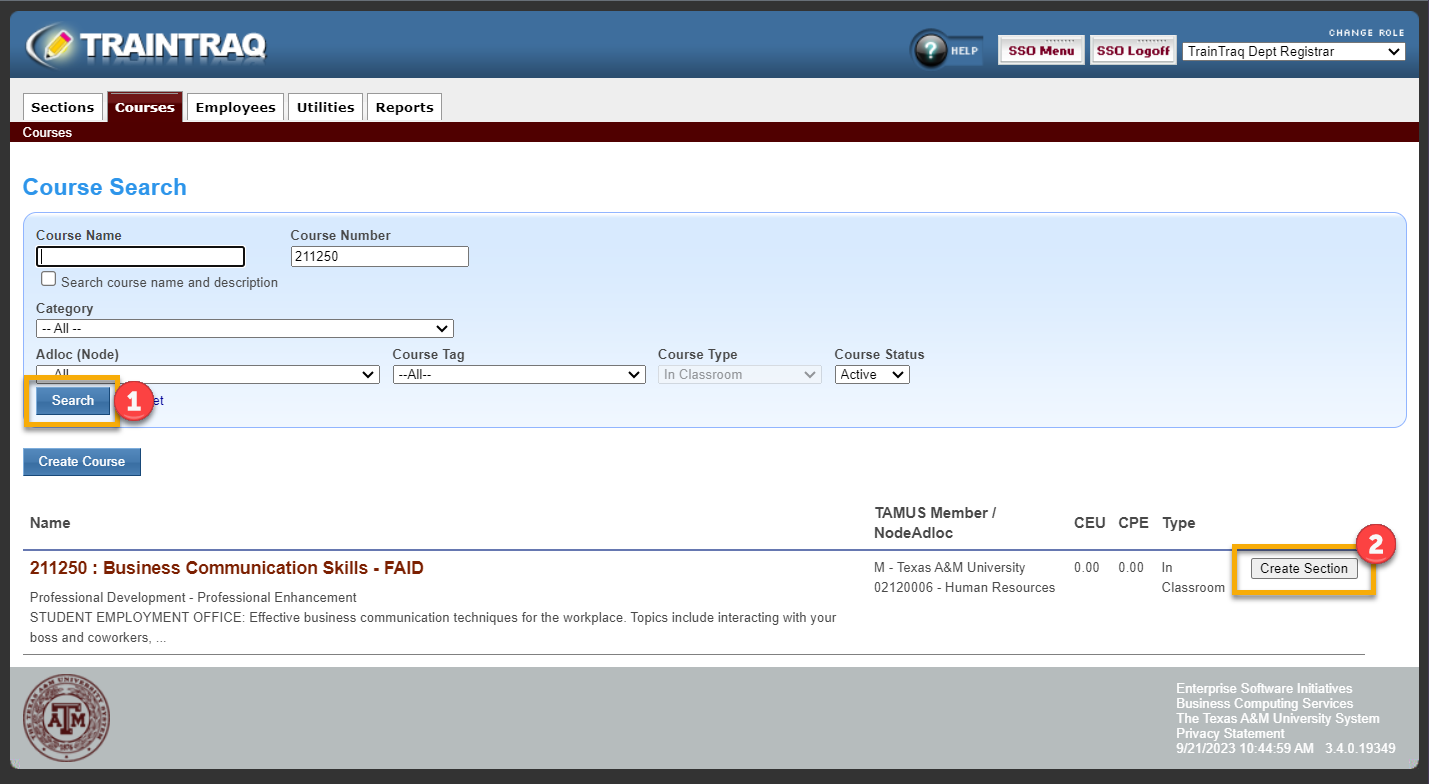
Creating a New Section
There are two locations a Section may be created.
To create a new section from the section screen:
- From the Sections screen, select the Create Section button.

- A pop-up box will appear for you to select the course that needs the section created. Locate the desired course that needs a new section by entering information into the search fields and clicking the Search button.
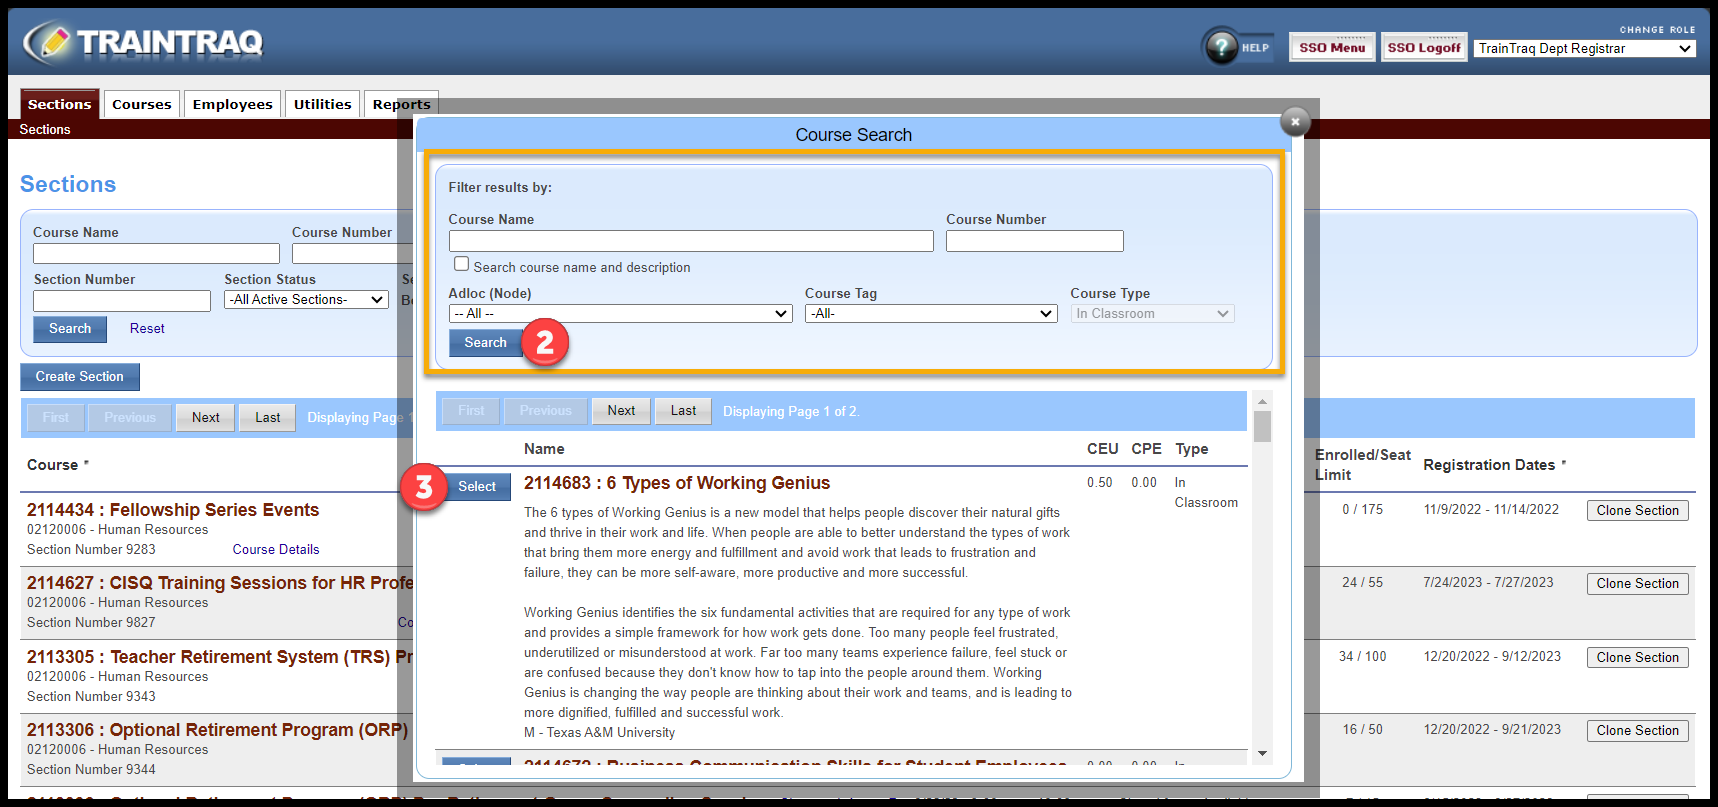
- Click on the Select button or the Course name and the Section Management screen will open. Course Details will be listed at the top of the screen.
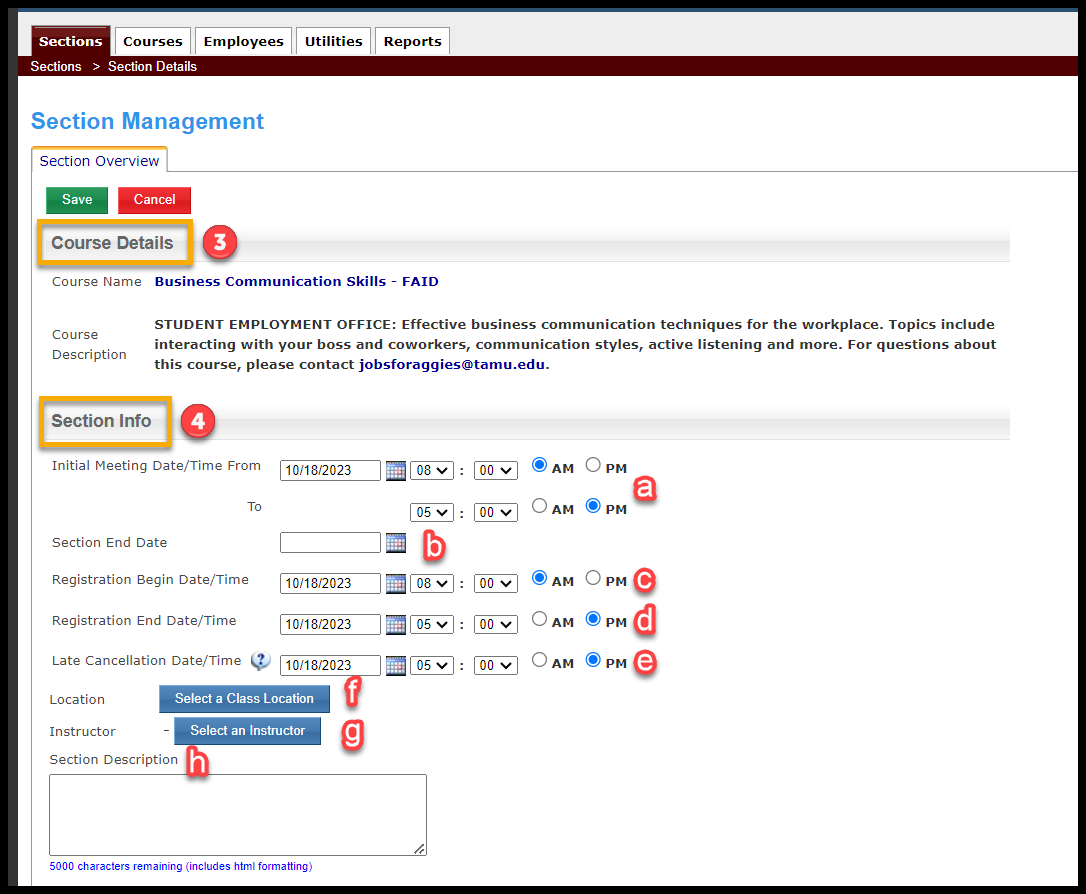
- Section Info is where the details for the new section are entered. Enter the desired Section Info:
- Initial Meeting Date/Time – enter the date and time the course begins.
- Section End Date – enter the date and time the course will end.
- Registration Begin Date/Time – enter the date and time for registration to open.
- Registration End Date/Time – enter the date and time for registration to close.
- Late Cancellation Date/Time – If the Fee Structure contains a Late Cancellation Fee, enter the date you would like the fee to begin. If a Late Cancellation Fee is not being charged, you may enter the date the registration will close and the time must be prior to the time the registration closes.
- Enter the course Location by clicking the Select a Class Location button, then searching for and selecting the location from the pop-up window.
- Enter the Instructor by clicking the Select an Instructor button, then searching for and selecting the instructor from the pop-up window.
- The Section Description field is optional. Only enter information in this area that is specific to the Section, not the Course.
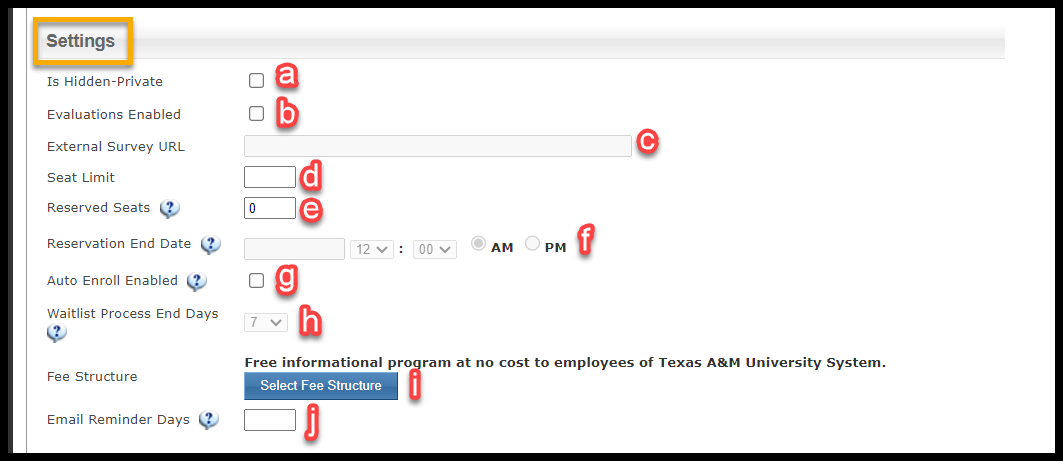
- The Settings fields provide additional information for the course. The information for Settings will need to be entered.
- Is Hidden-Private – Check this box to keep the course hidden from everyone except your Workstation. For example, if you are Workstation H and check the box, only the Health Science Center will see the course. No other Texas A&M System employee will seethe course. In order to register for a hidden-private section, employees must be provided with a direct link to the section. The URL for the section will be available once you click Save to create the new section.
- Evaluation Enabled – Check this box to activate the evaluation process. TrainTraq will default to the TrainTraq evaluation created under the Utilities tab Evaluation Questions. If a survey other than TrainTraq will be use, enter the survey URL in the following box. If the course will not use an evaluation, do not check the box. Evaluations will be automatically sent out to an employee once that employee’s attendance has been marked complete.
- External Survey URL, if necessary – Enter the URL for the survey if not using the TrainTraq evaluation. The survey link will be included in the completion notification email. Note: this field only becomes available when “Evaluation Enabled” is checked.
- Seat Limit – Enter the number of seats available in the classroom.
- Reserved Seats – Allows seats to be held from the main registration process. Enter the number of seats you would like to hold for those who may not register on their own. Employees use the Private Registration URL to register for these seats. The URL for the reserved seats will be available once you click Save to create the new section.
- Reservation End Date – If a number is entered in the Reserved Seats field, you must enter a date and time to release the seats for general registration.
- Auto Enroll Enabled – If enable, employees may select to allow TrainTraq to automatically register them from the Waitlist. The employee will receive an email they have been enrolled in the course.
- Waitlist Process End Days – Enter the number of days from the close of registration to stop the Auto Enroll option. After this date, employees on the Waitlist will need to be manually registered by the Department Registrar; they will no longer be auto enrolled.
- Fee Structure – Select the Fee Structure for the course from the pop-up box. A fee structure is required for all in-classroom courses. Your department may or may not charge for training courses. For more information, please visit Fee Structures.
- Email Reminder Days – Enter the number of days from the course start date for TrainTraq to send employees registered the reminder email for the course. This number is based on calendar days not work days.
- Registration Email Text and Reminder Email Text will need to be written for the Section. The Course information, date, time, and location will be automatically populated in the email by the system. The Registration Email will be sent as soon as an employee registers for a course. The Reminder Email will be sent to registered employees the number of days prior to the course entered in the Email Reminder Days Field. You will need to enter text in these fields, they are required.
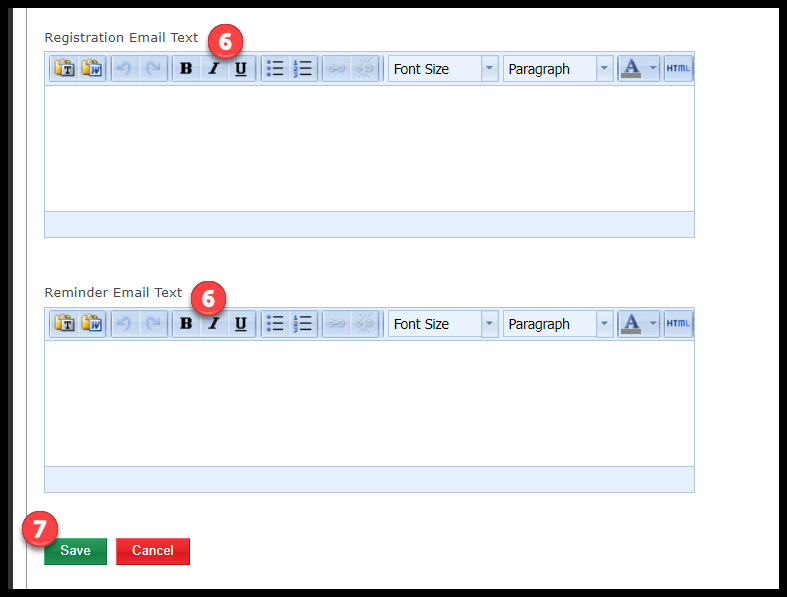
- Hit Save to create the new Section.

